


Mehndi Designs for Beginners – Easy and Beautiful Ideas to Try Today
Discover the best mehndi designs for beginners. Simple, stunning, and easy-to-follow patterns anyone can try at home with step-by-step inspiration.
Mehndi has always held a special place in our hearts. Whether it’s a festive gathering, a casual evening, or a wedding celebration, mehndi adds that extra charm. But here’s the thing—not everyone knows where to begin. I’ve been there too, completely clueless with a cone in hand, wondering what to draw first. That’s why I’m writing this guide—to help you discover the world of mehndi designs for beginners in the easiest, most fun way possible.
Let’s explore the basics, learn step-by-step, and create patterns that look amazing even if you’re just starting.
Why Mehndi Feels Special from Day One
Mehndi is more than just a design. It’s a feeling. The smell, the coolness on your hand, and the excitement of seeing the color deepen—it all creates a beautiful experience. For beginners, this feeling often comes with a little fear, too. What if I mess it up? Will it look too simple?
The truth is, your first mehndi design doesn’t need to be perfect. It just needs to be you. That’s where real beauty begins.
What You Need Before You Start
Before jumping into patterns, take a moment to gather your tools. You don’t need anything fancy, just:
-
A fresh mehndi cone (go for natural henna if possible)
-
A few tissue papers for cleaning
-
A transparent sheet (for practicing)
-
A steady surface and good lighting
Believe me, the setup makes a big difference. The more comfortable you feel, the better your design turns out.
Basic Tips for First-Time Mehndi Artists
Starting with mehndi doesn’t have to be overwhelming. Just keep these simple tips in mind:
-
Practice on paper first: Use a pen to sketch basic shapes like leaves, spirals, dots, and flowers.
-
Keep your cone warm: If the mehndi is cold, it gets thick and hard to control.
-
Try smaller patterns: Don’t aim for a full-hand design on your first try.
-
Take your time: Rushing leads to shaky lines and crooked shapes.
Trust me, once your hand gets used to the cone, your confidence builds up faster than you think.
Top Easy Mehndi Designs for Beginners
Now the fun part—let’s explore some beginner-friendly mehndi designs. I’ve personally tried each of these, and they’re perfect for learning, practicing, and even flaunting!
1. Basic Floral Design
Start with a small flower in the center of your palm. Add petals around it. Then, extend a few vines outward with small leaves. That’s it! It’s cute, quick, and always looks elegant.
Why it’s great:
Flowers are forgiving—even if they’re not perfect, they still look beautiful.
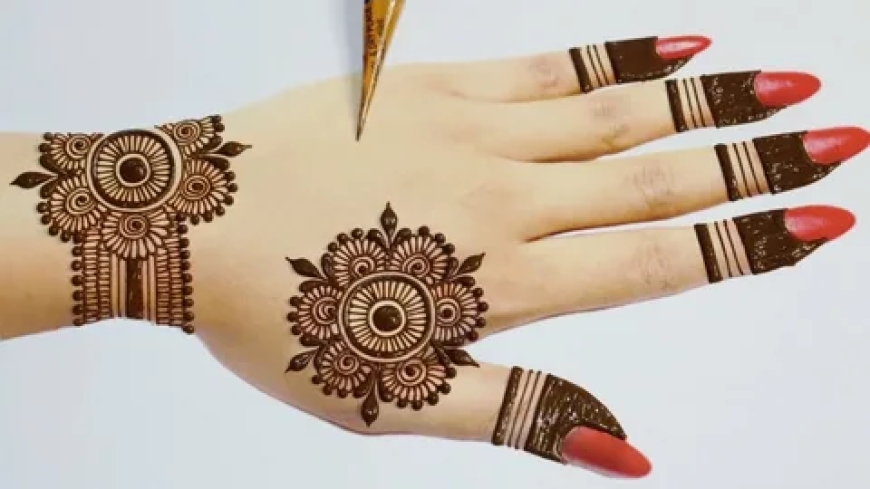
2. Mandala Magic
A circular mandala drawn on the palm looks neat and traditional. Start with a dot in the center and keep adding circles and petals around it. Use dots and lines to fill gaps.
Why it’s great:
Mandalas teach balance and symmetry—important skills for all mehndi styles.
3. The Finger Trail
If you want something light, design only the fingers. Start from the tip and move downward, using dots, zigzags, and tiny leaves. You can leave the palm empty or add a small motif.
Why it’s great:
It’s stylish and doesn’t take long to complete.
4. Wrist Bracelet Look
Draw a pattern that wraps around the wrist like a bracelet. Add connecting vines, leaves, or circles for detail. It looks chic and minimalistic.
Why it’s great:
Perfect if you're going for a modern vibe with a hint of tradition.
5. Half-Hand Design
If you’re ready for a slightly bigger design, try covering half the hand diagonally. Start at the finger and go toward the opposite side of the wrist with flowers, vines, and swirls.
Why it’s great:
Gives you space to play without feeling too difficult.
Common Beginner Mistakes (And How to Avoid Them)
Nobody starts as a pro, and making mistakes is okay. Still, you can save time by knowing what to watch out for:
-
Too much pressure on the cone: It leads to thick, smudgy lines.
-
Not letting it dry properly: Mehndi needs time to develop color.
-
Designing on dirty hands: Always wash your hands before applying.
-
Overfilling gaps: Negative space matters just as much as design.
If you catch yourself doing any of these, don’t worry. Every artist learns through trial and error.
How to Make Your Mehndi Darker
One of the most common questions I get is: “How can I get a deep, rich mehndi color?”
Here’s what has worked for me:
-
Let it dry for at least 6-8 hours (or overnight).
-
Dab the lemon-sugar mixture gently with a cotton ball.
-
Wrap your hand with tissue or use gloves to trap warmth.
-
Avoid washing your hands with water right after removal. Instead, scrape it off.
These small steps make a huge difference. I once followed this routine before a wedding and the stain lasted almost two weeks!
Practicing Like a Pro (Even as a Beginner)
No artist grows without consistent practice. When I started, I gave myself one design challenge every weekend. It became a fun routine. Slowly, I began experimenting with new shapes, combining styles, and adding my twist.
You can also practice using:
-
Plastic sheets (draw and wipe again)
-
Mehndi sketchbooks (yes, they exist!)
-
Printable design templates (to trace)
With time, your lines get cleaner, your flow improves, and your hand becomes steady. Mehndi starts feeling like meditation, not just decoration.
What Style Should You Try First?
That depends on your vibe. Do you like simplicity or something detailed? Here are a few beginner-friendly style options:
● Arabic Style:
Bold flowers, large leaves, and flowing vines. It’s easier than it looks and has a trendy look.
● Indian Traditional:
Peacocks, mandalas, and paisleys—these take patience, but look so rewarding.
● Modern Minimal:
Clean lines, small patterns, lots of space—perfect for everyday looks.
Start with one, then mix and match to find your style. I started with Arabic and slowly added Indian elements to it. Now, my designs have their signature look.
How Mehndi Boosts Confidence
This might sound surprising, but applying mehndi taught me patience, focus, and even self-love. Something is empowering about decorating your own hands. It's a form of art, expression, and care.
Many of my friends told me they started applying mehndi when they were going through stressful times. It gave them a creative escape and something to look forward to.
So if you’re starting this journey today, you’re not just learning a skill—you’re also nurturing joy and mindfulness.
Final Words – You’ve Got This!
I know it can feel intimidating at first, but remember this—you don’t need to be perfect to be beautiful. Your lines don’t have to be straight, your flowers don’t need to match. Just enjoy the process, one design at a time.
With regular practice, smart tips, and creative freedom, you’ll soon be creating your signature mehndi designs. And trust me—someone will look at your hand one day and say, “Wow! Did you do this yourself?”


