


LH2L: Servers 101 (Now 2x as basic!)
Welcome to another installment in Learning How to Learn. For context, I am on a journey to teach myself backend. To do that, in addition to all of the technical knowledge, I also need to know how to learn and be a teacher. So today we will breach fundamental concepts in both areas: levels of understanding and servers. Lets start with levels of understanding. In the world of education, there is a helpful framework called "Bloom's Taxonomy" that breaks them down easily: Remembering Understanding Applying Analyzing Evaluating Creating This covers everyone from the newest student to the oldest expert. So if I have this goal to learn backend, my very next question is to what level should I be learning backend? Well my goal is ultimately to be employable, and the standard for employment seems to be around 3 and beyond. Lets breakdown those first three levels a little bit further. Remembering - This is the most basic, rote task imaginable for learning. This is being able to parrot back a definition or a fact. Being able to identify the target when presented with it. In practice it looks like this: Q: What is a server? A: A server is a piece of software that takes in requests and provides responses. Understanding - When we are striving for understanding, we start to expand from definitions to understanding how the target is used. Can we explain why the target is necessary? Can we discuss it in a broader context? Q: Explain how a server works to me like I have no technical knowledge. A: A server is like the engine of your car. First it exists in an ecosystem. Just as the engine is supposed to take in fuel from the tank and produce force to turn the wheels, a server is made to take requests from the client and return a response to them. Secondly, engines have two specific states: On and Off. If the engine is off, pressing the gas isn't going to do too much, neither will turning the wheel or pressing the break. In the same way, the server has to be on to take in requests and provide a response. Applying - At this point, you know the definitions and further more how they are supposed to function. This is where you show you know how to use them. In an interview, it may look like this: Q: Can you show me how you would code a basic server in a node environment? A: import http from 'node:http' const PORT = 8000 const server = http.createServer((req, res) => { res.end('Hello from the server!') }) server.listen(PORT, () => console.log(server running on port: ${PORT})) With answering these three questions, I have demonstrated a that I understand a single aspect about servers on an actionable level. There are many other aspects about servers alone that I will need to understand on this level to get hired, not to mention all of the aspects of backend. But now I know when I understand something enough to move on to the next topic. This should streamline your process or learning largely. This brings us to the second part where we actually discuss the technical parts a server. Huge shout out to Scrimba.com for being my source of learning on this topic. The code snippet I posted above came from their course on node.JS, I highly recommend it. Lets go through it line by line. import http from 'node:http' Pretty straight forward. The node http package has everything we need to get a server started. Note how it is being imported from 'node:http' instead of just 'http'. Essentially, this is due to http being a core node module. Importing it directly from node should prevent bugs, and offer some small performance benefits on larger projects. There's no harm in it on the small scale, so it's a good habit to be into. const PORT = 8000 Much like channels on a TV, we have to tell our computer which port to listen for traffic on. This will be more important later. const server = http.createServer((req, res) => { res.end('Hello from the server!') }) This is the meat and potatoes of the code. The .createServer() method returns a server object with dozens of different methods that can be called against it. For ease of use, we assigned it to the server variable. The method takes in an arrow function which itself has two arguments: Request and Response (req and res as seen above). Generally speaking, everything interesting about servers happens in that little arrow function. As it stands, this server will only do one thing: return the string "Hello from the server!" If you want to have a more useful, or even just functional server, it happens here. We will start simply with this .end() method. Getting a response from a server is somewhat of an ongoing process. The .end() method tells the client that no further responses are expected, and concludes the response process. It takes two parameters, the data you want to send, and the encoding you want to use. utf8 is standard, and node will default to it if none are specified. Now as we discussed earlier, server objects have two states: running and not run
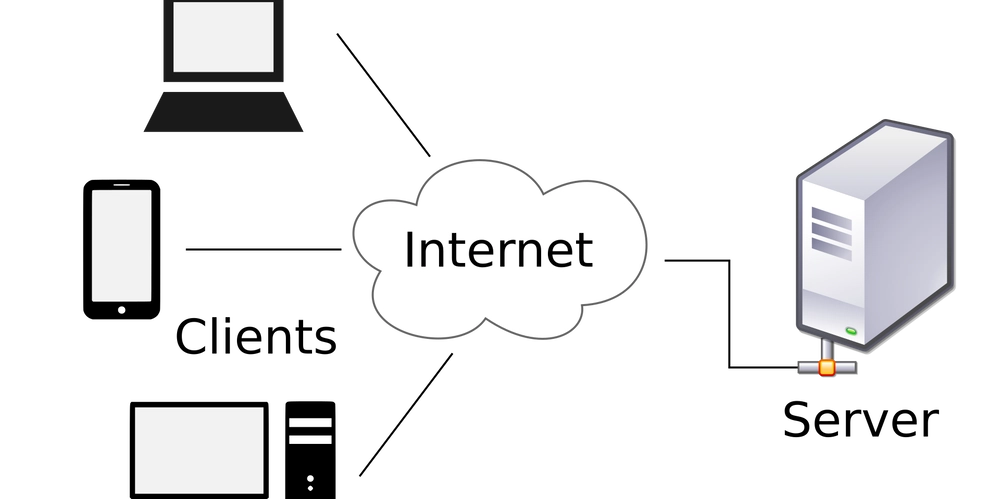
Welcome to another installment in Learning How to Learn. For context, I am on a journey to teach myself backend. To do that, in addition to all of the technical knowledge, I also need to know how to learn and be a teacher. So today we will breach fundamental concepts in both areas: levels of understanding and servers.
Lets start with levels of understanding. In the world of education, there is a helpful framework called "Bloom's Taxonomy" that breaks them down easily:
- Remembering
- Understanding
- Applying
- Analyzing
- Evaluating
- Creating
This covers everyone from the newest student to the oldest expert. So if I have this goal to learn backend, my very next question is to what level should I be learning backend? Well my goal is ultimately to be employable, and the standard for employment seems to be around 3 and beyond. Lets breakdown those first three levels a little bit further.
Remembering - This is the most basic, rote task imaginable for learning. This is being able to parrot back a definition or a fact. Being able to identify the target when presented with it. In practice it looks like this:
Q: What is a server?
A: A server is a piece of software that takes in requests and provides responses.
Understanding - When we are striving for understanding, we start to expand from definitions to understanding how the target is used. Can we explain why the target is necessary? Can we discuss it in a broader context?
Q: Explain how a server works to me like I have no technical knowledge.
A: A server is like the engine of your car. First it exists in an ecosystem. Just as the engine is supposed to take in fuel from the tank and produce force to turn the wheels, a server is made to take requests from the client and return a response to them. Secondly, engines have two specific states: On and Off. If the engine is off, pressing the gas isn't going to do too much, neither will turning the wheel or pressing the break. In the same way, the server has to be on to take in requests and provide a response.
Applying - At this point, you know the definitions and further more how they are supposed to function. This is where you show you know how to use them. In an interview, it may look like this:
Q: Can you show me how you would code a basic server in a node environment?
A:
import http from 'node:http'

const PORT = 8000

const server = http.createServer((req, res) => {
  res.end('Hello from the server!')
})

server.listen(PORT, () => console.log(server running on port: ${PORT}))
With answering these three questions, I have demonstrated a that I understand a single aspect about servers on an actionable level. There are many other aspects about servers alone that I will need to understand on this level to get hired, not to mention all of the aspects of backend. But now I know when I understand something enough to move on to the next topic. This should streamline your process or learning largely.
This brings us to the second part where we actually discuss the technical parts a server. Huge shout out to Scrimba.com for being my source of learning on this topic. The code snippet I posted above came from their course on node.JS, I highly recommend it. Lets go through it line by line.
import http from 'node:http'
Pretty straight forward. The node http package has everything we need to get a server started. Note how it is being imported from 'node:http' instead of just 'http'. Essentially, this is due to http being a core node module. Importing it directly from node should prevent bugs, and offer some small performance benefits on larger projects. There's no harm in it on the small scale, so it's a good habit to be into.
const PORT = 8000
Much like channels on a TV, we have to tell our computer which port to listen for traffic on. This will be more important later.
const server = http.createServer((req, res) => {

  res.end('Hello from the server!')

})
This is the meat and potatoes of the code. The .createServer() method returns a server object with dozens of different methods that can be called against it. For ease of use, we assigned it to the server variable. The method takes in an arrow function which itself has two arguments: Request and Response (req and res as seen above).
Generally speaking, everything interesting about servers happens in that little arrow function. As it stands, this server will only do one thing: return the string "Hello from the server!" If you want to have a more useful, or even just functional server, it happens here.
We will start simply with this .end() method. Getting a response from a server is somewhat of an ongoing process. The .end() method tells the client that no further responses are expected, and concludes the response process. It takes two parameters, the data you want to send, and the encoding you want to use. utf8 is standard, and node will default to it if none are specified.
Now as we discussed earlier, server objects have two states: running and not running. You need to get it running to use it, and that brings us to the final line:
server.listen(PORT, () => console.log(server running on port: ${PORT}))
We are calling the .listen() method on the server object that is being referenced by the server variable. This will start the server, and tell it which port to listen for communication on, as defined by the PORT variable. As we say earlier, the current port is 8000. The second argument is a callback function to log information to the console when the code is executed.
The whole process finally kicks off when you run the code. In the terminal, run npm start and the code will execute. Notice how the process does not exit, or even conclude in the terminal. You will see "server running on port 8000" in the console, and your little blinking cursor. At this point, you should be able to ping localhost:8000, and you will get the response you placed in earlier: "Hello from the server!" To shut down the server, press [control] + [C], and the process will finally exit. Pinging localhost will no longer return anything.
That's all she wrote! Congratulations, your first server is underway. Let me know what aspects of servers you're interested in learning more about in the comments, and I'll see you next time.