


![[Podcast] Smarter Brand Growth: How to Align Marketing & Sales (with ABM/ABX) with Jennifer Mancusi](https://justcreative.com/wp-content/uploads/2025/04/jennifer-mancusi-26.png)


How To Do a Renegade Row To Build a Bigger, Stronger Back
Sculpt serious muscle with this no-frills move.
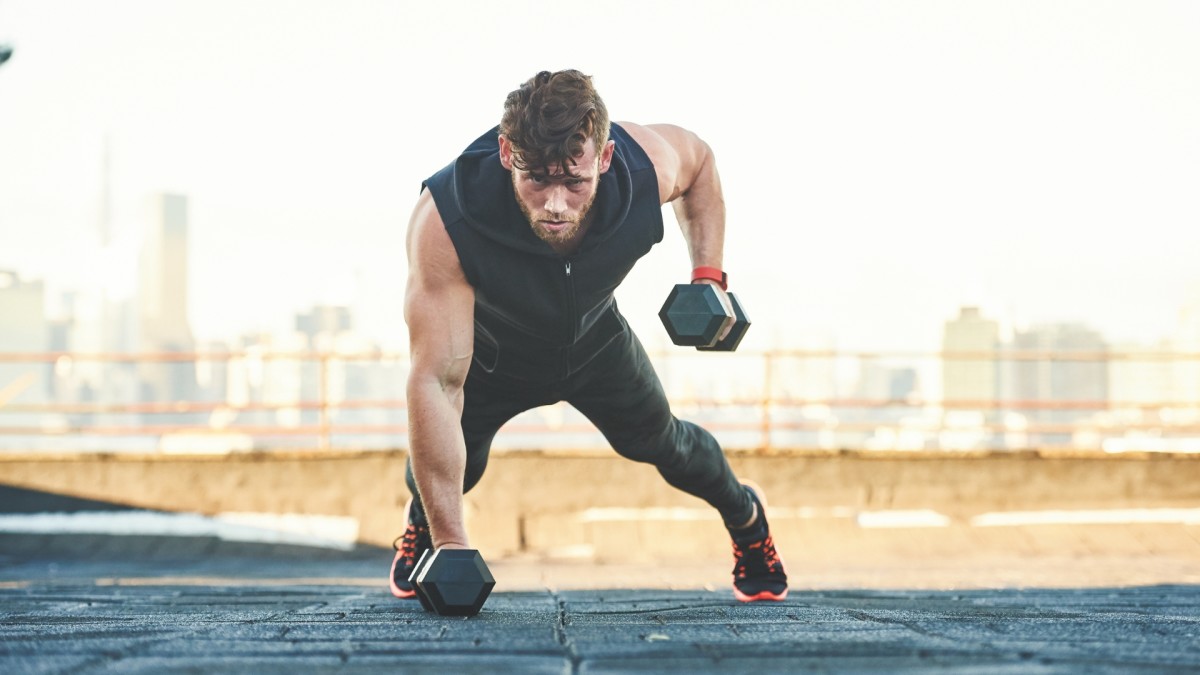
We’re not here to knock bodybuilders, but powerlifters might be on to something with their no-fuss training method. Some of the most effective exercises are simple, straightforward moves that hit multiple muscle groups at once and require minimal equipment. Take the renegade row, for example. It combines a basic pushup with a one-arm dumbbell row to create a brutally effective move that builds serious upper-body strength. All you need is some space and a pair of dumbbells or kettlebells to get it done.
As great as the renegade row is, the way you perform it matters even more. Rushing through sloppy reps won't just kill your gains—it could also set you up for injury. To get the most out of this move, you need full control over both the pushup and the row. Nail the form and you'll build serious strength across your chest, shoulders, back, arms, and core.
Find a mat, a pair of weights, and get ready to take on a move that can help you achieve new results.
Benefits of the Renegade Row
The renegade row is a multi-joint exercise that can save time in training by working multiple upper-body muscles at once. This exercise can also help improve coordination and functional fitness. When used properly, the renegade row will help you build muscle, get stronger, and even improve muscular endurance. It's a movement that all strength athletes and fitness enthusiasts can benefit from using as a regular part of their training routine.
Renegade Row Muscles Worked
The renegade row works the chest, back, shoulders, and even the triceps and biceps to some degree. The pushup portion will target the chest, front delts, and triceps, while the row will focus more on the lats, teres major, and even the rear delts and biceps. The core stability required will serve the abs, lower back, and glutes well. James Michelfelder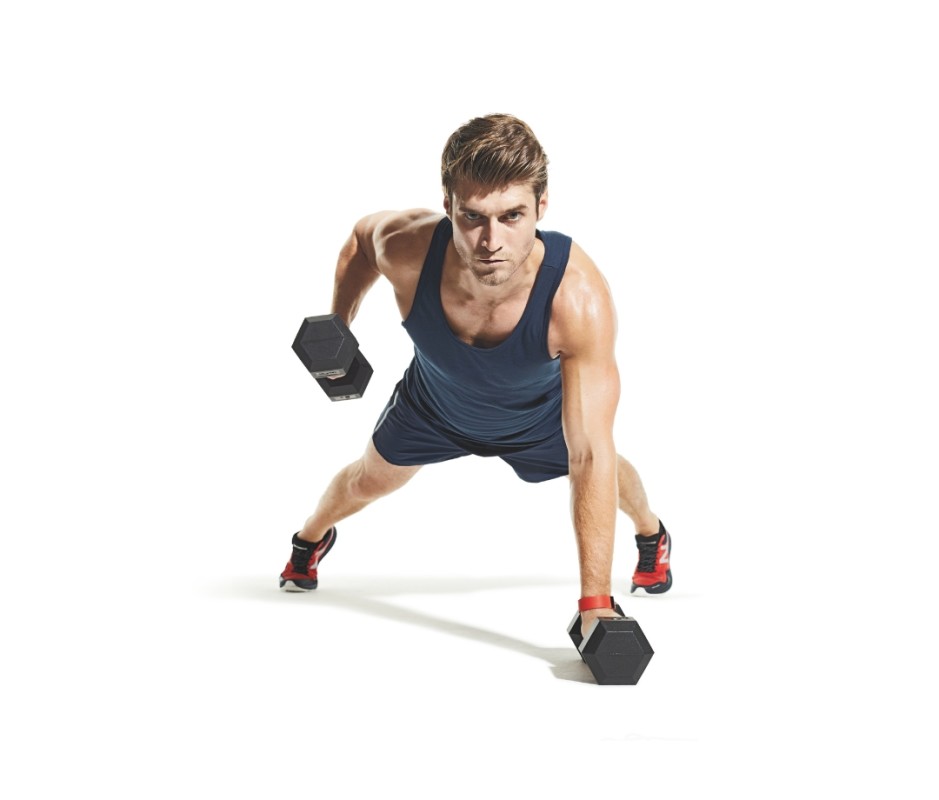
How to Do the Renegade Row
- Start at the top of a pushup position with a light dumbbell in each hand and feet wider than shoulder-width apart. Advanced trainees could use kettlebells, but hex dumbbells are best for beginners, as they're more stable.
- Look down at the floor and tighten your body from shoulders down to the glutes. Make sure your abs are tight as well, so the core is engaged. This is the starting position.
- Slowly lower yourself down into a pushup position while keeping the core tight. Push back up to the top position and maintain a strong plank.
- Pick a side and lift that dumbbell up towards your ribcage. Don’t allow your hips to rotate. Keeping the glutes engaged should help prevent this. Briefly hold the top of the row before slowly lowering the weight back to the floor.
- Perform another pushup, then perform another row with the opposite arm. This is one complete rep. Repeat for the desired reps.
There is another variation that calls for the lifter to perform a row on both sides before doing the next pushup. That pattern would be pushup, row on one side, row on the other, then repeat.
Related: Want More Defined Abs? Here's How to Do Planks for a Chiseled Core and Improved Stability
Common Mistakes to Avoid
Regardless of how comfortable you feel with the renegade row or how advanced you are in training, don’t speed through the reps. Coordination and control are key to making this move effective. To reap the benefits of this upper body exercise, move slowly through each rep, keeping your hips and glutes stationary.
Also, don’t allow your hands to be too far in front of your shoulders. The row needs to be as close to vertical as possible. Trying to pull back (instead of just up) toward the hip will not make the row more effective and may cause you to lose balance and risk injury. The risks are not worth the reward in this case.
The weights are also important to consider. Lighter dumbbells will allow you to control the movement better than heavier weights or kettlebells. However, kettlebells can be used if that’s all you have.
Pro Tips
Make sure you don’t slide out of position while doing the renegade row. Your hands should be solid in front of the shoulders, but not so far that you feel like you're stretching out. The shoes you wear should have tread on the soles so they don’t slide. If you try to do this barefoot or while wearing socks, then you should be on a mat or rug.
The head and neck should be neutral at all times while doing this exercise. Looking up could lead to neck strain or take you off balance. If you need to check your form, film yourself on your smartphone or camera and check the form after you finish the set.
Last, but not least, if you have wrist issues, then you can use wrist wraps to maximize safety. If this doesn’t help, then don’t do the exercise.
Related: The Secret Breathing Method Elite Fighters Use to Boost Their Performance
How to Make Renegdae Rows More Challenging
Adding weight isn't the only way to level up this exercise. One option is to wear a weighted vest, which adds resistance to your upper body. This not only makes the pushup portion more challenging but also forces you to stay locked out during the row.
Another strategy could be doing pauses at the bottom of the pushup. Add one second of pause time each time you go down to the floor or ground. Start by holding for one second at the bottom, then two seconds on the next rep, three on the next, and so on. Once you can crush a 10-second pause followed by a strong row, you can kick it up another notch by adding pauses at the top of the row, too.
Programming Renegade Rows
Now that you know how to do the renegade row, it’s time to add it to your program. If you want to use it as the foundation of an upper body or full body workout session, place it at the beginning. This will ensure you have the most energy to stabilize yourself throughout the movement.
Beginners can strive to do multiple sets of five reps until they feel more comfortable with the form. As you advance, you can increase the rep range to as high as ten or even 12 reps. That would be 12 pushups with six rows on each side. If you can’t complete all the reps with the proper form, then scale back down.
If you train the chest and back in the same workout, then this would be a great way to pre-exhaust both major muscle groups so you can train them effectively without the need for heavy weights. Using this as a finisher would not be recommended unless you are a very advanced athlete.
If you are against a time crunch and need a quick full-body workout snack, then you could pair the renegade row with a lower body movement like bodyweight lunges to train the entire body with only two movements. Perform one minute of renegade rows, followed by one minute of lunges. Rest for one minute and repeat. Three rounds of this pairing could be a ten-minute solution for those who have a full day ahead of them with limited time for the gym.
Related: This German Strength Training Method Is 2X More Effective for Muscle Growth
Can I Do the Renegade Row With My Feet Elevated?
A common pushup variation is to elevate the feet, so it places more focus on the upper pecs and front delts. This is not recommended with the renegade row due to the instability of holding the dumbbells in the hands. Keep your feet on the ground and wider than shoulder-width to maximize safety and stability.
I Can’t Do the Renegade Row Very Well. Is There a Substitution?
You can do the pushups on their own, then perform a basic one-arm row with each weight while resting your opposite hand and knee on a weight bench. It is not a complete duplicate version, but this can help you while you work to get better at the renegade row.
I Don’t Feel Comfortable Holding the Weights. Is There Another Way to Do This?
If you have ankle or wrist weights, you could wrap those around the wrists and place your hands in the same position as you would for a traditional pushup. If this is something you choose to do, use very light weights so there is no unnecessary stress on the wrist joint.