


Building React Project with Vite, TailwindCSS, Docker, and Deploying to DigitalOcean
In this tutorial, we will guide through the process of setting up a React Project using Vite as build tool, integrating TailwindCSS for styling, containerizing the application with Docker for both development and production environments, and deploying it to DigitalOcean. This tutorial assumes you have a basic understanding of Docker. 1. Install React First, create a new react project using Vite. For installation you can refer to this link. 2. Install TailwindCSS with Vite Next, install the TailwindCSS by following this guide. Once you have both React and TailwindCSS set up and working locally, we can process to containerize the application using Docker. 3. Creating a Dockerfile We will create a Dockerfile that supports both the development and production environments. To achieve this, we used multi-stage build, which allows us to define multiple FROM within a single Dockerfile. To learn more about multi-stage builds, click here. In our Dockerfile it consists of four stages. They are: Base Stage FROM node:22-alpine AS base WORKDIR /app COPY package*.json ./ RUN npm install && npm install tailwindcss @tailwindcss/vite COPY . . We start by creating a base stage using AS keyword. This stage install all the necessary dependencies and copies the files from host to container. Dev Stage FROM base AS dev EXPOSE 5137 CMD ["npm","run","dev"] In the dev stage, we build on top of the base stage. We then expose port 5137, which is the default port for the Vite development server. Finally, we start the development server using npm run dev. Build Stage FROM base AS build RUN npm run build In this stage, we build on top of the base stage and execute the npm run build command to generate optimized static assets for production. Production Stage FROM nginx:1.28.0-alpine AS prod COPY --from=build /app/dist /usr/share/nginx/html EXPOSE 80 CMD ["nginx","-g","daemon off;"] In the prod stage, we serve the static files generated by the build stage. We using Nginx, a lightweight and high-performance web server. COPY --from=build /app/dist /usr/share/nginx/html: This command copies the static files from the build stage (located in app/dist) to Nginx's default directory (/usr/share/nginx/html), making them accessible for serving. CMD ["nginx","-g","daemon off;"]: This runs Nginx in the foreground to keep the container running. EXPOSE 80: This command exposes port 80, which is the default port for HTTP traffic and is used by Nginx to serve web content. Overall, the Dockerfile looks like this FROM node:22-alpine as base WORKDIR /app COPY package*.json . RUN npm install && npm install tailwindcss @tailwindcss/vite COPY . . FROM base AS dev EXPOSE 5137 CMD ["npm","run","dev"] FROM base AS build RUN npm run build FROM nginx:1.28.0-alpine as prod COPY --from=build /app/dist /usr/share/nginx/html EXPOSE 80 CMD ["nginx","-g","daemon off;"] 4. Creating a Docker Compose Once, the Dockerfile is created, we create a docker-compose.dev.yml file to build the image and run the container, simplifying the process of managing services and configurations. version: '3.8' services: web: build: context: . target: dev image: react-vite-project:dev container_name: react-vite-project-dev volumes: - .:/app - /app/node_modules ports: - "5173:5173" environment: - CHOKIDAR_USEPOLLING=true In the file, we need to specify the target stage dev for our development environment using target:dev. We then mount the project directory to /app inside the container to enable live changes, while ignoring the node modules directory. Additionally, we set the CHOKIDAR_USEPOLLING environment variable to ensure proper file watching. 5. Vite Configuration In the vite.config.ts we need to configure the server settings and use polling for file changes to ensure proper-file watching, especially in environments like Docker. import { defineConfig } from 'vite' import react from '@vitejs/plugin-react' import tailwindcss from '@tailwindcss/vite' // https://vite.dev/config/ export default defineConfig({ plugins: [ react(), tailwindcss(), ], server: { host: true, strictPort: true, port: 5173, watch: { usePolling: true } } }) 6. Run Docker Compose Once everything is configured, you can run the following command: docker compose -f docker-compose-dev.yml up This command will build the Docker image and start the container. You should see similar output in your terminal: Once the container is up and running, you can access the application at (http://localhost:5173). 7. DigitalOcean Configuration Now, let's configured the Digital Ocean to deploy our application. Setup Container Registry First, we use DigitalOcean Container Registry to store the private Docker image. To configure the registry, you can follow this instructions. Setup App Platform After configuring the registry,
In this tutorial, we will guide through the process of setting up a React Project using Vite as build tool, integrating TailwindCSS for styling, containerizing the application with Docker for both development and production environments, and deploying it to DigitalOcean.
This tutorial assumes you have a basic understanding of Docker.
1. Install React
First, create a new react project using Vite. For installation you can refer to this link.
2. Install TailwindCSS with Vite
Next, install the TailwindCSS by following this guide.
Once you have both React and TailwindCSS set up and working locally, we can process to containerize the application using Docker.
3. Creating a Dockerfile
We will create a Dockerfile that supports both the development and production environments. To achieve this, we used multi-stage build, which allows us to define multiple FROM within a single Dockerfile. To learn more about multi-stage builds, click here.
In our Dockerfile it consists of four stages. They are:
- Base Stage
FROM node:22-alpine AS base
WORKDIR /app
COPY package*.json ./
RUN npm install && npm install tailwindcss @tailwindcss/vite
COPY . .
We start by creating a base stage using AS keyword. This stage install all the necessary dependencies and copies the files from host to container.
- Dev Stage
FROM base AS dev
EXPOSE 5137
CMD ["npm","run","dev"]
In the dev stage, we build on top of the base stage. We then expose port 5137, which is the default port for the Vite development server. Finally, we start the development server using npm run dev.
- Build Stage
FROM base AS build
RUN npm run build
In this stage, we build on top of the base stage and execute the npm run build command to generate optimized static assets for production.
- Production Stage
FROM nginx:1.28.0-alpine AS prod
COPY --from=build /app/dist /usr/share/nginx/html
EXPOSE 80
CMD ["nginx","-g","daemon off;"]
In the prod stage, we serve the static files generated by the build stage. We using Nginx, a lightweight and high-performance web server.
COPY --from=build /app/dist /usr/share/nginx/html: This command copies the static files from thebuildstage (located in app/dist) to Nginx's default directory (/usr/share/nginx/html), making them accessible for serving.CMD ["nginx","-g","daemon off;"]: This runs Nginx in the foreground to keep the container running.EXPOSE 80: This command exposes port 80, which is the default port for HTTP traffic and is used by Nginx to serve web content.
Overall, the Dockerfile looks like this
FROM node:22-alpine as base
WORKDIR /app
COPY package*.json .
RUN npm install && npm install tailwindcss @tailwindcss/vite
COPY . .

FROM base AS dev
EXPOSE 5137
CMD ["npm","run","dev"]

FROM base AS build
RUN npm run build

FROM nginx:1.28.0-alpine as prod
COPY --from=build /app/dist /usr/share/nginx/html
EXPOSE 80
CMD ["nginx","-g","daemon off;"]
4. Creating a Docker Compose
Once, the Dockerfile is created, we create a docker-compose.dev.yml
file to build the image and run the container, simplifying the process of managing services and configurations.
version: '3.8'
services:
  web:
    build:
      context: .
      target: dev
    image: react-vite-project:dev
    container_name: react-vite-project-dev
    volumes:
      - .:/app
      - /app/node_modules
    ports:
      - "5173:5173"
    environment:
      - CHOKIDAR_USEPOLLING=true
In the file, we need to specify the target stage dev for our development environment using target:dev. We then mount the project directory to /app inside the container to enable live changes, while ignoring the node modules directory. Additionally, we set the CHOKIDAR_USEPOLLING environment variable to ensure proper file watching.
5. Vite Configuration
In the vite.config.ts we need to configure the server settings and use polling for file changes to ensure proper-file watching, especially in environments like Docker.
import { defineConfig } from 'vite'
import react from '@vitejs/plugin-react'
import tailwindcss from '@tailwindcss/vite'

// https://vite.dev/config/
export default defineConfig({
  plugins: [
    react(),
    tailwindcss(),
  ],
  server: {
    host: true,
    strictPort: true,
    port: 5173,
    watch: {
      usePolling: true
    }
  }
})
6. Run Docker Compose
Once everything is configured, you can run the following command:
docker compose -f docker-compose-dev.yml up
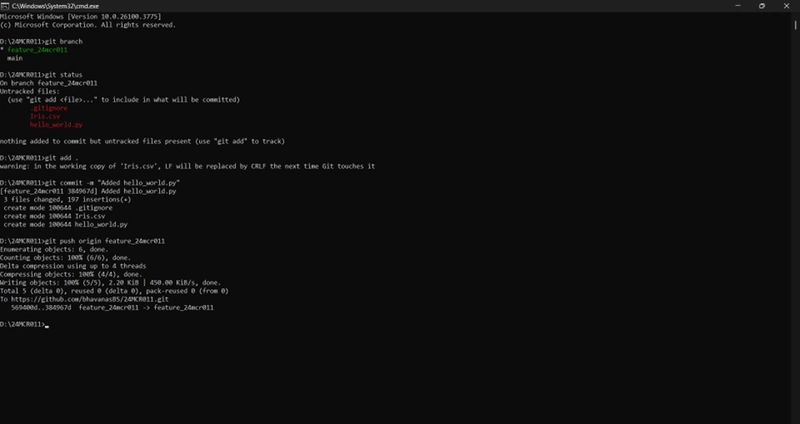
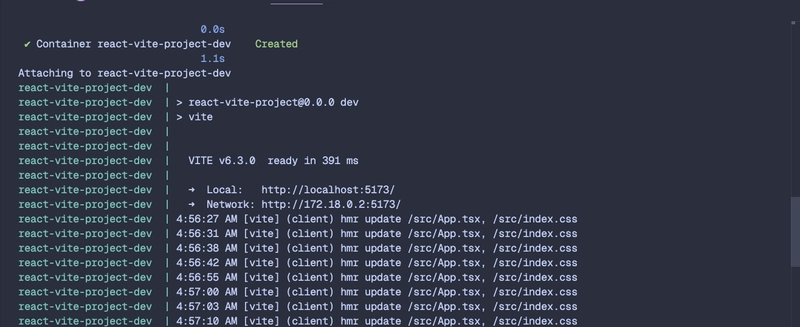
This command will build the Docker image and start the container.
You should see similar output in your terminal:
Once the container is up and running, you can access the application at (http://localhost:5173).
7. DigitalOcean Configuration
Now, let's configured the Digital Ocean to deploy our application.
- Setup Container Registry
First, we use DigitalOcean Container Registry to store the private Docker image. To configure the registry, you can follow this instructions.
- Setup App Platform
After configuring the registry, we set up the App Platform. You can easily create an App Platform from the DigitalOcean dashboard by clicking Create and selecting App Platform.

Now, when creating the app platform, select the Container Image and choose DigitalOcean Container Registry, since our image is stored there and enable AutoDeploy so that the app automatically updates whenever a new image is pushed to the registry.

8. Creating GitHub Action
To build the Docker image and push it to the container registry, we use GitHub Actions. You can create a GitHub Action by going to the Actions tab in your repository and clicking New Workflow. Then, select the Docker Image workflow template to get started.

Once GitHub Action is created, we need to configure it to work with DigitalOcean Container Registry.
To authenticate the GitHub Action with DigitalOcean, follow these steps:
Create a Personal Access Token: You can follow this guide to create a token from your DigitalOcean account.
In your GitHub repository, go to Settings → Secrets and variables → Actions.
-
Add the following secrets:
-
DO_USERNAME: The token name. -
DO_ACCESS_TOKEN: The token value.
-
name: Docker Image CI

on:
  push:
    branches: [ "main" ]
  pull_request:
    branches: [ "main" ]

jobs:

  build:
    runs-on: ubuntu-latest

    steps:
    - uses: actions/checkout@v4

    - name: Log in to DigitalOcean Container Registry
      uses: docker/login-action@v3
      with:
        registry: registry.digitalocean.com
        username: ${{secrets.DO_USERNAME}}
        password: ${{secrets.DO_ACCESS_TOKEN}}

    - name: Build the Docker image
      run: |
        docker build . --file Dockerfile --target prod --tag react-vite-project:latest
        docker tag react-vite-project:latest registry.digitalocean.com/private-docker-images/react-vite-project:latest

    - name: Push Docker Image to Digital Ocean Registry
      run: |
        docker push registry.digitalocean.com/private-docker-images/react-vite-project:latest
In the GitHub Action, we need to specify the prod target and tag the image so it can be pushed to the DigitalOcean Container Registry. Finally, we push the image to the registry.
Once the image is pushed to the registry, you can view it in the Container Registry.

Once the image is pushed, it is automatically deployed on App Platform. You can click the link above to view it.

Conclusion
In this guide, we walked through setting up a React, TailwindCSS application using Vite, containerizing it with Docker, automating the build and deployment process with GitHub Actions, and deploying it using DigitalOcean App Platform.
If you found this helpful, feel free to share it or leave a comment. Happy coding!