


_Weyo_alamy.png?width=1280&auto=webp&quality=80&disable=upscale#)


Azure Applied Skills: Create and configure virtual networks
In this article series, I will be walking though the process of configuring secure access to workloads using Azure virtual networking. In this exercise, we will put in place the virtual networks and subnets We will be walking through this exercise Requirements: To do this exercise you will need: An Azure subscription with Contributor RBAC role assigned. In this lab, when you are asked to create a resource, for any properties that are not specified, use the default value. Exercise 01 - Create and configure virtual networks In this section, we will be walking through the steps detailed here This exercise will emulate the steps to migrate a web-based application to Azure. The first task is to put in place the virtual networks and subnets. Then we need to securely peer the virtual networks. Tasks: Create a virtual network. Create a subnet. Configure vnet peering. Steps: Sign into the Azure portal Search for and select Virtual Networks. Click + Create Enter these values: Subscription and Resource group: Your valid subscription and chosen resource group Virtual network name: app-vnet Region: (US) East US Click IP addresses, then add IPV4 address space Ensure that the new space starts at 10.1.0.0 and the size is /16 Delete the default address space Click add a subnet Call it frontend, make sure the starting address is 10.1.0.0 and the size is 24 Click add when settings are configured Click Add subnet again in the same address space. Name it backend also a size of 24. Make sure that the starting address is 10.1.1.0. Click add Final setup Click review + create. Then create again and wait for deployment Search for and select virtual networks again. Click + create, like in the other steps. Use these settings for the configuration: Subscription and Resource Group: Same as previous virtual network Name: Virtual Network Name: hub-vnet Click IP addresses Click add subnet Click add subnet. Choose Azure Firewall as the subnet purpose, leave the default settings, and click Add. Remove the default space, click review + create In the virtual networks portal, click app-vnet Under peerings, select settings Click add Use these settings: Peering link name: app-vnet-to-hub Subscription: same subscription used earlier Virtual network: hub-vnet Local virtual network peering link name: hub-to-app-vnet Leave the rest on defaults and click "Add" Once the deployment completes, verify the Peering status is Connected (in the peering menu of app-vnet) At this point, you’ve successfully created and peered two virtual networks: app-vnet and hub-vnet. In the next exercise, we’ll start configuring security rules and deploying workloads within these networks.
In this article series, I will be walking though the process of configuring secure access to workloads using Azure virtual networking. In this exercise, we will put in place the virtual networks and subnets
We will be walking through this exercise
Requirements:
To do this exercise you will need:
- An Azure subscription with Contributor RBAC role assigned. In this lab, when you are asked to create a resource, for any properties that are not specified, use the default value.
Exercise 01 - Create and configure virtual networks
In this section, we will be walking through the steps detailed here
This exercise will emulate the steps to migrate a web-based application to Azure. The first task is to put in place the virtual networks and subnets. Then we need to securely peer the virtual networks.
- Tasks:
- Create a virtual network.
- Create a subnet.
- Configure vnet peering.
Steps:
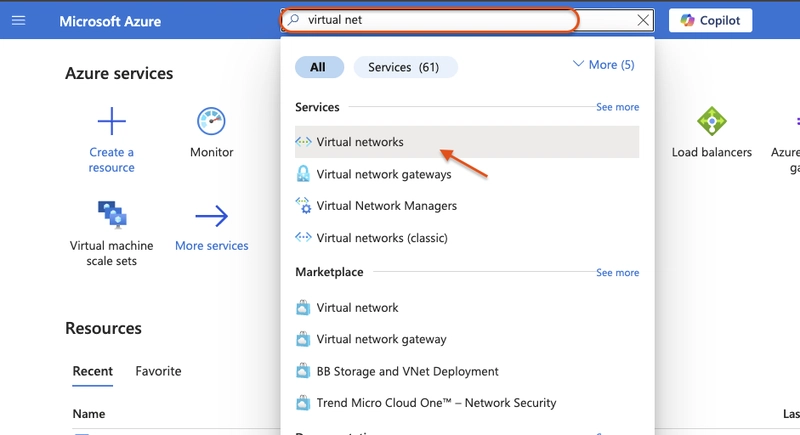
- Sign into the Azure portal
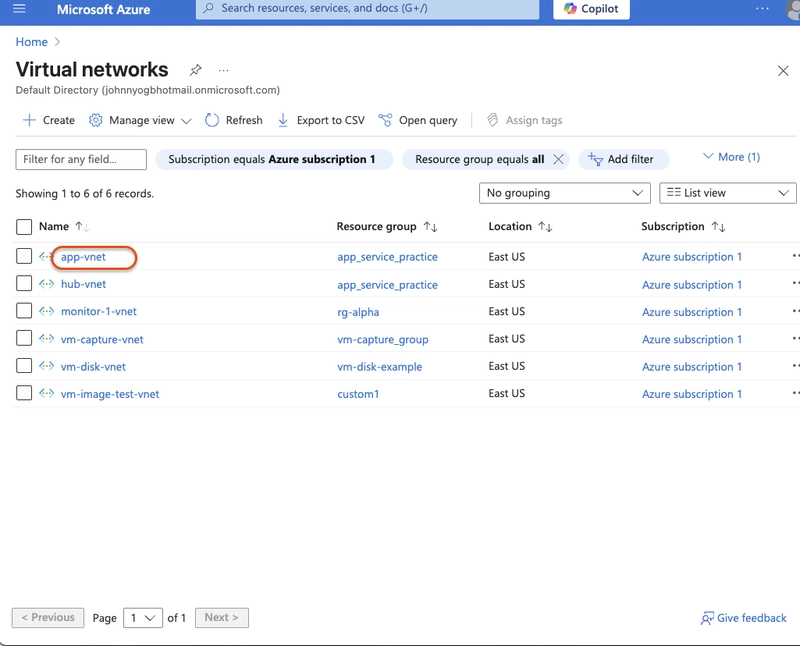
- Search for and select Virtual Networks.
Click + Create

-
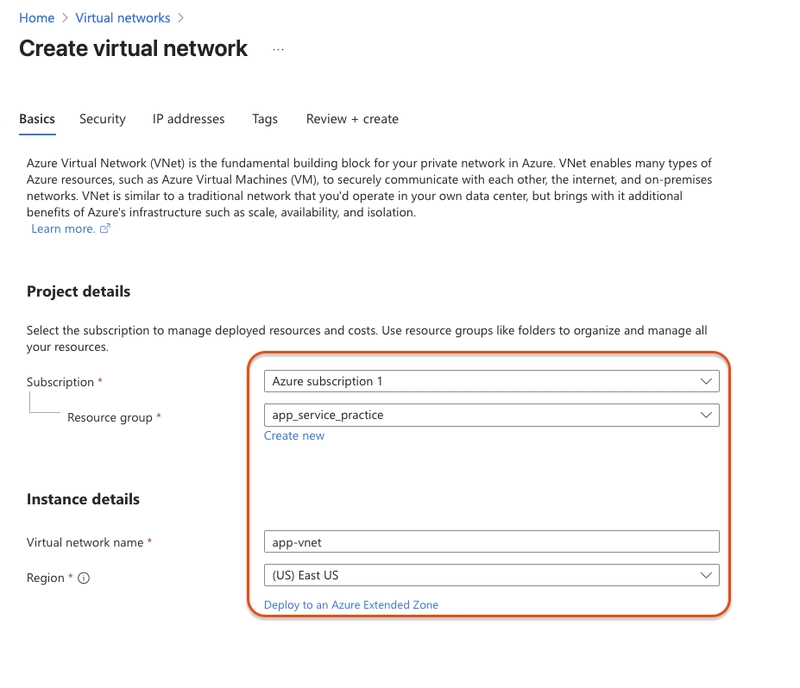
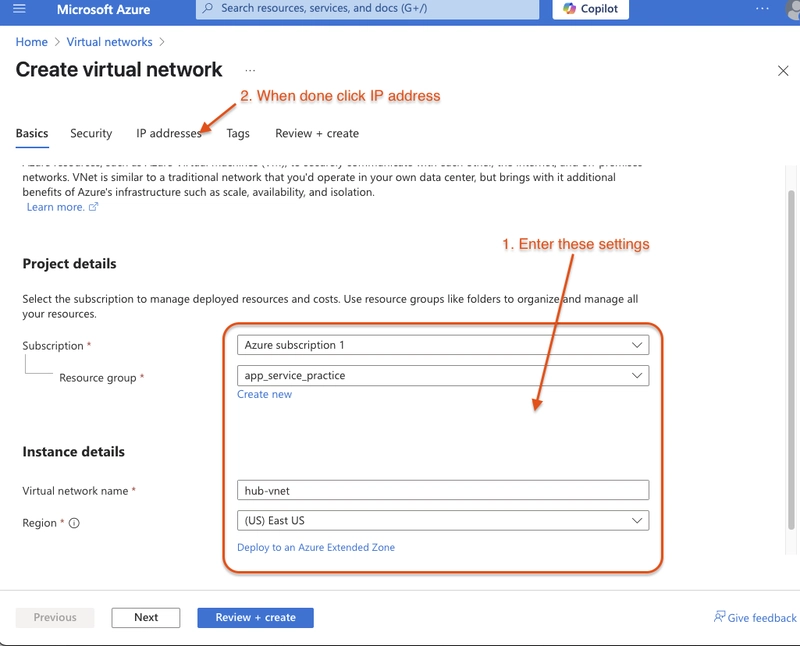
Enter these values:
- Subscription and Resource group: Your valid subscription and chosen resource group
- Virtual network name: app-vnet
- Region: (US) East US
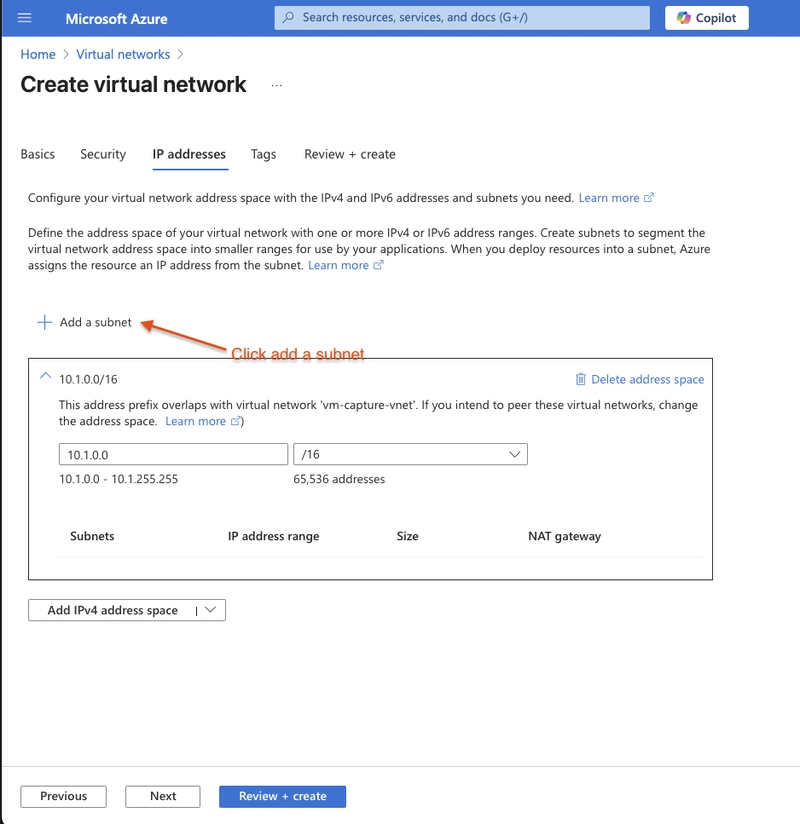
Click IP addresses, then add IPV4 address space
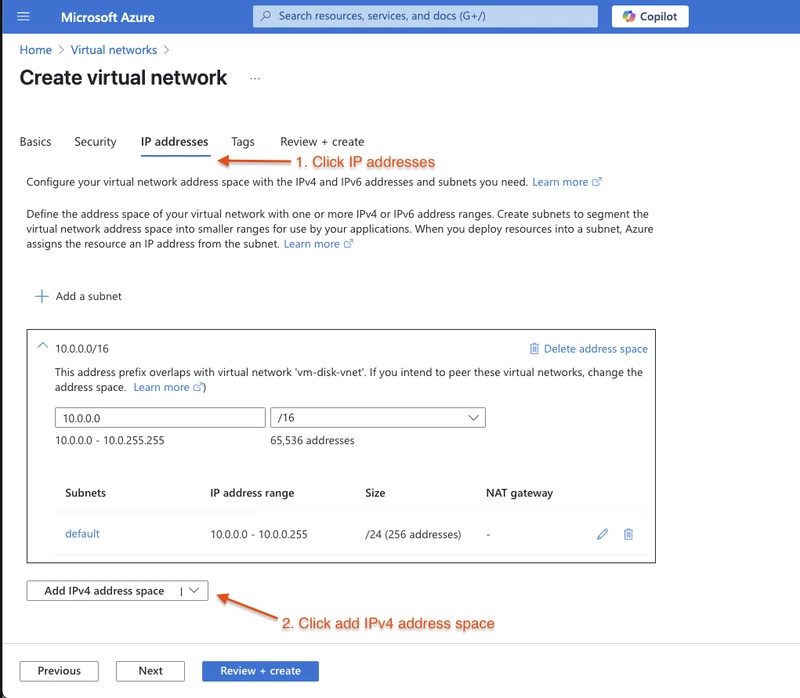
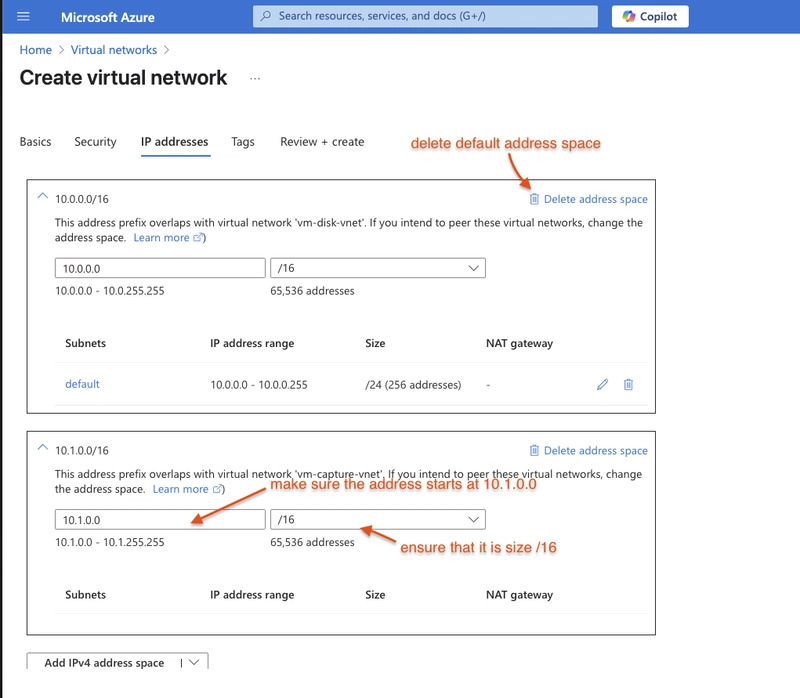
Ensure that the new space starts at 10.1.0.0 and the size is /16
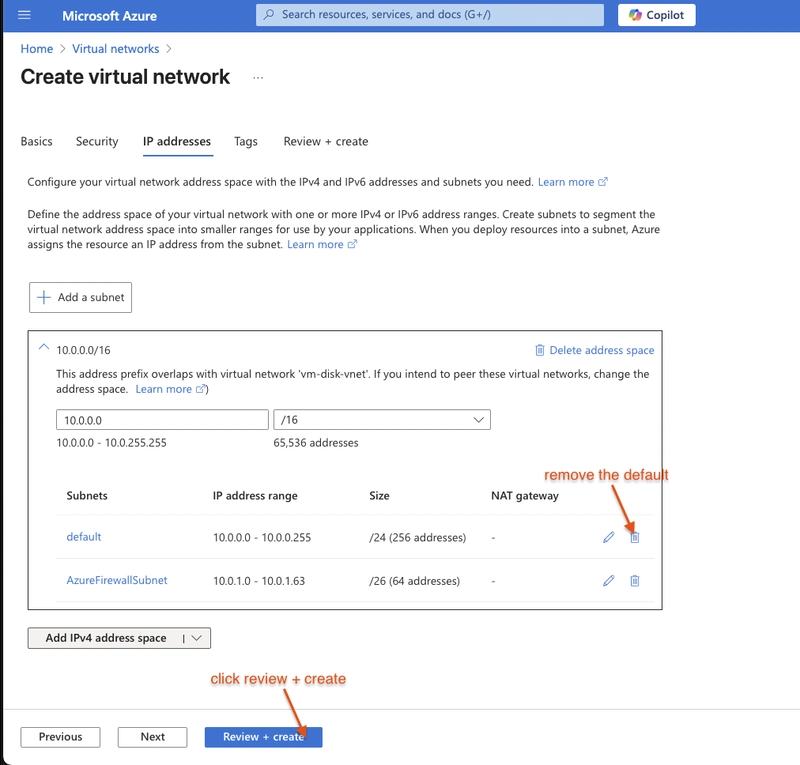
Delete the default address space
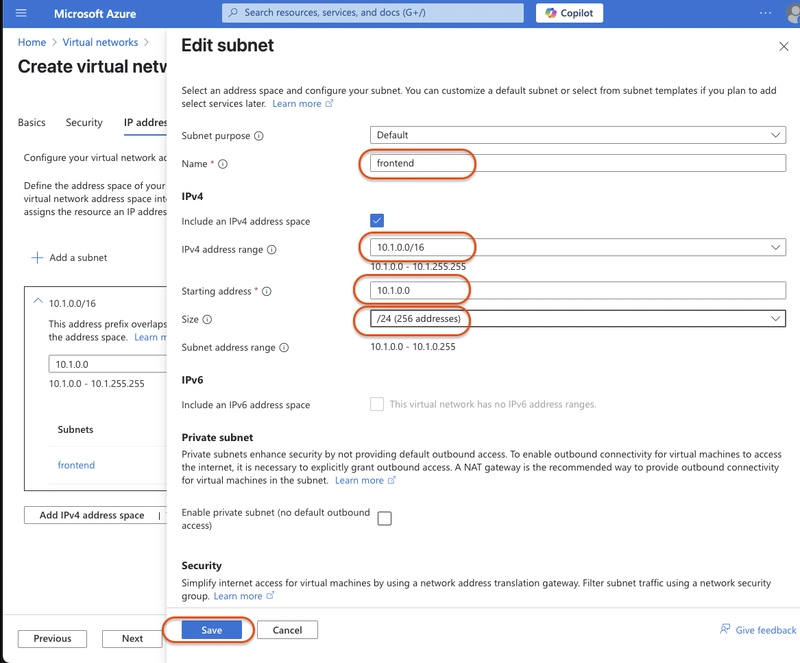
Click add a subnet
Call it
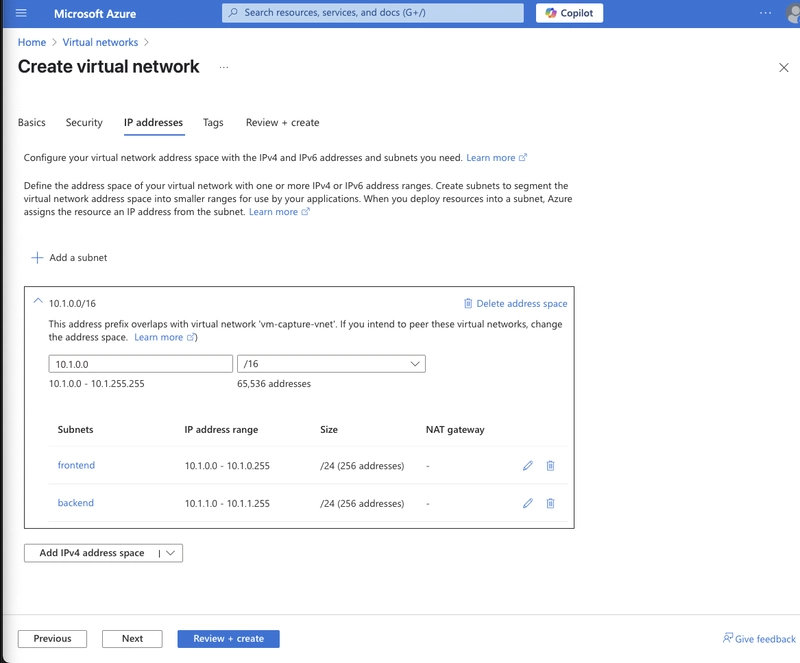
frontend, make sure the starting address is 10.1.0.0 and the size is 24Click add when settings are configured
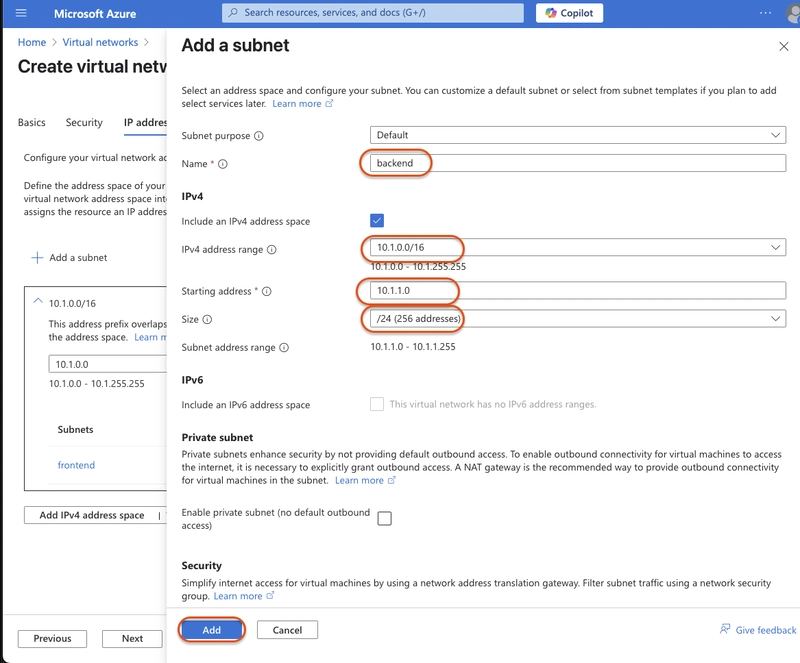
Click Add subnet again in the same address space. Name it
backendalso a size of 24. Make sure that the starting address is10.1.1.0. Click add
Final setup
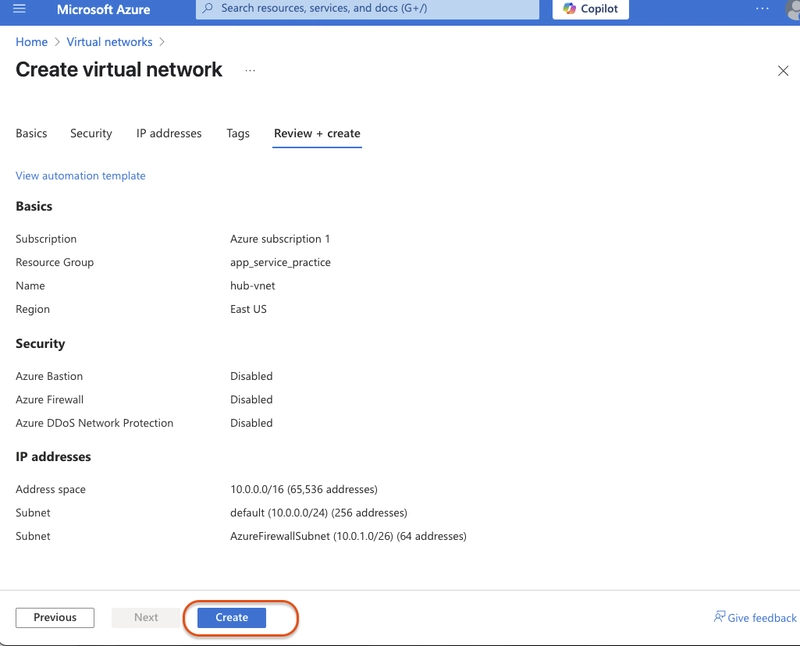
Click review + create. Then create again and wait for deployment
Search for and select virtual networks again. Click + create, like in the other steps.
-
Use these settings for the configuration:
- Subscription and Resource Group: Same as previous virtual network
- Name: Virtual Network Name:
hub-vnet
Click IP addresses
Click add subnet
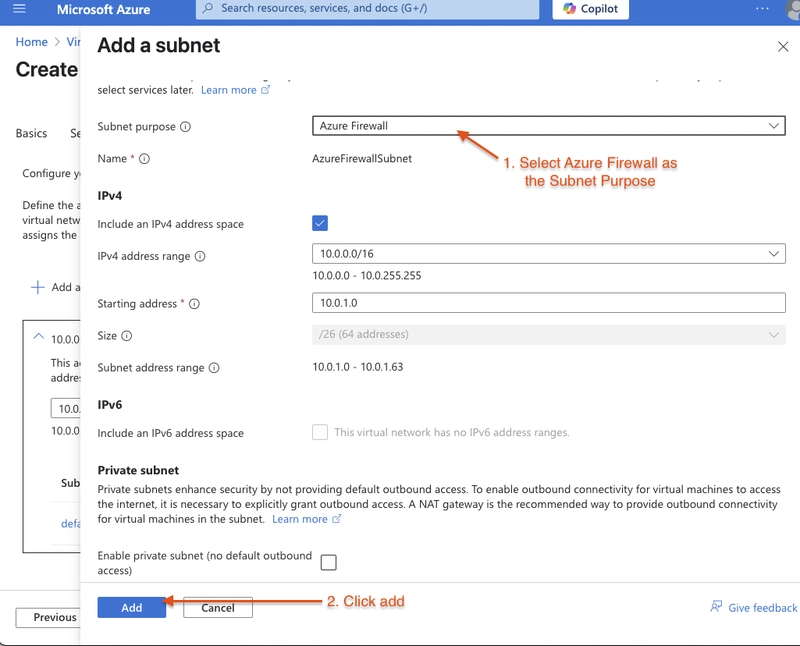
Click add subnet. Choose Azure Firewall as the subnet purpose, leave the default settings, and click Add.

Remove the default space, click review + create
In the virtual networks portal, click app-vnet
Under peerings, select settings
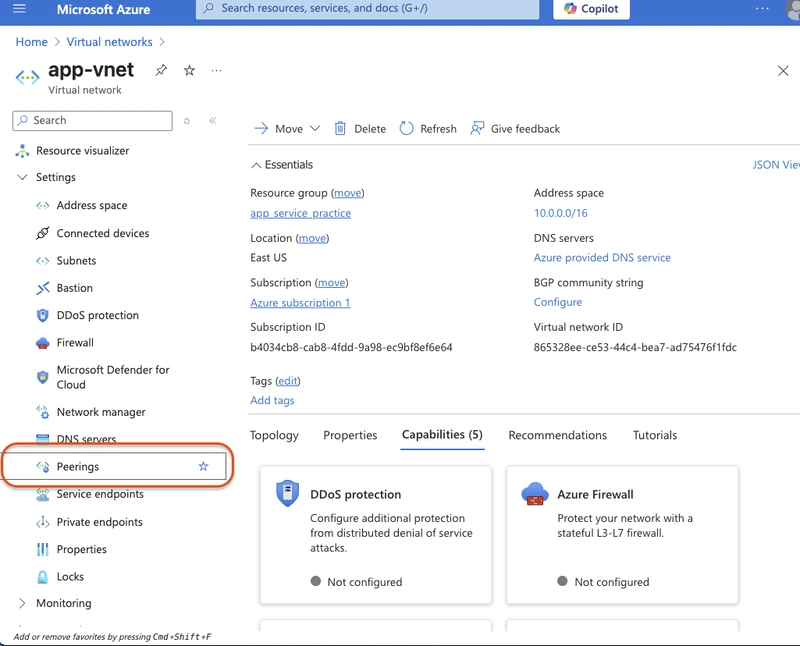
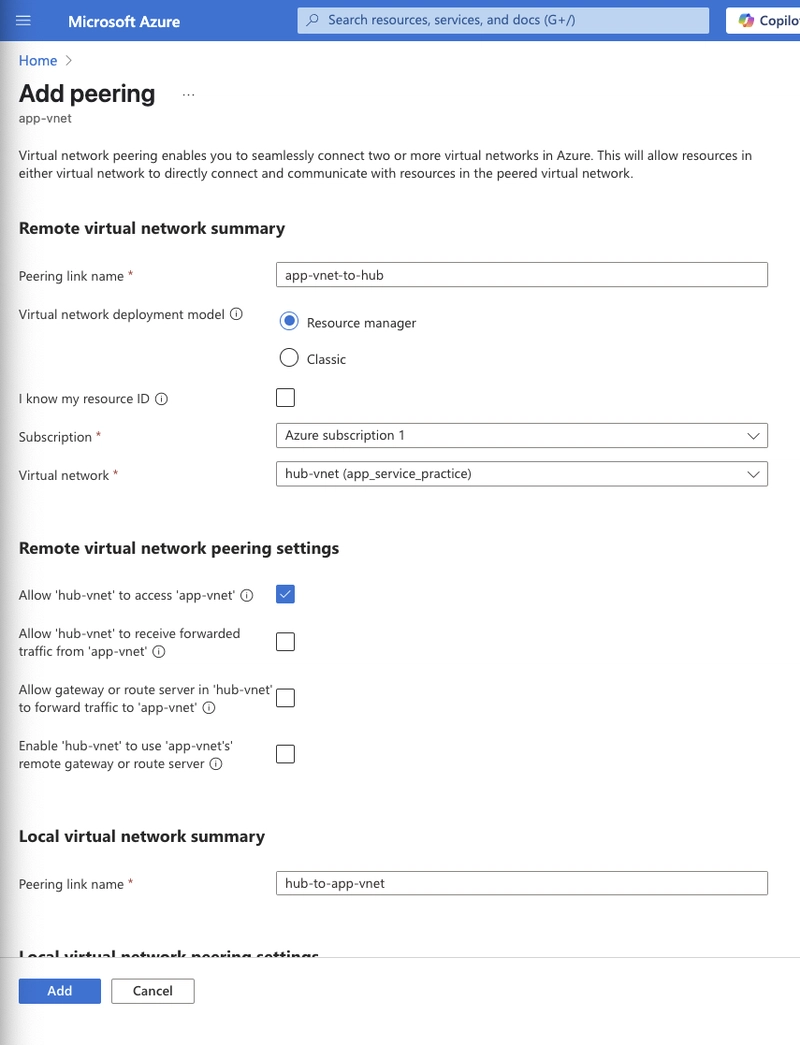
Click add
-
Use these settings:
- Peering link name:
app-vnet-to-hub - Subscription: same subscription used earlier
- Virtual network:
hub-vnet - Local virtual network peering link name:
hub-to-app-vnet - Leave the rest on defaults and click "Add"
- Peering link name:
Once the deployment completes, verify the Peering status is Connected (in the peering menu of app-vnet)
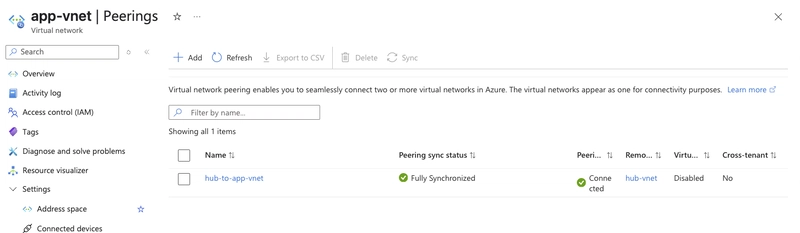
At this point, you’ve successfully created and peered two virtual networks: app-vnet and hub-vnet. In the next exercise, we’ll start configuring security rules and deploying workloads within these networks.


