


Adding Multiple Authors to my Astro Writing Blog: A Technical Walkthrough
At the end of last year, my brothers and I wrote our first novel together (The Battle for Christmas: Reign of the Nutcrackers). That experience inspired us to continue writing together, starting with a monthly newsletter with short stories. At this point, we decided we wanted a website. We had been using Kit to send emails, and we liked that functionality, but as our writing resumes grow, we also wanted to have a place where people could see all of our work, and this is where our Astro site came in. Now, I've been interested in checking out Astro for a while, but when I saw Lucia Cerchie's blog, I fell in love with the Astro template (by Maxi Ferreira) she used. I decided to start there, but since this was a blog for me and both of my brothers, I would need to add functionality for multiple authors. Here's how I did that. Learning the Hard Way: My Journey to Astro Content Collections Before we get into it, I need to acknowledge that I started with a mistake. I did the thing that I say not to do, and I started without fully reading the documentation. When I first added multiple author functionality, I created a simple JavaScript file to manage author data: export const authors = { BekahHW: { name: "BekahHW", bio: "Bekah grew up in a storytelling-rich environment with her brothers...", avatar: "/assets/bhw_headshot.jpg", }, Josh: { name: "Josh", bio: "Josh Hawrot is married to his inspiring wife Cruz...", avatar: "/assets/josh.jpg", }, // ...another author }; I connected this to my blog posts using dynamic routes. Everything worked, and I didn't think twice about it. And then a couple of days later, I was looking at Astro documentation when I had my facepalm moment: the documentation clearly outlined a more structured, type-safe approach using collections that would make my content more maintainable and scalable. It's worth noting that I was also using an older version of Astro, and updating to 5.5.3 gave me more functionality. From their docs: Content collections are the best way to manage sets of content in any Astro project. Collections help to organize and query your documents, enable Intellisense and type checking in your editor, and provide automatic TypeScript type-safety for all of your content. This was exactly what I had needed, and I missed it because I hadn't spent enough time in the docs. Let's just say this is one of those lessons you remember. What I had was working though, so why did I need to change? Why I Needed to Change My original approach worked, but switching to Astro's Content Collections API provided significant benefits: Schema validation: Content collections automatically validate my data structure, preventing errors before they happen TypeScript integration: I get autocompletion and type checking when working with author and blog data Structured content: All data follows a consistent format, making it easier to maintain and extend Simplified queries: The Collections API provides built-in methods for accessing content, eliminating custom filtering code Performance improvements: Astro 5's Content Layer API is specifically optimized for efficiency and scalability Additionally, with Astro 5's reference system, I can establish proper relationships between content types. For example, I can directly reference an author from a blog post using reference("authors") in the schema, which creates a clean, maintainable connection between content. Migrating to Astro Content Collections 1. Setting Up the Content Directory First, I created the proper content directory structure: src/ ├── content/ │ ├── config.ts
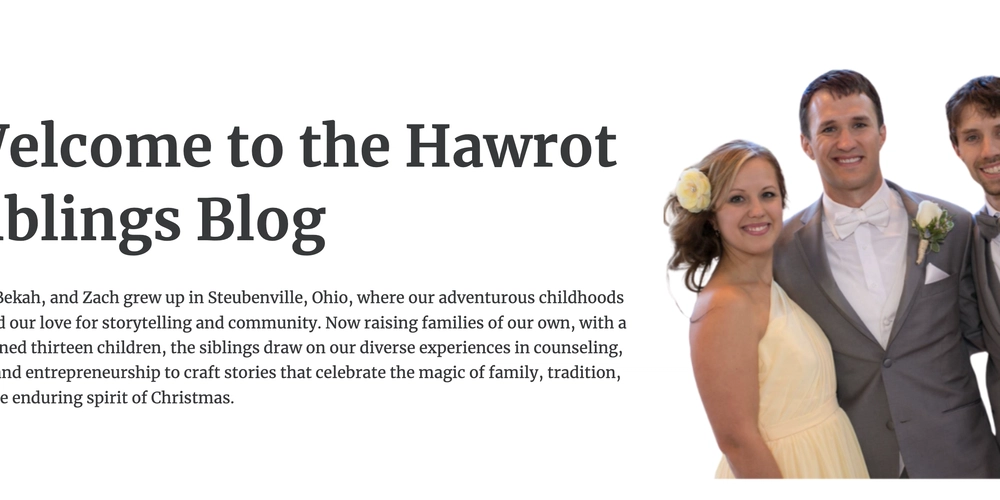
At the end of last year, my brothers and I wrote our first novel together (The Battle for Christmas: Reign of the Nutcrackers). That experience inspired us to continue writing together, starting with a monthly newsletter with short stories. At this point, we decided we wanted a website. We had been using Kit to send emails, and we liked that functionality, but as our writing resumes grow, we also wanted to have a place where people could see all of our work, and this is where our Astro site came in.
Now, I've been interested in checking out Astro for a while, but when I saw Lucia Cerchie's blog, I fell in love with the Astro template (by Maxi Ferreira) she used. I decided to start there, but since this was a blog for me and both of my brothers, I would need to add functionality for multiple authors. Here's how I did that.
Learning the Hard Way: My Journey to Astro Content Collections
Before we get into it, I need to acknowledge that I started with a mistake. I did the thing that I say not to do, and I started without fully reading the documentation.
When I first added multiple author functionality, I created a simple JavaScript file to manage author data:
export const authors = {
  BekahHW: {
    name: "BekahHW",
    bio: "Bekah grew up in a storytelling-rich environment with her brothers...",
    avatar: "/assets/bhw_headshot.jpg",
  },
  Josh: {
    name: "Josh",
    bio: "Josh Hawrot is married to his inspiring wife Cruz...",
    avatar: "/assets/josh.jpg",
  },
  // ...another author
};
I connected this to my blog posts using dynamic routes. Everything worked, and I didn't think twice about it. And then a couple of days later, I was looking at Astro documentation when I had my facepalm moment: the documentation clearly outlined a more structured, type-safe approach using collections that would make my content more maintainable and scalable. It's worth noting that I was also using an older version of Astro, and updating to 5.5.3 gave me more functionality.
From their docs:
Content collections are the best way to manage sets of content in any Astro project. Collections help to organize and query your documents, enable Intellisense and type checking in your editor, and provide automatic TypeScript type-safety for all of your content.
This was exactly what I had needed, and I missed it because I hadn't spent enough time in the docs. Let's just say this is one of those lessons you remember.
What I had was working though, so why did I need to change?
Why I Needed to Change
My original approach worked, but switching to Astro's Content Collections API provided significant benefits:
- Schema validation: Content collections automatically validate my data structure, preventing errors before they happen
- TypeScript integration: I get autocompletion and type checking when working with author and blog data
- Structured content: All data follows a consistent format, making it easier to maintain and extend
- Simplified queries: The Collections API provides built-in methods for accessing content, eliminating custom filtering code
- Performance improvements: Astro 5's Content Layer API is specifically optimized for efficiency and scalability
Additionally, with Astro 5's reference system, I can establish proper relationships between content types. For example, I can directly reference an author from a blog post using reference("authors") in the schema, which creates a clean, maintainable connection between content.
Migrating to Astro Content Collections
1. Setting Up the Content Directory
First, I created the proper content directory structure:
src/
├── content/
│   ├── config.ts  <- Configuration for all collections
│   ├── authors/
│   │   ├── Bekah.md
│   │   ├── Josh.md
│   │   └── Zach.md
│   └── blog/
│       └── my-blog-posts.md
2. Defining Content Schemas
The heart of content collections is the schema definition, which makes sure all your content follows a consistent structure:
// src/content/config.ts
import { defineCollection, reference, z } from 'astro:content';
import { glob, file } from 'astro/loaders';

// Define the schema for the authors collection
const authors = defineCollection({
  loader: glob({ pattern: "**/*.md", base: "./src/content/authors" }),
  schema: z.object({
    name: z.string(),
    bio: z.string(),
    avatar: z.string(),
  }),
});

// Define the schema for the blog collection
const blog = defineCollection({
  loader: glob({ pattern: "**/*.md", base: "./src/content/blog" }),
  schema: z.object({
    title: z.string(),
    description: z.string(),
    publishDate: z.string(),
    author: reference("authors"),
  }),
});

// Export the collections
export const collections = { authors, blog };
3. Converting Author Data to Individual Files
I converted each author from my JS object to individual Markdown files:
---
name: "Bekah"
bio: "Bekah grew up in a storytelling-rich environment with her brothers, where books and imagination were central to daily life..."
avatar: "/assets/bhw_headshot.jpg"
---
4. Fixing Author Name Capitalization in the Blog List View
One issue I ran into was that the author name was appearing in all lowercase in the blog list view (/blog/). This happened because I was using the author ID (which is derived from filenames and always lowercase) instead of their actual name from the frontmatter. Here's how I updated that in src/pages/index.astro:
// Fetch all author entries
const authorEntries = await getCollection('authors');
const getAuthorName = (authorId) => {
  const author = authorEntries.find(a => a.id === authorId);
  return author ? author.data.name : authorId; // Fallback to ID if author not found
};
---

<BaseLayout title={title} description={description} permalink={permalink} current="blog">
  <div class="container">
    <h1>Stories</h1>
    {sortedPosts.map((post, index) => {
      return (
        <div>
          { index !== 0 && <hr /> }
          <div class="post-item">
            <h2>
              <a href={`/blog/${post.id}`}>{post.data.title}</a>
            </h2>
            <p>{post.data.description}</p>
              <span class="post-item-author">
  By <a href={`/authors/${post.data.author.id}`}>{getAuthorName(post.data.author.id)}</a>
</span>

              <span class="post-item-date">— {post.data.publishDate}</span>
            </div>
          </div>
      )
    })}
  </div>
</BaseLayout>
5. Updating Templates to Use Content Collections
Next, I refactored my blog and author pages to use the Content Collections API:
---
// src/pages/blog/[slug].astro
import BaseLayout from '../../layouts/BaseLayout.astro';
import Bio from '../../components/Bio.astro';
import { getCollection, getEntry, render } from 'astro:content';
import ShareButtons from '../../components/ShareButtons.astro';

export async function getStaticPaths() {
try {
    const blogEntries = await getCollection('blog');

    // Create routes using entry ID
    return blogEntries.map(post => {
      console.log(`Creating route for ${post.id}`);
      return {
        params: { slug: post.id },
        props: { entryId: post.id },  // Just pass the ID
      };
    });
  } catch (error) {
    console.error("Error in getStaticPaths:", error);
    return [];
  }
}

// Get blog post data from props
const { entryId } = Astro.props;
const entry = await getEntry('blog', entryId);

if (!entry) {
  return Astro.redirect('/404');
}

// Render the content
const { Content } = await render(entry);
const allAuthors = await getCollection('authors');
let author;
if (entry.data.author?.id) {
  try {
    author = await getEntry('authors', entry.data.author.id);
    if (author) {
      console.log(`Found author for ${entry.data.author.id}`);
    } else {
      console.error(`Author not found: ${entry.data.author.id}`);
    }
  } catch (error) {
    console.error(`Error fetching author: ${error.message}`);
  }
}

const permalink = `${Astro.site.href}blog/${entry.id}`;
---

<BaseLayout title={entry.data.title} description={entry.data.description} permalink={permalink} current="blog">
  <header>
    <p>{entry.data.publishDate} ~ {entry.data.readingTime}</p>
    <h1>{entry.data.title}</h1>
    <hr />
  </header>
  <div class="container">
    <article class="content">
      <Content />
    </article>
    <hr />

    {author && (
      <div class="author-bio">
        <h3>About the Author</h3>
        <Bio
          name={author.data.name}
          bio={author.data.bio}
          avatar={author.data.avatar}
        />
      </div>
    )}

    <ShareButtons title={entry.data.title} permalink={permalink} />
  </div>
</BaseLayout>
There are two things that I wanted to implement while working on this:
- At the bottom of every short story, you see the author and their bio
- When you click an author from the list view, you are taken to their page with links to all of their works.
Both of those are fully functional on the site now.
Lessons Learned
The good news is that I learned a lot during this project, including:
- Read the documentation first: So much time and effort could have been saved
- Use the platform's built-in features: Modern frameworks like Astro provide powerful tools
- Be willing to refactor: Sometimes you need to accept you've taken the wrong approach
There are still things that I need to work on for the site. The next priority is to improve the mobile view and responsiveness, but I'm happy to have it working. We already have two of our short stories up there attributed to the correct authors, and in a couple of weeks mine will be there too. You can check out our site now!