


![From fast food worker to cybersecurity engineer with Tae'lur Alexis [Podcast #169]](https://cdn.hashnode.com/res/hashnode/image/upload/v1745242807605/8a6cf71c-144f-4c91-9532-62d7c92c0f65.png?#)


What I learned from Vibe Coding
Software development is changing rapidly, and a new way of coding is becoming popular. It’s called “vibe coding,” a term used by Andrej Karpathy. This isn’t about how code appears or feels. It’s about leveraging AI to handle the majority of the heavy lifting in code writing. Developers who use AI can complete 26% more work, and they’re able to finish coding tasks 55% faster, and 81% agree that productivity is their biggest benefit. Even if you’ve given AI a try in the past, the technologies are changing weekly with new models, beating the best developers in coding competitions. This new generation of models can understand the context of your entire code base, debugging, commenting, and refactoring code for you. They can help you as an AI pair programmer, and eliminate the need to look up solutions online. What is the Vibe Coding? Karpathy describes vibe coding as “Giving into vibes, embrace exponentials, and forget that code even exists” At its core vibe coding means working with AI coding assistant and adopting an “accept all” philosophy- assuming the AI will write and fix the software you’re creating with minimal human intervention. Unlike traditional programming approaches that require developers to craft each line of code, vibe coding encourages developers to: Focus on high-level ideas and concepts. Let AI generate the implementation details. Accept AI suggestions with minimal review or changes. Use prompt engineering rather than manual coding. Iterate through AI assistance rather than manual debugging. This represents a fundamental shift in how we think about the developer’s role-from code writer to code director. Setup Cursor for Vibe Coding Cursor AI is an AI-powered code editor designed to enhance the coding experience by integrating AI to assist with various tasks, including code completion, code generation, and codebase understanding. It aims to streamline the coding process and improve productivity. You can download it from here: https://www.cursor.com/downloads Once you download a cursor code editor you need to setup it up. First you need to setup your keybinding, prompting language and other couple of settings. Cursor functions more effectively when you grant access to the full code. This allows you to choose how to manage your data. You can either opt for a privacy mode or share your data with Cursor. Within the Cursor settings, you can establish rules for the AI and select the model you wish to use. If you have API keys for LLM models, you can add them to Cursor and access premium features. However, this option is more expensive than purchasing a pro version of Cursor. Start Vibe Coding I found that we need to follow these steps when we vibe coding: Plan project Set Guidelines Write Prompts Review Output Iterate Then I started vibe coding using a cursor. Before that, we needed to plan the application. I’m going to implement a ToDo application that contains an Express JS backend and a React frontend. For that, I used this command first: Create a full-stack ToDo application using React for the frontend and Node.js with Express for the backend. Set up two folders: /client for frontend and /server for backend. Use TypeScript in both. Include an initial README in root with setup instructions. In /client folder, create a React app using TypeScript and TailwindCSS. Build a simple UI for a ToDo app with the following features: - Input to add a task - List to display tasks - Checkbox to mark complete - Delete button to remove task Use functional components and hooks. Maintain tasks using local state. In /server folder, build a Node.js backend using Express and TypeScript. Implement RESTful API endpoints for managing todos: - GET /todos - POST /todos - PUT /todos/:id - DELETE /todos/:id Use an in-memory array to store todos. Add basic error handling and CORS support. Then cursor started to create folders and necessary files for the application. I accepted all the suggestions commands and code changes that Cursor has given to me. Then I gave a prompt to integrate frontend with backend. Update the frontend in /client to consume the backend API from /server. Replace local state with API calls using axios: - GET to load todos - POST to create new todo - PUT to toggle complete - DELETE to remove todo Ensure proper async/await and error handling. Update the frontend in /client to consume the backend API from /server. Replace local state with API calls using axios: - GET to load todos - POST to create new todo - PUT to toggle complete - DELETE to remove todo Ensure proper async/await and error handling. Then Cursor created me a Todo application. But it had some issues. I gave that as prompt and asked to fix. It fixed issues and finally created a ToDo application. Then I asked Cursor to write unit testing for that application using this prompt. Add basic test coverage: - For backend: use Jest and Supertest to test API endpoi

Software development is changing rapidly, and a new way of coding is becoming popular. It’s called “vibe coding,” a term used by Andrej Karpathy. This isn’t about how code appears or feels. It’s about leveraging AI to handle the majority of the heavy lifting in code writing. Developers who use AI can complete 26% more work, and they’re able to finish coding tasks 55% faster, and 81% agree that productivity is their biggest benefit. Even if you’ve given AI a try in the past, the technologies are changing weekly with new models, beating the best developers in coding competitions. This new generation of models can understand the context of your entire code base, debugging, commenting, and refactoring code for you. They can help you as an AI pair programmer, and eliminate the need to look up solutions online.
What is the Vibe Coding?
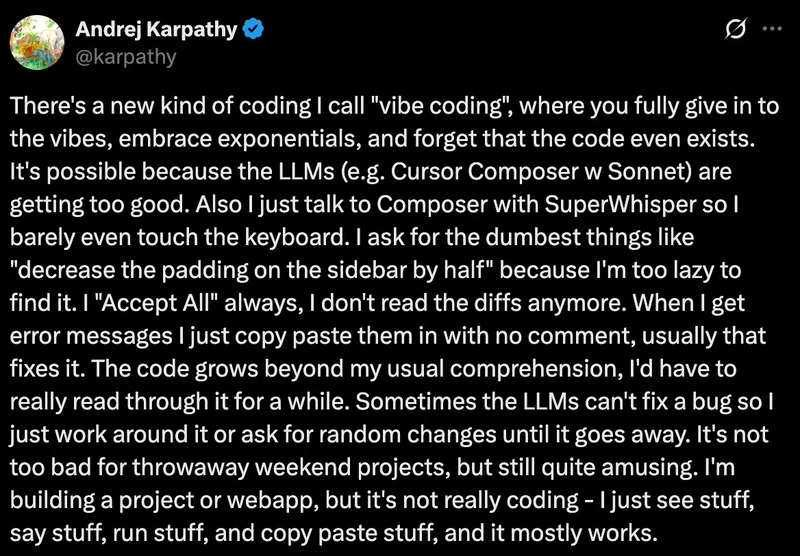
Karpathy describes vibe coding as “Giving into vibes, embrace exponentials, and forget that code even exists” At its core vibe coding means working with AI coding assistant and adopting an “accept all” philosophy- assuming the AI will write and fix the software you’re creating with minimal human intervention.
Unlike traditional programming approaches that require developers to craft each line of code, vibe coding encourages developers to:
Focus on high-level ideas and concepts.
Let AI generate the implementation details.
Accept AI suggestions with minimal review or changes.
Use prompt engineering rather than manual coding.
Iterate through AI assistance rather than manual debugging.
This represents a fundamental shift in how we think about the developer’s role-from code writer to code director.
Setup Cursor for Vibe Coding
Cursor AI is an AI-powered code editor designed to enhance the coding experience by integrating AI to assist with various tasks, including code completion, code generation, and codebase understanding. It aims to streamline the coding process and improve productivity. You can download it from here: https://www.cursor.com/downloads
Once you download a cursor code editor you need to setup it up. First you need to setup your keybinding, prompting language and other couple of settings.
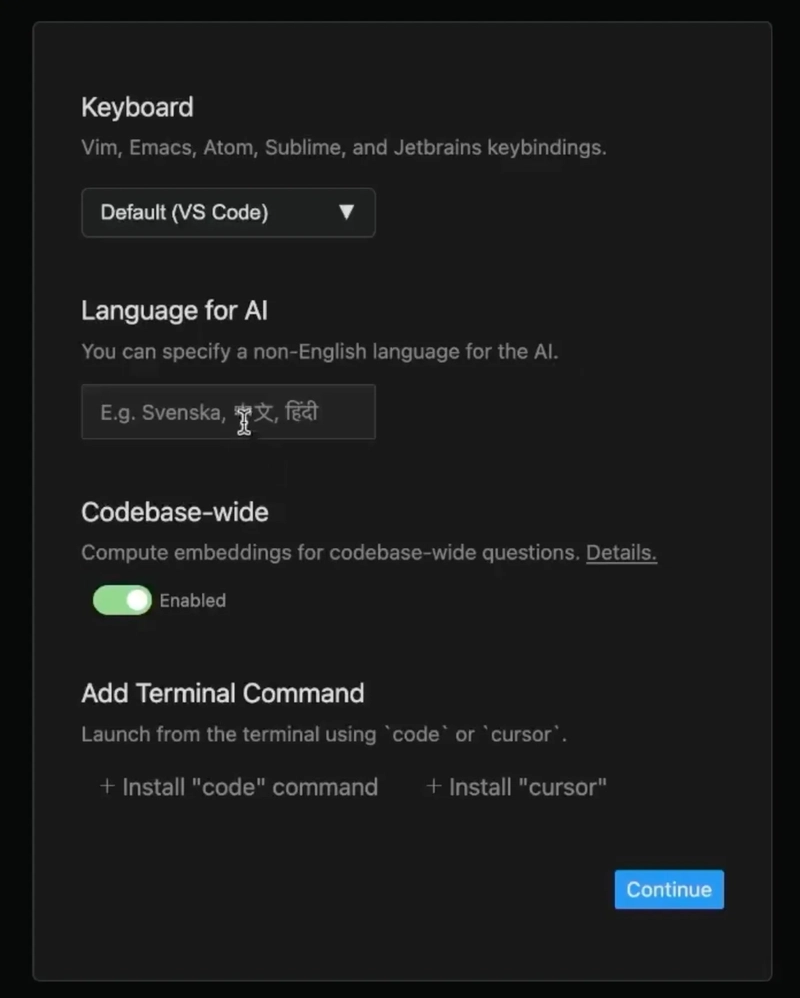
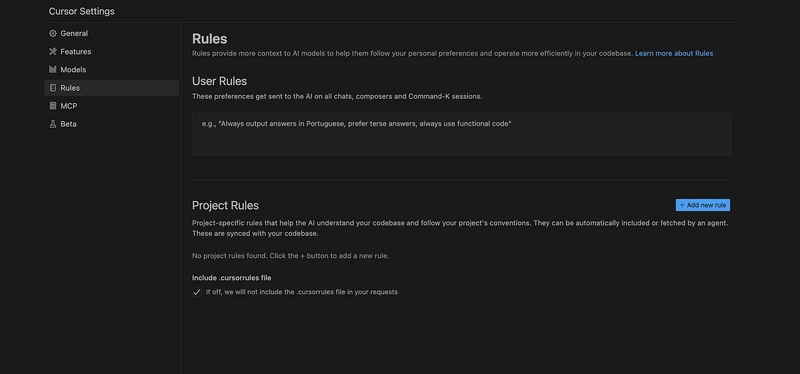
Cursor functions more effectively when you grant access to the full code. This allows you to choose how to manage your data. You can either opt for a privacy mode or share your data with Cursor. Within the Cursor settings, you can establish rules for the AI and select the model you wish to use.
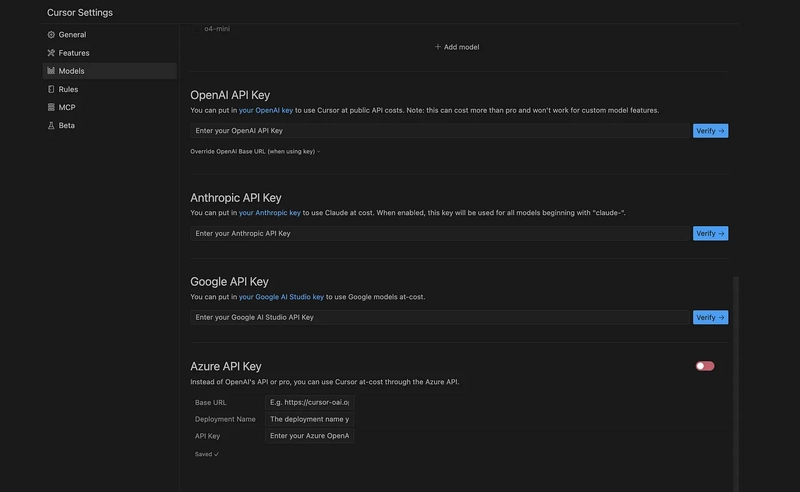
If you have API keys for LLM models, you can add them to Cursor and access premium features. However, this option is more expensive than purchasing a pro version of Cursor.
Start Vibe Coding
I found that we need to follow these steps when we vibe coding:
Plan project
Set Guidelines
Write Prompts
Review Output
Iterate
Then I started vibe coding using a cursor. Before that, we needed to plan the application. I’m going to implement a ToDo application that contains an Express JS backend and a React frontend. For that, I used this command first:
Create a full-stack ToDo application using React for the frontend and
Node.js with Express for the backend. Set up two folders: /client for
frontend and /server for backend. Use TypeScript in both.
Include an initial README in root with setup instructions.

In /client folder, create a React app using TypeScript and TailwindCSS.
Build a simple UI for a ToDo app with the following features:
- Input to add a task
- List to display tasks
- Checkbox to mark complete
- Delete button to remove task
Use functional components and hooks. Maintain tasks using local state.


In /server folder, build a Node.js backend using Express and TypeScript.
Implement RESTful API endpoints for managing todos:
- GET /todos
- POST /todos
- PUT /todos/:id
- DELETE /todos/:id
Use an in-memory array to store todos. Add basic error handling and
CORS support.
Then cursor started to create folders and necessary files for the application.
I accepted all the suggestions commands and code changes that Cursor has given to me.
Then I gave a prompt to integrate frontend with backend.
Update the frontend in /client to consume the backend API
from /server. Replace local state with API calls using axios:
- GET to load todos
- POST to create new todo
- PUT to toggle complete
- DELETE to remove todo
Ensure proper async/await and error handling.

Update the frontend in /client to consume the backend API
from /server. Replace local state with API calls using axios:
- GET to load todos
- POST to create new todo
- PUT to toggle complete
- DELETE to remove todo
Ensure proper async/await and error handling.
Then Cursor created me a Todo application. But it had some issues. I gave that as prompt and asked to fix. It fixed issues and finally created a ToDo application. Then I asked Cursor to write unit testing for that application using this prompt.
Add basic test coverage:
- For backend: use Jest and Supertest to test API endpoints
- For frontend: use React Testing Library to test rendering and
user interactions
Include at least 1 test per core functionality.
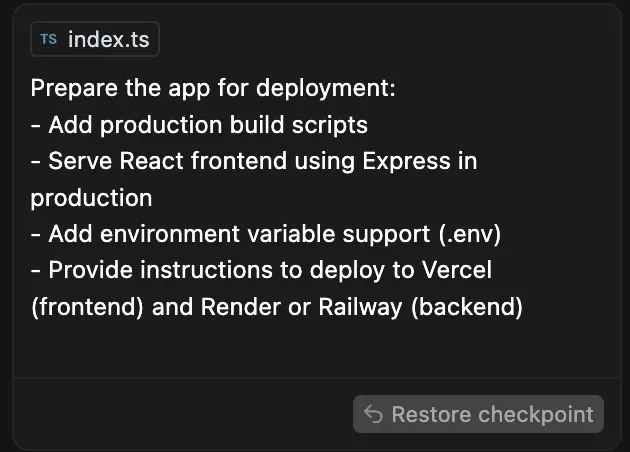
I provided prompts to prepare it for production.
Prepare the app for deployment:
- Add production build scripts
- Serve React frontend using Express in production
- Add environment variable support (.env)
- Provide instructions to deploy to Vercel (frontend) and Render
or Railway (backend)
I have noticed that the cursor keeps checkpoints after each prompt. If our prompts go wrong or the application doesn’t work after a new modification, we can simply restore to that checkpoint.
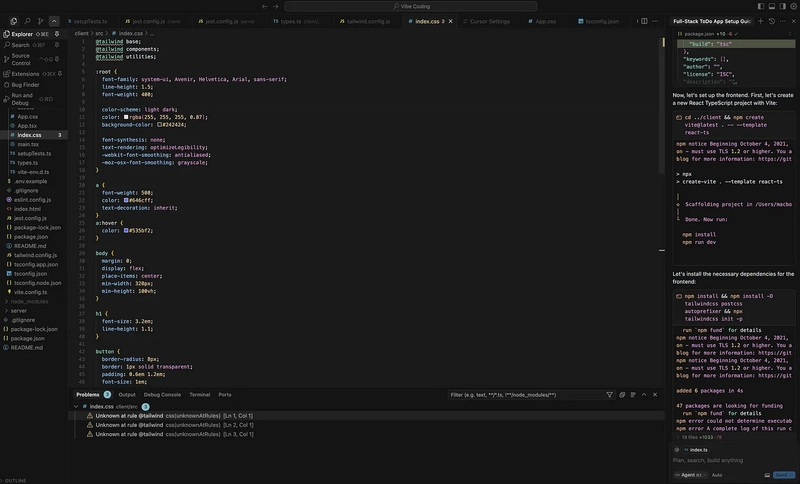
Then I ran the both backend and frontend applications. It worked well. But there were some css issues. But when it comes to functionality, it works really well. Claude 3.7 sonnet performed better than other LLM models.
This is the final application that I have created.
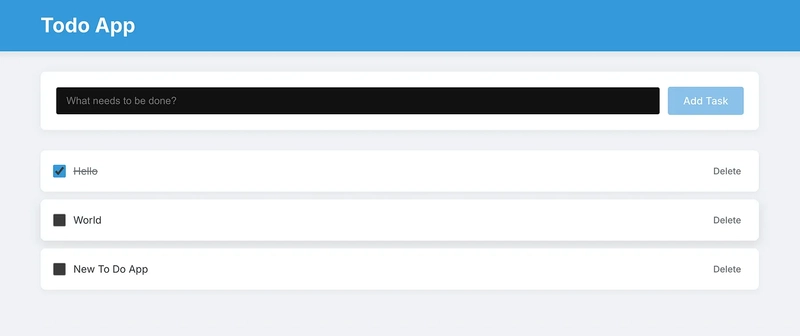
You can enhance the UI by suggesting colors and others alignments. The best part about this application? I didn’t write a single line of code myself. Everything — from installations to commands — was generated by Cursor AI. I didn’t even touch the codebase; I just accepted all the suggestions the AI provided.
What does the future hold with the rise of AI tools?
This is my 2 cents about it:
AI still developing and it’s not too perfect. So still manual intervention for software development must needed.
In the future, we may see a merger of roles, such as DevOps engineers and software engineers. Companies will likely expect engineers to be proficient in multiple programming languages, creating a demand for T-shaped engineers.
Continuous learning and efficient use of these tools will give individuals a competitive edge in this evolving landscape. A deeper understanding of these technologies will aid in this process.
Happy Coding


