


Terraform from 0 to Hero
Terraform from 0 to Hero This entire series was originally posted on Medium. Table of contents: 1. What is Terraform? 2. Terraform Provider 3. Terraform Resources 4. Terraform Data Sources and Outputs 5. Terraform Variables and Locals 6. Terraform Provisioners and Null resources 7. Terraform Loops and Conditionals 8. Terraform CLI commands 9. Terraform functions 10. Working with files 11. Understanding Terraform state 12. Terraform depends_on and lifecycle block 13. Terraform Dynamic blocks 14. Terraform Modules 15. Best practices for modules I 16. Best practices for modules II 17. Bonus1: OpenTofu differences 18. Bonus2: Specialized Infrastructure Orchestration platforms 1. What is Terraform? Once upon a time, if you worked in the IT industry, there was a big chance you faced different challenges when provisioning or managing infrastructure resources. It often felt like spinning plates, trying to keep everything running smoothly and making sure that all the resources are properly configured. Then, Terraform came to the rescue and saved us from this daunting task that took a lot of time. So what is Terraform? Terraform started as an open-source infrastructure as code (IaC) tool, developed by Hashicorp, that makes it easy to create and take care of your infrastructure resources. Now, it changed it license to BSL. If you want to learn more about the license change, and how it compares to OpenTofu checkout this article. It’s built in Golang (Go), which gives it a lot of power to create different infrastructure pieces in parallel, making it reliable by taking advantage of Go’s strong type-checking and error-handling capabilities. Terraform uses HCL (Hashicorp Configuration Language) code to define its resources, but even JSON can be used for this, if you, of course, hate your life for whatever reason. Let’s get back to HCL. It is a human-readable , high-level programming language that is designed to be easy to use and understand: resource "resource_type" "resource_name" { param1 = "value1" param2 = "value2" param3 = "value3" param4 = "value4" } resource "cat" "british" { color = "orange" name = "Garfield" age = 5 food_preference = ["Tuna", "Chicken", "Beef"] } I don’t want to get into too much detail about what a resource is in this article, as I plan to build a series around this, but the above code, with a pseudo real-life example, is pretty much self-explanatory. To make it as simple as possible for now to understand, when you are using HCL and declaring something, it will have a type (let’s suppose there is a resource type cat, for example) and a name on the first line. Inside the curly brackets, you are going to specify how you want to configure that type of “something”. In our example, we will create a “cat”, that will be named inside of terraform as “british”. After that, we are configuring the cat’s real name, the one that everyone will know about, the color, the age, and what it likes to eat. As you see, the language, at a first glance seems to be pretty close to English. There is more to it, of course, but you are going to see it in the next articles. One of the main benefits of using Terraform is that it is platform-agnostic. This means that people that are coding in Terraform, don’t need to learn different programming languages to provision infrastructure resources in different cloud providers. However, this doesn’t mean that if you develop the code to provision a VM instance in AWS, you can use the same one for Azure or GCP. Nevertheless, this can save a lot of time and effort, as engineers won’t need to constantly switch between a lot of tools (like going from Cloudformation for AWS to ARM templates for Azure). A consistent experience is offered across all platforms. Terraform is stateful. Is this a strength or is this a weakness? This topic is highly subjective and it depends on your use case. One of the main benefits of statefulness in Terraform is that it allows it to make decisions about how to manage resources based on the current state of the infrastructure. This ensures that Terraform does not create unnecessary resources and helps to prevent errors and conflicts. This can save time and resources, make the provisioning process more efficient and also encourage collaboration between different teams. Terraform keeps its state in a state file and uses it and your configuration, to determine the actions that need to be taken to reach the desired state of the resources. Even though I’ve presented only strengths until now, being stateful has a relatively big weakness: the managing of the state file. This adds complexity to the system and also in the case that the state file gets corrupted or deleted, it can lead to conflicts and errors in the provisioning process. We will tackle this subject in detail in the next articles. You may now ask, how can I easily install it? We

Terraform from 0 to Hero
This entire series was originally posted on Medium.
Table of contents:
1. What is Terraform?
2. Terraform Provider
3. Terraform Resources
4. Terraform Data Sources and Outputs
5. Terraform Variables and Locals
6. Terraform Provisioners and Null resources
7. Terraform Loops and Conditionals
8. Terraform CLI commands
9. Terraform functions
10. Working with files
11. Understanding Terraform state
12. Terraform depends_on and lifecycle block
13. Terraform Dynamic blocks
14. Terraform Modules
15. Best practices for modules I
16. Best practices for modules II
17. Bonus1: OpenTofu differences
18. Bonus2: Specialized Infrastructure Orchestration platforms
1. What is Terraform?
Once upon a time, if you worked in the IT industry, there was a big chance you faced different challenges when provisioning or managing infrastructure resources. It often felt like spinning plates, trying to keep everything running smoothly and making sure that all the resources are properly configured.
Then, Terraform came to the rescue and saved us from this daunting task that took a lot of time.
So what is Terraform? Terraform started as an open-source infrastructure as code (IaC) tool, developed by Hashicorp, that makes it easy to create and take care of your infrastructure resources. Now, it changed it license to BSL. If you want to learn more about the license change, and how it compares to OpenTofu checkout this article.
It’s built in Golang (Go), which gives it a lot of power to create different infrastructure pieces in parallel, making it reliable by taking advantage of Go’s strong type-checking and error-handling capabilities.
Terraform uses HCL (Hashicorp Configuration Language) code to define its resources, but even JSON can be used for this, if you, of course, hate your life for whatever reason. Let’s get back to HCL. It is a human-readable , high-level programming language that is designed to be easy to use and understand:
resource "resource_type" "resource_name" {
  param1 = "value1"
  param2 = "value2"
  param3 = "value3"
  param4 = "value4"
}

resource "cat" "british" {
  color           = "orange"
  name            = "Garfield"
  age             = 5
  food_preference = ["Tuna", "Chicken", "Beef"]
}
I don’t want to get into too much detail about what a resource is in this article, as I plan to build a series around this, but the above code, with a pseudo real-life example, is pretty much self-explanatory.
To make it as simple as possible for now to understand, when you are using HCL and declaring something, it will have a type (let’s suppose there is a resource type cat, for example) and a name on the first line. Inside the curly brackets, you are going to specify how you want to configure that type of “something”.
In our example, we will create a “cat”, that will be named inside of terraform as “british”. After that, we are configuring the cat’s real name, the one that everyone will know about, the color, the age, and what it likes to eat.
As you see, the language, at a first glance seems to be pretty close to English. There is more to it, of course, but you are going to see it in the next articles.
One of the main benefits of using Terraform is that it is platform-agnostic. This means that people that are coding in Terraform, don’t need to learn different programming languages to provision infrastructure resources in different cloud providers. However, this doesn’t mean that if you develop the code to provision a VM instance in AWS, you can use the same one for Azure or GCP.
Nevertheless, this can save a lot of time and effort, as engineers won’t need to constantly switch between a lot of tools (like going from Cloudformation for AWS to ARM templates for Azure).
A consistent experience is offered across all platforms.
Terraform is stateful. Is this a strength or is this a weakness? This topic is highly subjective and it depends on your use case.
One of the main benefits of statefulness in Terraform is that it allows it to make decisions about how to manage resources based on the current state of the infrastructure. This ensures that Terraform does not create unnecessary resources and helps to prevent errors and conflicts. This can save time and resources, make the provisioning process more efficient and also encourage collaboration between different teams.
Terraform keeps its state in a state file and uses it and your configuration, to determine the actions that need to be taken to reach the desired state of the resources.
Even though I’ve presented only strengths until now, being stateful has a relatively big weakness: the managing of the state file. This adds complexity to the system and also in the case that the state file gets corrupted or deleted, it can lead to conflicts and errors in the provisioning process.
We will tackle this subject in detail in the next articles.
You may now ask, how can I easily install it? Well, Hashicorp’s guide does a great job of helping you install it, just select your platform and you are good to go.
Ok, now you have a high-level idea about what Terraform is, how to install it, but it’s ok if you still have a lot of questions, as all the answers will come shortly.
Originally posted on Medium.
2. What is a Terraform provider?
In short, Terraform providers are plugins that allow Terraform to interact with specific infrastructure resources. They act as an interface between Terraform and the underlying infrastructure, translating the Terraform configuration into the appropriate API calls and allowing Terraform to manage resources across a wide variety of environments. Each provider has its own set of resources and data sources that can be managed and provisioned using Terraform.
One of the most common mistakes that people make when they are thinking about Terraform providers, is the fact that they assume that Terraform providers exist only for Cloud Vendors such as Amazon Web Services (AWS), Microsoft Azure, Google Cloud Platform (GCP), or Oracle Cloud Infrastructure (OCI). There are a lot of other providers that can be used that don’t belong to a Cloud Vendor as Template, Kubernetes, Helm, Spacelift, Artifactory, VSphere, and Aviatrix, to name a few.
Each provider has its own set of resources and data sources that can be managed and provisioned using Terraform. For example, the AWS provider has resources for managing EC2 instances, EBS volumes, and ELB load balancers.
Another great thing related to this feature is the fact that you can build your own Terraform provider. While it has an API, you can translate it to Terraform, so that’s just great. However, there are thousands of providers already available in the registry, so you don’t need to reinvent the wheel.
Before jumping in and showing you examples of how to use providers, let’s discuss about how to use the documentation.
After you are selecting your provider from the registry, you will be redirected to the provider’s page.
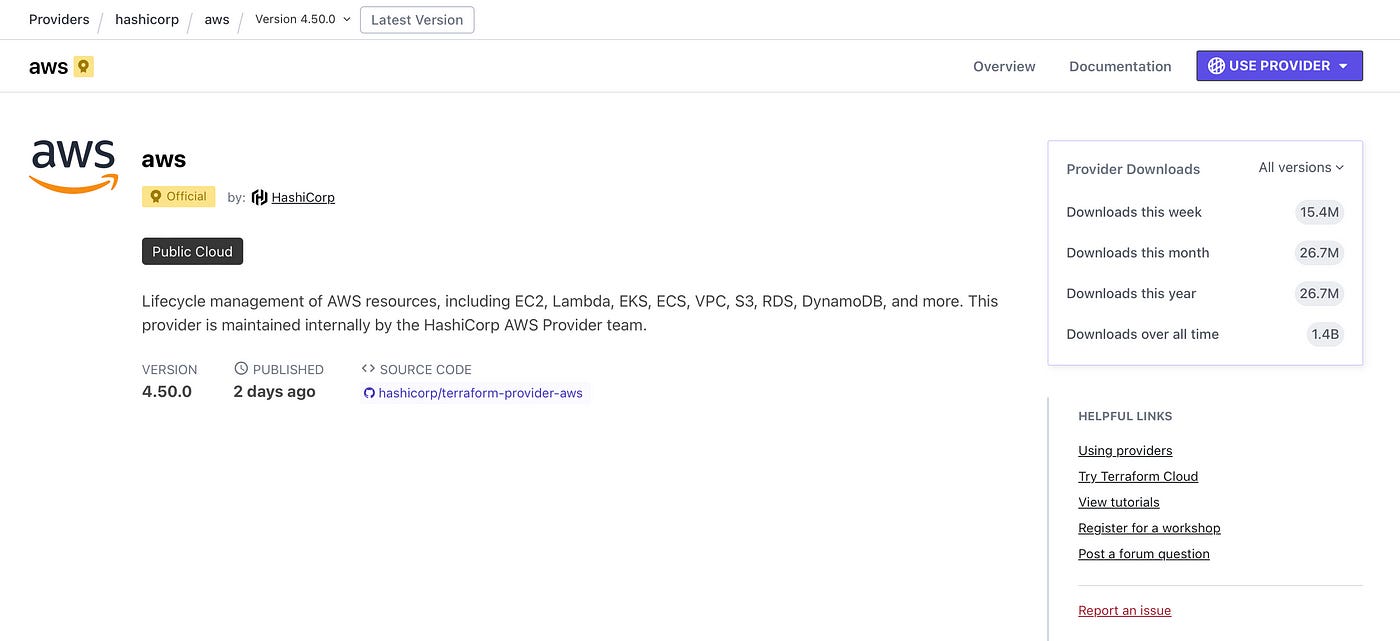
In the above view, click on documentation:
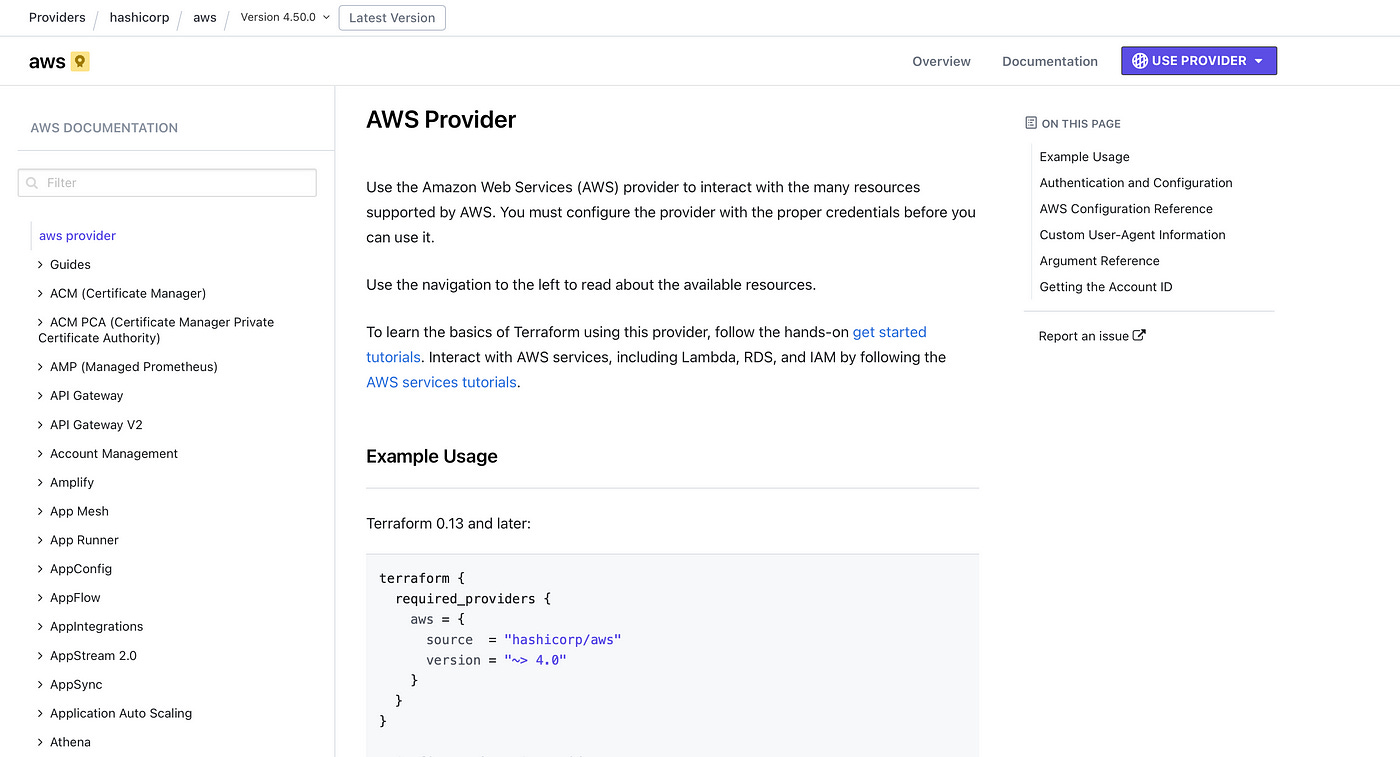
Usually, the first tab you are directed to will explain how to configure and use the provider and some simple examples of how to create some simple resources. Of course, this view is different from one provider to another, but usually, you will see these examples.
We will get back to how to use the documentation when we will talk about resources in the next article.
Even though AWS is the biggest player in the market when it comes to cloud vendors, in this article I will show an example provider with OCI and one with Azure.
You can choose your own, of course, by going to the registry and selecting whatever suits you.
OCI
You have multiple ways to connect to the OCI provider as stated in the documentation, but I will only discuss about the default one:
API Key Authentication (default)
Based on your tenancy and your user will have to specify the following details:
tenancy_ocid
user_ocid
private_key or private_key_path
private_key_password (optional, only required if your password is encrypted)
fingerprint
region
  provider "oci" {
      tenancy_ocid     = "tenancy_ocid"
      user_ocid        = "user_ocid"
      fingerprint      = "fingerprint"
      private_key_path = "private_key_path"
      region           = "region"
    }
After you specify the correct values for all of the values mentioned above you can interact with your Oracle Cloud Infrastructure’s cloud account.
You will be able to define resources and datasources to create and configure different pieces of infrastructure.
AZURE
Similar to the OCI provider, the Azure provider, can be configured in multiple ways:
Authenticating to Azure using a Service Principal and a Client Certificate
Authenticating to Azure using a Service Principal and a Client Secret
I will discuss the Azure CLI option which is the easiest way to authenticate by leveraging the az login command.
    provider "azurerm" {
      features {}
    }
This is the only configuration you have to do in the Terraform code and after running az login and following the prompt you are good to go.
Originally posted on Medium.
3. What is a Terraform Resource?
Resources in Terraform refer to the components of infrastructure that Terraform is able to manage, such as virtual machines, virtual networks, DNS entries, pods, and others. Each resource is defined by a type, such as “aws_instance” or “google_dns_record”, “kubernetes_pod”, “oci_core_vcn”, and has a set of configurable properties, such as the instance size, vcn cidr, etc. Remember the cat example from the first article in this series.
Terraform can be used to create, update, and delete resources, managing dependencies between them and ensuring they are created in the correct order. You can also create explicit dependencies between some of the resources if you would like to do that by using depends_on
Let’s go in-depth and try to understand how to create these resources and how can we leverage the documentation.
I will start with something simple, an aws_vpc
First things first, whenever you are creating a resource, you will need to go to the documentation. It is really important to understand what you can do for a particular resource and I believe that you should try to build a habit around this.
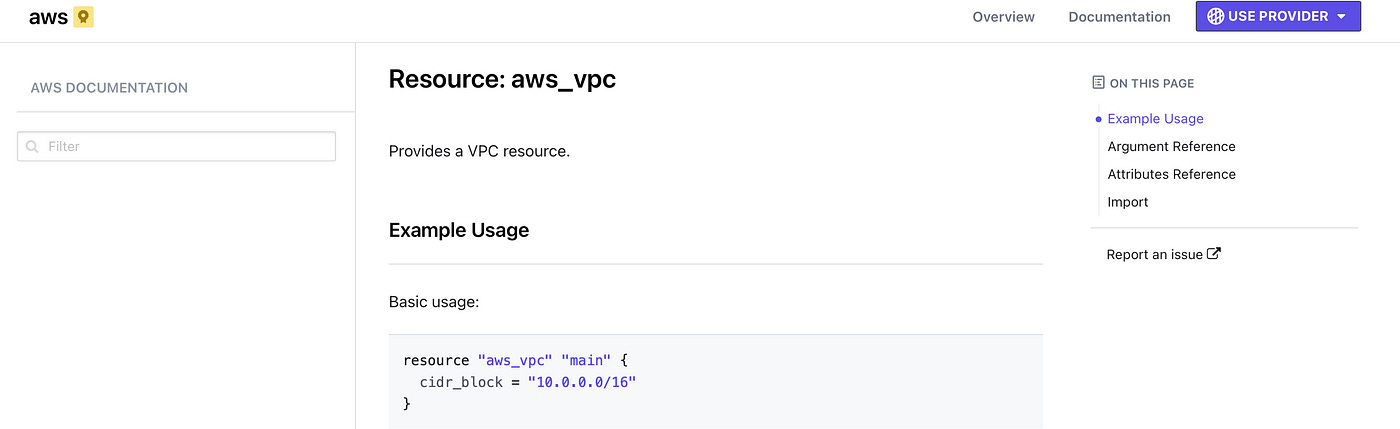
On the right-hand side, you have the On this page space, with 4 elements that you should know like you know to count:
Example Usage → this will show you a couple of examples of how to use the resource
Argument Reference → in this section you are going to see all the parameters that can be configured for a resource. Some parameters are mandatory and others are optional (these parameters will be signaled with an
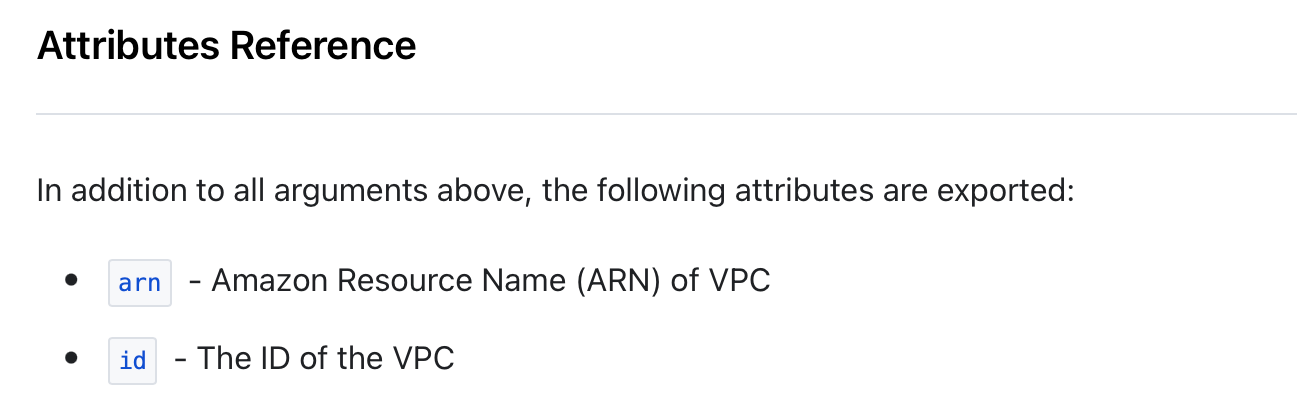
Optionalplaced between brackets)Attributes Reference → here you will find out what a resource exposes and I will talk about this in more detail when I get to the Outputs article
Import → Until now, if you didn’t know anything about Terraform and you’ve just read my articles, you are possibly thinking that it’s possible to import different resources in the state and that is correct. In this section, you are going to find out how you can import that particular resource type
So let’s create a VPC. First, we need to define the provider as specified in the last article, the only caveat now, is that we are doing it for a different cloud provider. If you forgot how to do it just reference the previous article as it has two examples for Azure and OCI and you easily do it for AWS.
Nevertheless, I will show you an option for AWS too using the credentials file that is leveraged by aws cli also. The provider will automatically read the AWS_ACCESS_KEY and AWS_SECRET_ACCESS_KEY from the ~/.aws/credentials, so make sure you have that configured. An example can be found here.
We are then going to add the vpc configuration. Everything should be saved in a .tf file.
    provider "aws" {
      region = "us-east-1"
    }

    resource "aws_vpc" "example" {
      cidr_block = "10.0.0.0/16"
    }
As we see in the documentation, all the parameters for the vpc are optional, as AWS will assign everything that you don’t specify for you.
Now it is time to run the code. For this, we are going to learn some terraform essential commands and I’m going just to touch upon the basics of these commands:
terraform init→ Initializes a working directory with Terraform configuration files. This should be the first command executed after creating a new Terraform configuration or cloning an existing one from version control. It also downloads the specified provider and modules if you are using any and saves them in a generated .terraform directory.terraform plan→ generates an execution plan, allowing you to preview the changes Terraform intends to make to your infrastructure.terraform apply→ executes the actions proposed in a Terraform plan. If you don’t provide it a plan file, it will generate an execution plan when you are running the command, as ifterraform planran. This prompts for your input so don’t be scared to run it.terraform destroy→ is a simple way to delete all remote objects managed by a specific Terraform configuration. This prompts for your input so don’t be scared to run it.
We will get into more details when we are going to tackle all Terraform commands during this series.
Ok, now that you know the basics, let’s run the code.
Go to the directory where you’ve created your terraform file with the above configuration and run terraform init
_Initializing the backend...

Initializing provider plugins...
\- Finding latest version of hashicorp/aws...
\- Installing hashicorp/aws v4.50.0...
\- Installed hashicorp/aws v4.50.0 (signed by HashiCorp)

Terraform has created a lock file .terraform.lock.hcl to record the provider
selections it made above. Include this file in your version control repository
so that Terraform can guarantee to make the same selections by default when
you run "terraform init" in the future.

Terraform has been successfully initialized!

You may now begin working with Terraform. Try running "terraform plan" to see
any changes that are required for your infrastructure. All Terraform commands
should now work.

If you ever set or change modules or backend configuration for Terraform,
rerun this command to reinitialize your working directory. If you forget, other
commands will detect it and remind you to do so if necessary._
After that, let’s run terraform plan to see what is going to happen:
_Terraform used the selected providers to generate the following execution plan. Resource actions are indicated with the following symbols:
\+ create

Terraform will perform the following actions:
_
# aws __vpc.example will be created
\+ resource "aws__vpc" "example" {
\+ arn = (known after apply)
\+ cidr __block = "10.0.0.0/16"
\+ default__network __acl__ id = (known after apply)
\+ default __route__ table __id = (known after apply)
\+ default__security __group__ id = (known after apply)
\+ dhcp __options__ id = (known after apply)
\+ enable __classiclink = (known after apply)
\+ enable__classiclink __dns__ support = (known after apply)
\+ enable __dns__ hostnames = (known after apply)
\+ enable __dns__ support = true
\+ enable __network__ address __usage__ metrics = (known after apply)
\+ id = (known after apply)
\+ instance __tenancy = "default"
\+ ipv6__association __id = (known after apply)
\+ ipv6__cidr __block = (known after apply)
\+ ipv6__cidr __block__ network __border__ group = (known after apply)
\+ main __route__ table __id = (known after apply)
\+ owner__id = (known after apply)
\+ tags __all = (known after apply)
}

Plan: 1 to add, 0 to change, 0 to destroy.

───────────────────────────────────────────────────────────────────

Note: You didn't use the -out option to save this plan, so Terraform can't guarantee to take exactly these actions if you run "terraform apply" now._

In the plan, we see that we are going to create one vpc with the above configuration. You can observe that the majority of the parameters will be known after apply, but the cidr block is the one that we’ve specified.
Let’s apply the code and create the vpc with terraform apply:
 _Terraform will perform the following actions:

# aws_vpc.example will be created
\+ resource "aws_vpc" "example" {
\+ arn = (known after apply)
\+ cidr_block = "10.0.0.0/16"
\+ default_network_acl_id = (known after apply)
\+ default_route_table_id = (known after apply)
\+ default_security_group_id = (known after apply)
\+ dhcp_options_id = (known after apply)
\+ enable_classiclink = (known after apply)
\+ enable_classiclink_dns_support = (known after apply)
\+ enable_dns_hostnames = (known after apply)
\+ enable_dns_support = true
\+ enable_network_address_usage_metrics = (known after apply)
\+ id = (known after apply)
\+ instance_tenancy = "default"
\+ ipv6_association_id = (known after apply)
\+ ipv6_cidr_block = (known after apply)
\+ ipv6_cidr_block_network_border_group = (known after apply)
\+ main_route_table_id = (known after apply)
\+ owner_id = (known after apply)
\+ tags_all = (known after apply)
}

Plan: 1 to add, 0 to change, 0 to destroy.

Do you want to perform these actions?
Terraform will perform the actions described above.
Only 'yes' will be accepted to approve.

Enter a value:_

Enter yes at the prompt and you will be good to go.

 _Enter a value: yes

aws_vpc.example: Creating...
aws_vpc.example: Creation complete after 3s [id=vpc-some_id]

Apply complete! Resources: 1 added, 0 changed, 0 destroyed._
Woohoo, we have created a vpc using Terraform. You can then go into the AWS console and see it in the region you’ve specified for your provider.
Very nice and easy, I would say, but before destroying the vpc, let’s see how we can create a resource that references this existing vpc.
An AWS internet gateway exists only inside of a vpc. So let’s go and check the documentation for the internet gateway.
From the documentation, we see in the example directly that we can reference a vpc id for creating the internet gateway:
    resource "aws_internet_gateway" "gw" {
      vpc_id = ""
    }
But the 100-point question is, how can we reference the above-created vpc? Well, that is not very hard if you remember the following:
type.name.attribute
All resources have a type, a name, and some attributes they expose. The exposed attributes are part of the Attributes reference section in the provider. Some providers will explicitly mention they are exposing everything from Argument reference + Attribute reference.
Let’s take our vpc as an example, its type is aws_vpc , its name is example and it exposes a bunch of things (remember, the documentation is your best friend).
So, as the internet gateway requires a vpc_id and we want to reference our existing one, our code will look like this in the end:
    provider "aws" {
      region = "us-east-1"
    }

    resource "aws_vpc" "example" {
      cidr_block = "10.0.0.0/16"
    }

    resource "aws_internet_gateway" "gw" {
      vpc_id = aws_vpc.example.id
    }
We can then reapply the code with terraform applyand terraform will simply compare what we have already created with what we have in our configuration and create only the internet gateway.
aws __vpc.example: Refreshing state... [id=vpc-some__ id]

Terraform used the selected providers to generate the following execution plan. Resource actions are indicated with the following symbols:
\+ create

Terraform will perform the following actions:

_# aws_internet_gateway.gw will be created
\+ resource "aws_internet_gateway" "gw" {
\+ arn = (known after apply)
\+ id = (known after apply)
\+ owner_id = (known after apply)
\+ tags_all = (known after apply)
\+ vpc_id = "vpc-some_id"
}

Plan: 1 to add, 0 to change, 0 to destroy.

Do you want to perform these actions?
Terraform will perform the actions described above.
Only 'yes' will be accepted to approve.

Enter a value: yes

aws_internet_gateway.gw: Creating...
aws_internet_gateway.gw: Creation complete after 2s [id=igw-some_igw]

Apply complete! Resources: 1 added, 0 changed, 0 destroyed._
Pretty neat, right?
Once we are done with our infrastructure, we can destroy it, using terraform destroy
_aws_vpc.example: Refreshing state... [id=vpc-some_vpc]
aws_internet_gateway.gw: Refreshing state... [id=igw-some_igw]

Terraform used the selected providers to generate the following execution plan. Resource actions are indicated with the following symbols:
\- destroy

Terraform will perform the following actions:

# aws_internet_gateway.gw will be destroyed
\- resource "aws_internet_gateway" "gw" {
\- all parameters are specified here
}

# aws_vpc.example will be destroyed
\- resource "aws_vpc" "example" {
\- all parameters are specified here
}

Plan: 0 to add, 0 to change, 2 to destroy.

Do you really want to destroy all resources?
Terraform will destroy all your managed infrastructure, as shown above.
There is no undo. Only 'yes' will be accepted to confirm.

Enter a value: yes

aws_internet_gateway.gw: Destroying... [id=igw-some_igw]
aws_internet_gateway.gw: Destruction complete after 2s
aws_vpc.example: Destroying... [id=vpc-some_vpc]
aws_vpc.example: Destruction complete after 0s

Destroy complete! Resources: 2 destroyed._
It can be a little overwhelming, but bear with me and understand the key points:
A resource is a component that can be managed with Terraform (a VM, a Kubernetes Pod, etc)
Documentation is your best friend, understand how the use those 4 sections from it
There are 4 essential commands that help you provision and destroy your infrastructure: init/plan/apply/destroy
When referencing a resource from a configuration we are using
type.name.attribute
Originally posted on Medium.
4. Data Sources and Outputs
Terraform resources are great and you can do a bunch of stuff with them. But did I tell you can use Data Sources and Outputs in conjunction with them to better implement your use case? Let’s jump into it.
To put it as simply as possible, A data source is a configuration object that retrieves data from an external source and can be used in resources as arguments when they are created or updated. When I am talking about an external source, I am referring to absolutely anything: manually created infrastructure, resources created from other terraform configurations, and others.
Data sources are defined in their respective providers and you can use them with a special block called data. The documentation of a data source is pretty similar to one of a resource, so if you’ve mastered how to use that one, this will be a piece of cake.
Let’s take an example of a data source that returns the most recent ami_id (image id) of an Ubuntu image in AWS.
    provider "aws" {
      region = "us-east-1"
    }

    data "aws_ami" "ubuntu" {
      filter {
        name   = "name"
        values = ["ubuntu-*"]
      }
      most_recent = true
    }

    output "ubuntu" {
      value = data.aws_ami.ubuntu.id
    }
I am putting a filter on the image name and I’m specifying all the image names that start with ubuntu-. I’m adding the most_recent = true to get only one image, as the aws_ami data source doesn’t support returning multiple image ids. So this data source will return only the most recent Ubuntu ami.
In the code example, there is also one reference to an output, but I haven’t exactly told you what an output is, did I?
An output is a way to easily view the value of a specific data source, resource, local, or variable after Terraform has finished applying changes to infrastructure. It can be defined in the Terraform configuration file and can be viewed using the terraform output command, but just to reiterate, only after a terraform apply happens. Outputs can be also used to expose different resources inside a module, but we will discuss this in another post.
Outputs don’t depend on a provider at all, they are a special kind of block that works independently from them.
The most important parameters an output supports are value , for which you specify what you want to see, and description (optional) in which you explain what that output wants to achieve.
Let’s go back to our example.
In the output, I have specified a reference to the above data source. When we are referencing a resource, we are using type.name.attribute, for data sources, it’s pretty much the same but we have to prefix it with data , so data.type.name.attribute will do the trick.
As I mentioned above, in order to see what this returns, you will first have to apply the code. You are not going to see the contents of a data source without an output, so I encourage you to use them at the beginning when you are trying to get familiar with them.
This is the output of a terraform apply:
_data.aws_ami.ubuntu: Reading...
data.aws_ami.ubuntu: Read complete after 3s [id=ami-0f388924d43083179]
Changes to Outputs:
+ ubuntu = "ami-0f388924d43083179"
You can apply this plan to save these new output values to the Terraform state, without changing any real infrastructure.
Do you want to perform these actions?
Terraform will perform the actions described above.
Only 'yes' will be accepted to approve.
Enter a value: yes
Apply complete! Resources: 0 added, 0 changed, 0 destroyed.
Outputs:
ubuntu = "ami-0f388924d43083179"_
In an apply, the first state a resource goes through is creating , a data source is going through a reading state, just to make the differences between them clearer.
Now, let’s use this image to create an ec2 instance:
provider "aws" {
  region = "us-east-1"
}

data "aws_ami" "ubuntu" {
  filter {
    name   = "name"
    values = ["ubuntu-*"]
  }
  most_recent = true
}

output "ubuntu" {
  value = data.aws_ami.ubuntu.id
}

resource "aws_instance" "web" {
  ami           = data.aws_ami.ubuntu.id
  instance_type = "t2.micro"
}
Just by referencing the ami id from our data source and an instance type, we are able to create an ec2 instance with a terraform apply
Don’t forget to delete your infrastructure if you are practicing, as everything you create will incur costs. Do that with a terraform destroy.
Originally posted on Medium.
5. Terraform Variables and Locals
Terraform variables and locals are used to better organize your code, easily change it, and make your configuration reusable.
Before jumping into variables and locals in Terraform, let’s first discuss their supported types.
Usually, in any programming language, when we are defining a variable or a constant, we are assigning it, or it infers a type.
Supported types in Terraform:
Primitive:
String
Number
Bool
Complex — These types are created from other types :
List
Set
Map
Object
Null — Usually represents absence, really useful in conditional expressions.
There is also the any type, in which you basically add whatever you want without caring about the type, but I really don’t recommend it as it will make your code harder to maintain.
Variables
Every variable will be declared with a variable block and we will always use it with var.variable_name. Let’s see this in action:
resource "aws_instance" "web" {
  ami           = data.aws_ami.ubuntu.id
  instance_type = var.instance_type
}

variable "instance_type" {
  description = "Instance Type of the variable"
  type        = string
  default     = "t2.micro"
}
I have declared a variable called instance_type and in it, I’ve added 3 fields, all of which are optional, but usually, it is a best practice to add these, or at least the type and description. Well, there are three other possible arguments (sensitive, validation, and nullable), but let’s not get too overwhelmed by this.
In the resource block above, I’m referencing the variable, with var.instance_type and due to the fact I’ve set the default value to t2.micro, my variable will get that particular value and I don’t need to do anything else. Cool, right?
Well, let’s suppose we are not providing any default value and we are not doing anything else and we run a terraform apply. As Terraform does not know the value of the variable, it will ask you to provide a value for it. Pretty neat, that means you can forget to assign it. This is not a best practice, though.
There are a couple of other ways you can assign values to variables. If you happen to specify a value for a variable in multiple ways, Terraform will use the last value it finds, by taking into consideration their precedence order. I’m going to present these to you now:
using a default → as in the example above, this will be overwritten by any other option
-
using a
terraform.tfvarsfile → this is a special file in which you can add values to your variablesinstance_type = "t2.micro"
using a
*.auto.tfvarsfile → similar to the terraform.tfvars file, but will take precedence over it. The variables' values will be declared in the same way. The “*” is a placeholder for any name you want to useusing
-varor-var-filewhen running terraform plan/apply/destroy. When you are using both of them in the same command, the value will be taken from the last option.
terraform apply -var="instance_type=t3.micro" -var-file="terraform.tfvars"→ This will take the value from the var file, but if we specify the -var option last, it will get the value from there.
Some other variables examples:
variable "my_number" {
  description = "Number example"
  type        = number
  default     = 10
}

variable "my_bool" {
  description = "Bool example"
  type        = bool
  default     = false
}

variable "my_list_of_strings" {
  description = "List of strings example"
  type        = list(string)
  default     = ["string1", "string2", "string3"]
}

variable "my_map_of_strings" {
  description = "Map of strings example"
  type        = map(string)
  default = {
    key1 = "value1"
    key2 = "value2"
    key3 = "value"
  }
}

variable "my_object" {
  description = "Object example"
  type = object({
    parameter1 = string
    parameter2 = number
    parameter3 = list(number)
  })
  default = {
    parameter1 = "value"
    parameter2 = 1
    parameter3 = [1, 2, 3]
  }
}

variable "my_map_of_objects" {
  description = "Map(object) example"
  type = map(object({
    parameter1 = string
    parameter2 = bool
    parameter3 = map(string)
  }))
  default = {
    elem1 = {
      parameter1 = "value"
      parameter2 = false
      parameter3 = {
        key1 = "value1"
      }
    }
    elem2 = {
      parameter1 = "another_value"
      parameter2 = true
      parameter3 = {
        key2 = "value2"
      }
    }
  }
}

variable "my_list_of_objects" {
  description = "List(object) example"
  type = list(object({
    parameter1 = string
    parameter2 = bool
  }))
  default = [
    {
      parameter1 = "value"
      parameter2 = false
    },
    {
      parameter1 = "value2"
      parameter2 = true
    }
  ]
}
In the above example, there are two variables of a simple type (number and bool), and a couple of complex types. As the simple ones are pretty easy to understand, let’s jump into the others.
list(string) — in this variable, you can declare how many strings you want inside the list. You are going to access an instance of the list by using var.my_list_of_strings[index]. Keep in mind that lists start from 0. var.my_list_of_strings[1] will return string2.
map(string) — in this variable, you can declare how many key:value pairs you want. You are going to access an instance of the map by using var.my_map_of_strings[key] where key is on the left-hand side from the equal sign. var.my_map_of_strings["key3"] will return value
object({}) — inside of an object, you are declaring parameters as you see fit. You can have simple types inside of it and even complex types and you can declare as many as you want. You can consider an object to be a map having more explicit types defined for the keys. You are going to access instances of an object, by using the same logic as you would for a map.
map(object({})) — I’ve specified this complex build, because this is something I am using a lot inside of my code because it works well with for_each (don’t worry, we will talk about this in another post). You are going to access a property of an object in the map by using var.my_map_of_objects["key"]["parameter"] and if there are any other complex parameters defined you will have to go deeper. var.my_map_of_objects["elem1"]["parameter1"] will return value. var.my_map_of_objects["elem1"]["parameter3"]["key1"] will return value1.
list(object({})) — This is something I’m using in dynamic blocks(again, we will discuss this in detail in another post). You are going to access a property of an object in the list, by using var.my_list_of_objects[index]["parameter"]. Again, if there are any parameters that are complex, you will have to go deeper. var.my_list_of_objects[0]["parameter1"] will return value.
One important thing to note is the fact that you cannot reference other resources or data sources inside a variable, so you cannot say that a variable is equal to a resource attribute by using the type.name.attribute.
Locals
On the other hand, a local variable assigns a name to an expression, making it easier for you to reference it, without having to write that expression a gazillion times. They are defined in a locals block, and you can have multiple local variables defined in a single local block. Let’s take a look:
locals {
  instance_type = "t2.micro"
  most_recent   = true
}

data "aws_ami" "ubuntu" {
  filter {
    name   = "name"
    values = ["ubuntu-*"]
  }
  most_recent = local.most_recent
}

resource "aws_instance" "web" {
  ami           = data.aws_ami.ubuntu.id
  instance_type = local.instance_type
}
As you see, we are defining inside the locals block two local variables and we are referencing them throughout our configuration with local.local_variable_name.
As opposed to variables, inside of a local, you can define whatever resource or data source attribute you want. We can even define more complex operations inside of them, but for now, let’s just let this sync in as we are going to experiment with these some more in the future.
Originally posted on Medium.
6. Terraform Provisioners and Null Resource
Terraform provisioners have nothing in common with providers. You can use provisioners to run different commands or scripts on your local machine or a remote machine, and also copy files from your local machine to a remote one. Provisioners, exist inside of a resource, so in order to use one, you will simply have to add a provisioner block in that particular resource.
One thing worth mentioning is the fact that a provisioner is not able to reference the parent resource by its name, but they can use the self object which actually represents that resource.
They are considered a last resort, as they are not a part of the Terraform declarative model.
There are 3 types of provisioners:
local-exec
file (should be used in conjunction with a connection block)
remote-exec (should be used in conjunction with a connection block)
All provisioners support two interesting options when and on_failure.
You can run provisioners either when the resource is created (which is, of course, the default option) or if your use case asks for it, run it when a resource is destroyed.
By default, on_failure is set to fail, which will fail the apply if the provisioner fails, which is expected Terraform behaviour, but you can set it to ignore a fail by setting it to continue.
From experience, I can tell you that sometimes provisioners fail for no reason, or they can even appear to be working and not doing what they are expected to. Still, I believe it is still very important to know how to use them, because, in some of your use cases, you may not have any alternatives.
Before jumping into each of the provisioners, let’s talk about null resources. A null resource is basically something that doesn’t create anything on its own, but you can use it to define provisioners blocks. They also have a “trigger” attribute, which can be used to recreate the resource, hence to rerun the provisioner block if the trigger is hit.
Local-Exec
As its name suggests, a local-exec block is going to run a script on your local machine. Nothing too fancy about it. Apart from the when and on_failure options, there are a couple of other options you can specify:
command — what to run; this is the only required argument.
working_dir — where to run it
interpreter — what interpreter to use (e.g /bin/bash), by default terraform will decide based on your system os
environment — key/value pairs that represent the environment
Let’s see this in action in a null resource and observe the output of a terraform apply
resource "null_resource" "this" {
  provisioner "local-exec" {
    command = "echo Hello World!"
  }
}

# null_resource.this: Creating...
# null_resource.this: Provisioning with 'local-exec'...
# null_resource.this (local-exec): Executing: ["/bin/sh" "-c" "echo Hello World!"]
# null_resource.this (local-exec): Hello World!
# null_resource.this: Creation complete after 0s [id=someid]
You can use this to run different scripts before or after an apply of a specific resource by using depends_on (we will talk about this in another article in more detail).
Connection Block
Before going into the other two provisioners, remote-exec and file, let’s take some time and understand the connection block. In order to run or copy something on a remote vm, you will first have to connect to it, right?
Connection blocks, support both ssh and winrm, so you can easily connect to both your Linux and Windows vms.
You even have the option to connect via a bastion host or a proxy, but I will just show you a simple connection block for a Linux VM.
connection {
    type        = "ssh"
    user        = "root"
    private_key = "private_key_contents"
    host        = "host"
}
File
The file provisioner is used to copy a file from your local vm to a remote vm. There are three arguments that are supported:
source (what file to copy)
content (the direct content to copy on the destination)
destination (where to put the file)
As mentioned before, file needs a connection block to make sure it works properly. Let’s see an example on an ec2 instance.
provider "aws" {
  region = "us-east-1"
}

locals {
  instance_type = "t2.micro"
  most_recent   = true
}

data "aws_ami" "ubuntu" {
  filter {
    name   = "name"
    values = ["ubuntu-*"]
  }
  most_recent = local.most_recent
}

resource "aws_key_pair" "this" {
  key_name   = "key"
  public_key = file("~/.ssh/id_rsa.pub")
}

resource "aws_instance" "web" {
  ami           = data.aws_ami.ubuntu.id
  instance_type = local.instance_type
  key_name      = aws_key_pair.this.key_name
}

resource "null_resource" "copy_file_on_vm" {
  depends_on = [
    aws_instance.web
  ]
  connection {
    type        = "ssh"
    user        = "ubuntu"
    private_key = file("~/.ssh/id_rsa")
    host        = aws_instance.web.public_dns
  }
  provisioner "file" {
    source      = "./file.yaml"
    destination = "./file.yaml"
  }
}

# null_resource.copy_file_on_vm: Creating...
# null_resource.copy_file_on_vm: Provisioning with 'file'...
# null_resource.copy_file_on_vm: Creation complete after 2s [id=someid]
Remote-Exec
Remote-Exec is used to run a command or a script on a remote-vm.
It supports the following arguments:
inline → list of commands that should run on the vm
script → a script that runs on the vm
scripts → multiple scripts to run on the vm
You have to provide only one of the above arguments as they are not going to work together.
Similar to file, you will need to add a connection block.
resource "null_resource" "remote_exec" {
  depends_on = [
    aws_instance.web
  ]
  connection {
    type        = "ssh"
    user        = "ubuntu"
    private_key = file("~/.ssh/id_rsa")
    host        = aws_instance.web.public_dns
  }
  provisioner "remote-exec" {
    inline = [
      "mkdir dir1"
    ]
  }
}

# null_resource.remote_exec: Creating...
# null_resource.remote_exec: Provisioning with 'remote-exec'...
# null_resource.remote_exec (remote-exec): Connecting to remote host via SSH...
# null_resource.remote_exec (remote-exec):   Host: somehost
# null_resource.remote_exec (remote-exec):   User: ubuntu
# null_resource.remote_exec (remote-exec):   Password: false
# null_resource.remote_exec (remote-exec):   Private key: true
# null_resource.remote_exec (remote-exec):   Certificate: false
# null_resource.remote_exec (remote-exec):   SSH Agent: true
# null_resource.remote_exec (remote-exec):   Checking Host Key: false
# null_resource.remote_exec (remote-exec):   Target Platform: unix
# null_resource.remote_exec (remote-exec): Connected!
# null_resource.remote_exec: Creation complete after 3s [id=someid]
In order to use the above code, just use the file example and change the copy_file_on_vm null resource with this one and you are good to go.
You have to make sure that you can connect to your vm, so make sure you have a security rule that permits ssh access in your security group.
Even though I don’t recommend provisioners, keep in mind they may be a necessary evil.
Originally posted on Medium.
7. Terraform Loops and Conditionals
In this post, we will talk about how to use Count, for_each, for loops, ifs, and ternary operators inside of Terraform. It will be a long journey, but this will help a lot when writing better Terraform code.
As I am planning to use the Kubernetes provider in this lesson, you can easily create your own Kubernetes cluster using Kind. More details here.


