


![Why are some people more boring while others are less boring [closed]](https://cdn.sstatic.net/Sites/interpersonal/Img/apple-touch-icon@2.png?v=17e836faa592)


How to Grill Corn on the Cob (3 Methods)
I’m here to share the 3 best methods for grilling corn on the cob. Each technique brings delicious flavor to the table and ensures the corn is cooked perfectly.

Grilled corn has always been a summer favorite in my family, and over the years, I’ve tried just about every method to get it just right. The goal is always to keep it sweet and juicy, but there’s something special about a hint of char in that first crunchy bite. If you’re not making yours like this: you haven’t lived (yet!).
Below, I’m sharing three ways to approach corn on the grill: right on the grate (the fastest and my personal favorite), in foil (the easiest method), and right in the husks (a flavor bomb for those with a little more time).
Each way brings something different to the table, but the end result is always the same: something delicious and simple to share with the people I love.
Method 1: Grilling on the Grates
My favorite way to grill corn is right on the grill grates. It makes the best grill marks and comes out tender and crispy. To take things a step further, I like to tie the husk back to form a makeshift handle. This makes the messy job of eating corn on the cob a breeze!
Here are the step-by-step instructions:
- Preheat the grill to medium-high (around 375-450°F).
- Tie back the leaves to make a handle. Pull down the outermost leaf first, then keep pulling down one leaf at a time to work your way around the corn. You may notice some leaves crack when they’re pulled back. That’s OK!
- Use your hands to rub neutral or olive oil on each corn cob evenly.
- Grill the cobs directly on the oven grates for 12-15 minutes, turning until they’re blackened on all sides.

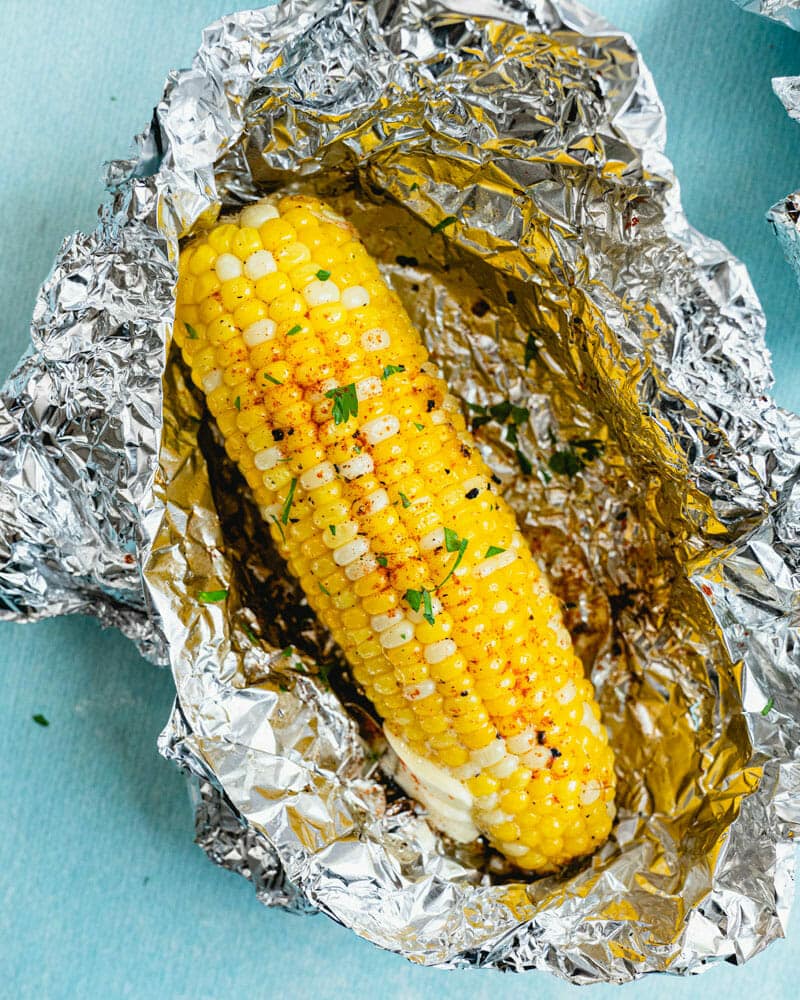
Method 2: Grilling the Corn in Foil
Grilling corn in foil results in the juiciest corn, but you sacrifice that smoky grill flavor since the grates won’t permeate the foil. I like using this method when I want to keep things hands-off while working on the rest of that night’s meal. Here’s how to do it:
- Preheat a grill to medium-high heat (around 375-450°F).
- Place the corn on foil and rub it with olive oil.
- Cover it with salt and pepper, and then place a few pats of butter on top.
- Loosely wrap the corn in foil. Poke a few holes in the aluminum foil to allow air to escape.
- Grill your corn for 20-25 minutes, turning occasionally, until it’s bright yellow.
Method 3: Grilling in the Husk
Making corn on the grill in its husk takes a little longer, but you’ll get a flavor combination between the methods above. Your corn will be deliciously moist and sweet with a subtly charred flavor you’d expect on grilled veggies. Here are the steps:
- Pull back the husks, remove the silk of the corn, then pull the husks back up.
- Soak the cobs for 20 minutes. This prevents them from catching fire while grilling.
- Preheat the grill to medium-high, or around 375-450°F.
- Grill the corn for 20-22 minutes. Turn them to get even blackening on the outside of the husk. (You can test if it’s done by checking one cob to ensure it’s bright yellow.)

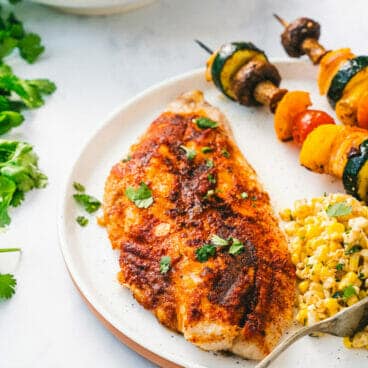
Season and Serve
Once you’ve got your grilled corn, there are so many things you can do to make them even more delicious. Salt and melted butter are great, but here are some of my favorite (more creative) seasonings and toppings:
- Compound butter: This compound garlic butter with fresh herbs is ideal for corn. I have a classic homemade butter recipe if you’ve always wanted to try that out, too.
- Old Bay: The iconic seafood seasoning is great on corn. Try my homemade version!
- Yum Yum sauce: This quick Yum Yum sauce is just as tasty as it sounds. If you’re grilling shrimp, slather those with this sauce, too.
- Ranch seasoning: Add butter or sour cream and a sprinkle of ranch seasoning for extra savory corn.
Grilled corn can also be the base for some fun corn-based side dishes and appetizers. Here are my favorite uses for grilled corn kernels:
- Elote: This Mexican street corn is made with a creamy Cotija cheese sauce (instead of parmesan), lime, chili powder, and cilantro. It’s the perfect side for tacos or burgers.
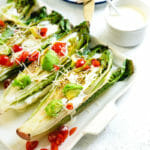
- Grilled corn salad: Cut kernels off the cob to make this zingy corn salad, or try elote salad with Mexican grilled corn flavors.
- Corn dip: This Mexican street corn dip takes the classic flavors of elote and turns them into an app.
- Black bean and corn salad: My classic recipe calls for canned corn, but opting for grilled corn is an upgrade with smoky flavor that really pops with the lime juice.
Read a 5-Star Review

“Buttered and added Old Bay before cooking…..OMG….. awesome”
-Tom G.
Storing and Reheating Leftovers
As with most grilled dishes, grilled corn is best served fresh and warm. If you made too much, your corn will keep well in the fridge for 3-4 days. To store leftovers, let them cool completely, then wrap them tightly in foil or place them in an airtight container.
To reheat, throw your corn back on the grill or warm it up in the oven as roasted corn for best results. If you’re going for efficiency, the microwave is fine; just cover it with a damp kitchen towel to keep it from drying out.
Other Grill-Based Recipes I Love


How to Grill Corn on the Cob

Grilling corn on the cob is easy, especially when you have options! Here are my 3 favorite ways to cook corn on the grill, one of my favorite summertime BBQ treats.
- Prep Time: 15 minutes
- Cook Time: 15 minutes
- Total Time: 30 minutes
- Yield: 8
- Category: Side dish
- Method: Grilled
- Cuisine: Summer
- Diet: Vegetarian
Ingredients
- 8 ears of corn
- Olive oil
- Butter and salt, for serving
Instructions
On the Grates
- Preheat your grill to medium-high heat (375-450°F).
- Shuck the corn by peeling down the outside layers one at a time, keeping them attached and facing downwards away from the cob.
- Optional: Use kitchen twine or string to tie the leaves together and make a natural handle for eating the corn.
- Use your hands to rub oil on each corn cob evenly.
- Place the corn directly on the grill grates and cook until it begins to blacken, then turn.
- Cook 12-15 minutes total, until blackened on all sides.
- Serve immediately with butter and sea salt, using the tied corn husks as a handle for easy eating.
In Foil
- Preheat your grill to medium-high heat (375-450°F).
- Shuck the corn, and place each corn cob in a sheet of aluminum foil.
- Rub the corn with olive oil and sprinkle with salt and pepper.
- Top each packet with ½ tablespoon butter.
- Seal the foil around the corn without making it too tight.
- Poke a few small holes in each packet.
- Place the packets on the grill grates and grill for 20-25 minutes, turning occasionally, until the corn is bright yellow and cooked.
In the Husks
- Preheat your grill to medium-high heat (375-450°F).
- Shuck the corn by peeling down the outside layers one at a time and keeping them attached, facing downwards away from the cob.
- Remove the silk, then pull the husks back up over the corn.
- Soak the corn cobs in cool water for at least 20 minutes to prevent scorching.
- Place the corn directly on the grill grates and cook until the husk begins to blacken, then turn.
- Cook 20-22 minutes total, until the corn is cooked through. To check whether it’s done, pull back the husk on one corn to make sure it is bright yellow to the bottom of the cob.
- Serve immediately with butter and salt.
Notes
Delicious grilled corn recipes for home cooks start with a quality product. Summertime is the ideal time to enjoy fresh, sweet corn – especially if you have access to a farmers market where you can buy farm-fresh corn.
When picking the best corn, even if it’s at the grocery store, choose firm cobs with tassels that are white, yellow, or light brown. (Those silky bits at the top shouldn’t be brown or sticky.) You really shouldn’t peel the whole cob, but if you need a peek at the husk, peel back a small portion.


