


How to Deploy a LLM Locally and Make It Accessible from the Internet
This post shares my personal experience on how to deploy a LLM locally and make it accessible from the public internet. Requirements A personal computer A server with a public IP address The process is divided into three steps: Use Ollama to deploy the Deepseek-R1 model locally. Deploy Open-WebUI. Use Neutrino-Proxy to enable NAT traversal. Deploying a LLM Locally with Ollama First, let me explain why I chose to deploy the model on my personal computer instead of the server. Simply put, I can't afford a high-performance server. My server only has 2 CPU cores and 2GB of RAM, which is far from sufficient for deploying LLMs. 1. Download Ollama Download Ollama on Windows Go to the Ollama website, download the installer, and install it on your computer. 2. Running Ollama The Ollama directory looks like this: We won't use ollama app.exe. Instead, we'll use ollama.exe. Open Git Bash or CMD, and running any Ollama command will start the service: Command Description serve Start ollama create Create a model from a Modelfile show Show information for a model run Run a model stop Stop a running model pull Pull a model from a registry push Push a model to a registry list List models ps List running models cp Copy a model rm Remove a model help Help about any command 3. Running deepseek-r1:8b Run the following command: ollama run deepseek-r1:8b Yes, you can skip the second step because running ollama run deepseek-r1:8b will automatically start Ollama. Alternatively, you can pull the model first and then run it. After running the command, you'll see a command-line interface where you can interact with the model. For example, you can say hello: At this point, the model is successfully deployed. 4. Accessing the API In practice, no one interacts with a LLM via the command line. Instead, you can use the API provided by Ollama. Check out the API documentation here: ollama/docs/api.md at main · ollama/ollama (github.com). There are two main APIs for interacting with the model: POST /api/generate curl http://localhost:11434/api/generate -d '{ "model": "deepseek-r1:8b", "prompt": "What color is the sky at different times of the day? Respond using JSON", "format": "json", "stream": false }' POST /api/chat curl http://localhost:11434/api/chat -d '{ "model": "deepseek-r1:8b", "messages": [ { "role": "user", "content": "why is the sky blue?" } ] }' The difference, as I understand it, is that /generate allows you to send a simple prompt, while /chat requires constructing a messages array, enabling the model to "keep a chat memory." /chat is more comprehensive, so I generally use it (though I could be wrong, but it works for me). Most parameters in the API have default values, so you can use them as needed. Refer to the documentation for details: ollama/docs/modelfile.md at main · ollama/ollama (github.com). If you exit Ollama, you can restart it later using: ollama serve You don't need to specify which model to run, as the API will automatically start the specified model when called. Deploying Open-WebUI Visit the Open-WebUI documentation here:
This post shares my personal experience on how to deploy a LLM locally and make it accessible from the public internet.
Requirements
- A personal computer
- A server with a public IP address
The process is divided into three steps:
- Use Ollama to deploy the
Deepseek-R1model locally. - Deploy Open-WebUI.
- Use Neutrino-Proxy to enable NAT traversal.
Deploying a LLM Locally with Ollama
First, let me explain why I chose to deploy the model on my personal computer instead of the server. Simply put, I can't afford a high-performance server. My server only has 2 CPU cores and 2GB of RAM, which is far from sufficient for deploying LLMs.
1. Download Ollama
Go to the Ollama website, download the installer, and install it on your computer.
2. Running Ollama
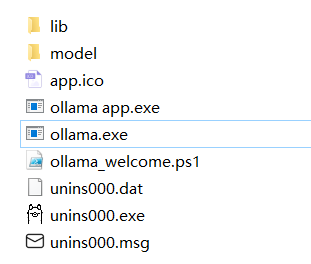
The Ollama directory looks like this:
We won't use ollama app.exe. Instead, we'll use ollama.exe.
Open Git Bash or CMD, and running any Ollama command will start the service:
| Command | Description |
|---|---|
serve |
Start ollama |
create |
Create a model from a Modelfile |
show |
Show information for a model |
run |
Run a model |
stop |
Stop a running model |
pull |
Pull a model from a registry |
push |
Push a model to a registry |
list |
List models |
ps |
List running models |
cp |
Copy a model |
rm |
Remove a model |
help |
Help about any command |
3. Running deepseek-r1:8b
Run the following command:
ollama run deepseek-r1:8b
Yes, you can skip the second step because running ollama run deepseek-r1:8b will automatically start Ollama.
Alternatively, you can pull the model first and then run it.
After running the command, you'll see a command-line interface where you can interact with the model. For example, you can say hello:

At this point, the model is successfully deployed.
4. Accessing the API
In practice, no one interacts with a LLM via the command line. Instead, you can use the API provided by Ollama. Check out the API documentation here: ollama/docs/api.md at main · ollama/ollama (github.com).
There are two main APIs for interacting with the model:
POST /api/generate
curl http://localhost:11434/api/generate -d '{
  "model": "deepseek-r1:8b",
  "prompt": "What color is the sky at different times of the day? Respond using JSON",
  "format": "json",
  "stream": false
}'
POST /api/chat
curl http://localhost:11434/api/chat -d '{
  "model": "deepseek-r1:8b",
  "messages": [
    {
      "role": "user",
      "content": "why is the sky blue?"
    }
  ]
}'
The difference, as I understand it, is that /generate allows you to send a simple prompt, while /chat requires constructing a messages array, enabling the model to "keep a chat memory." /chat is more comprehensive, so I generally use it (though I could be wrong, but it works for me).
Most parameters in the API have default values, so you can use them as needed. Refer to the documentation for details: ollama/docs/modelfile.md at main · ollama/ollama (github.com).
If you exit Ollama, you can restart it later using:
ollama serve
You don't need to specify which model to run, as the API will automatically start the specified model when called.