


![[Sponsor] Democracy](https://protectdemocracy.org/wp-content/uploads/2022/10/Social-Share.png)


How to create a Jenkins Pipeline job
Requirements GitHub Source Code GitHub Personal Access Token Set up GitHub Source Code Click Here to use a pre-defined template to create a repository. Enter a name for your repository. Enter your description. Set visibility to Private. Select Create repository. Set up GitHub Personal Access Token To enable Jenkins to access your private GitHub repository, you'll need to configure GitHub credentials in the Jenkins UI. This requires a personal access token - please refer to GitHub's official documentation for creating one. Create Pipeline Job Login to your Jenkins and click New item. Click Here to install Jenkins Enter a name for your job, select Pipeline and click OK. This will take you to job configuration page. Click on Pipeline to go to Pipeline configuration section. Choose Pipeline script from SCM under Definition, choose Git for SCM. Copy the newly created repo URL and paste it in Repository URL. You may see an error saying Failed to connect to repository, that's because you need to authenticate to your GitHub account. Click Add under Credentials and select Jenkins Leave Domain, Kind and Scope as default value. Enter your GitHub username for Username and enter your GitHub Personal Access Token created earlier for Password. Enter a unique ID and a description. Click Add After. Choose the newly created credentials and scroll down to Branch Specifiers to change to main; this is the branch you will be using. Leave other other settings as default and click save. In the GitHub repository, there is a predefined Jenkinsfile with two stages i.e. build and test. There is a single step in each of this single stages ( an echo statement ). This base Jenkinsfile will be used to build our pipeline job. In the Jenkins UI, click Build now. Modify Build stage Changes will be made to your build stage by clicking on Jenkinsfile in our repo and click on pencil icon to edit. Under buid stage, you will remove the existing step and add two new steps sh 'chmod a+x run_build_script.sh' sh './run_build_script.sh' Your edited Jenkinsfile should look like this pipeline { agent any stages { stage('Build') { steps { sh 'chmod a+x run_build_script.sh' sh './run_build_script.sh' } } stage('Test') { steps { echo "Run tests" } } } } Click commit changes. Back to the Jenkins UI, Click Build now to start a new build Once build #2 is successful, click Console output. Scroll down to confirm the two steps configured as part of the build stage. Modify Test stage Head back to Jenkinsfile in GitHub, Remove the existing stage and add a new one with a parallel block in it which has two stages ( Test on Windows and Test on Linux ) stage('Test') { parallel { stage('Test On Windows') { steps { echo "Running tests on Windows" } } stage('Test On Linux') { steps { echo "Running tests on Linux" } } Your edited Jenkinsfile should look like this pipeline { agent any stages { stage('Build') { steps { sh 'chmod a+x run_build_script.sh' sh './run_build_script.sh' } } stage('Test') { parallel { stage('Test On Windows') { steps { echo "Running tests on Windows" } } stage('Test On Linux') { steps { echo "Running tests on Linux" } } } } } } commit the changes. Back to your Jenkins UI, Click Build now N.B: My build #3 encountered an error, I debugged it and build it again which is why is it displaying build #4. Check the Console output, scroll down to confirm the two see the two parallel test stages. Seek Approval to deploy to a staging environment Modify the Jenkinsfile again in GitHub by adding this: stage('Confirm Deploy to staging') { steps { timeout(time: 60, unit: 'SECONDS') { input(message: 'Okay to Deploy?', ok: 'Let\'s Do it!') } } } stage('Deploy to Staging') { steps { echo "Deploying to staging..." } } } } Your edited Jenkinsfile should look like this: pipeline { agent any stages { stage('Build') { steps { sh 'chmod a+x run_build_script.sh' sh './run_build_script.sh' } } stage('Test') { parallel { stage('Test On Windows') { steps { echo "Running tests on Windows" } } stage('Test On Linux') { steps { echo "Running tests on Linux" } } } } stage('Confirm Deploy to staging') { steps { timeout(time: 60, unit: 'SECONDS') { input(message: 'Okay to Deploy?', ok: 'Let\'s Do it!') } }
Requirements
- GitHub Source Code
- GitHub Personal Access Token
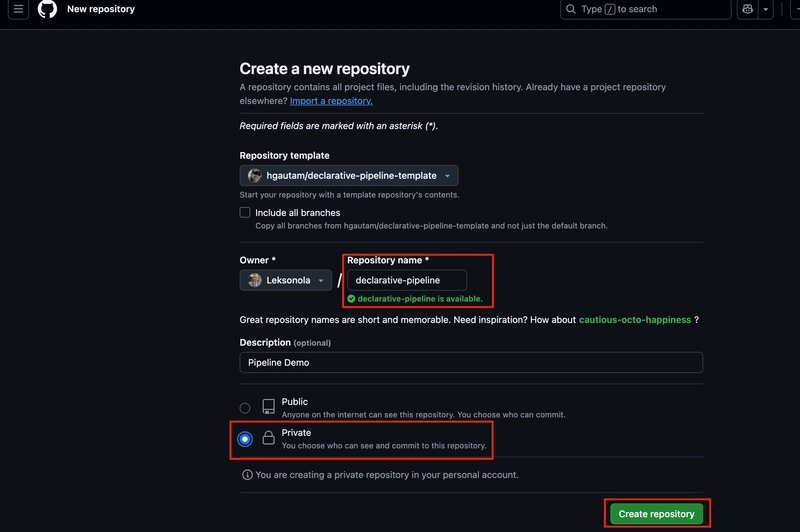
Set up GitHub Source Code
- Click Here to use a pre-defined template to create a repository.
- Enter a name for your repository.
- Enter your description.
- Set visibility to Private.
- Select Create repository.
Set up GitHub Personal Access Token
To enable Jenkins to access your private GitHub repository, you'll need to configure GitHub credentials in the Jenkins UI. This requires a personal access token - please refer to GitHub's official documentation for creating one.
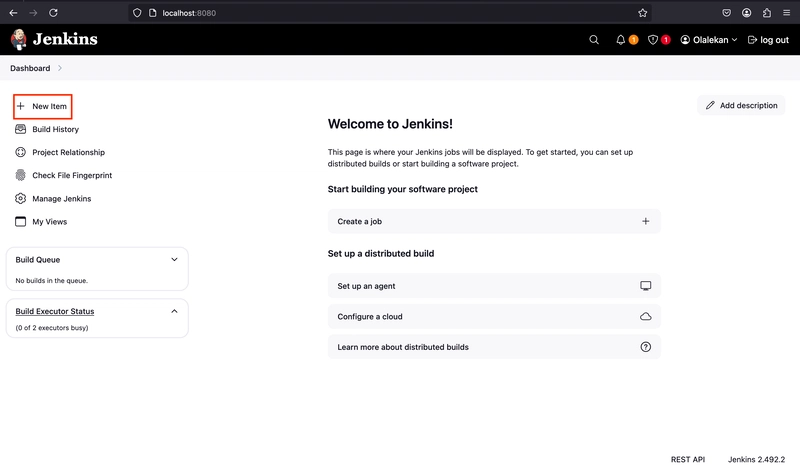
Create Pipeline Job
- Login to your Jenkins and click New item. Click Here to install Jenkins
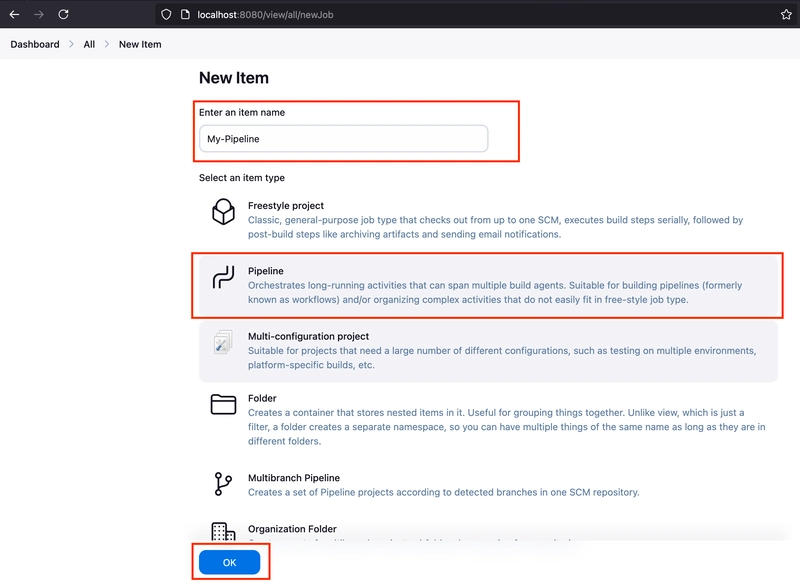
- Enter a name for your job, select Pipeline and click OK.
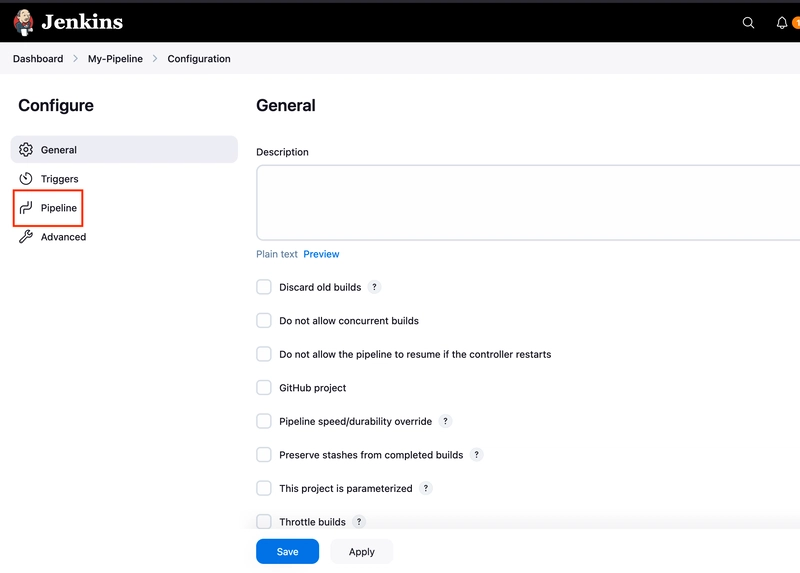
- This will take you to job configuration page. Click on Pipeline to go to Pipeline configuration section.
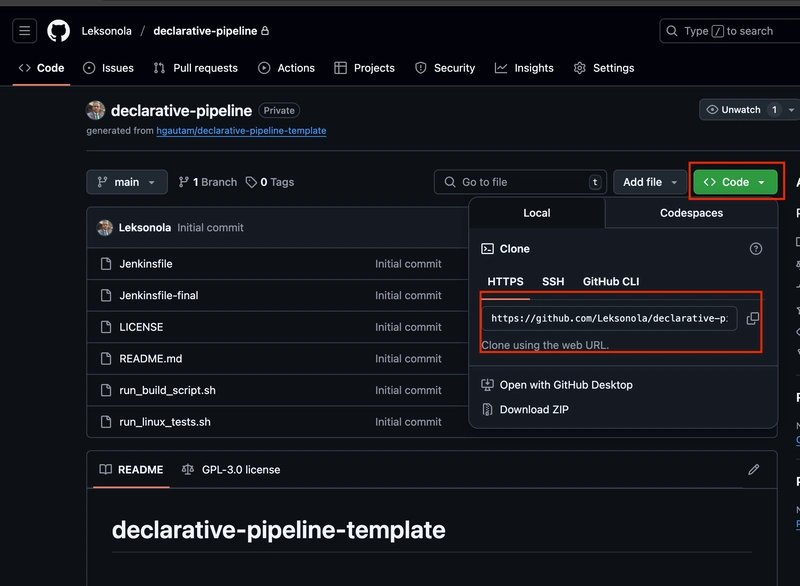
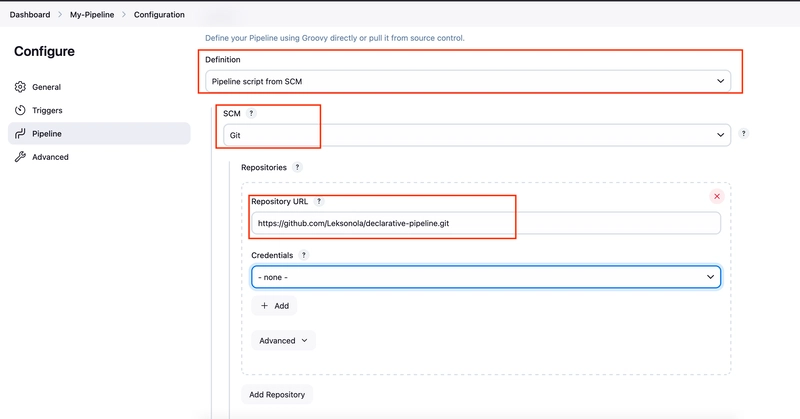
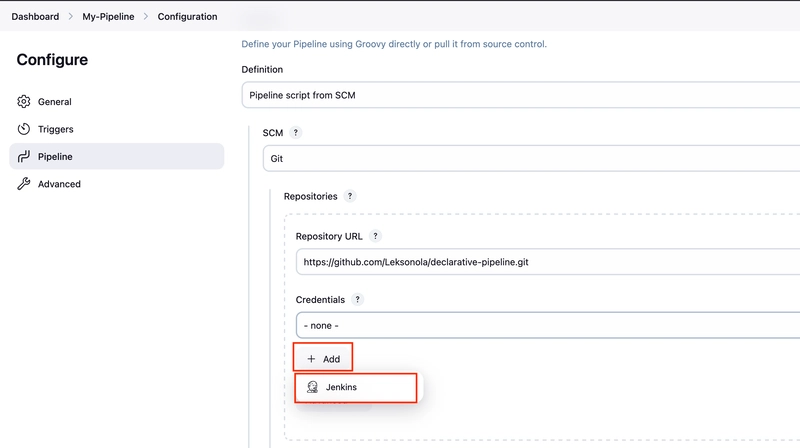
- Choose Pipeline script from SCM under Definition, choose Git for SCM. Copy the newly created repo URL and paste it in Repository URL.
- You may see an error saying Failed to connect to repository, that's because you need to authenticate to your GitHub account. Click Add under Credentials and select Jenkins
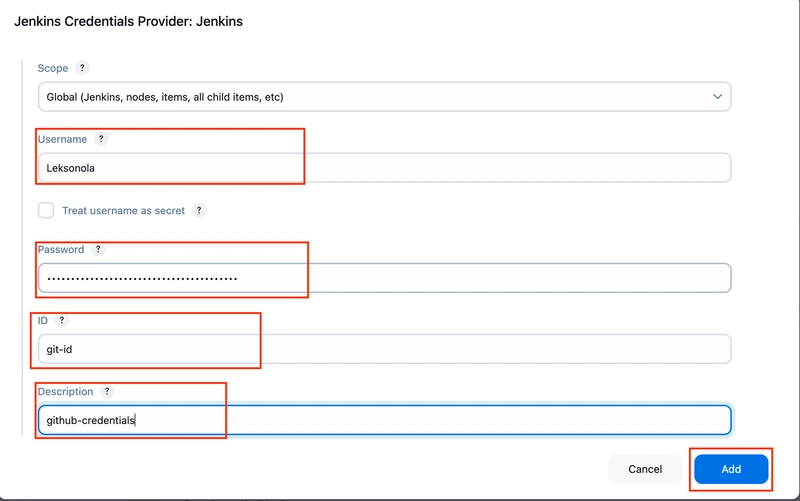
- Leave Domain, Kind and Scope as default value.
- Enter your GitHub username for Username and enter your GitHub Personal Access Token created earlier for Password.
- Enter a unique ID and a description. Click Add After.
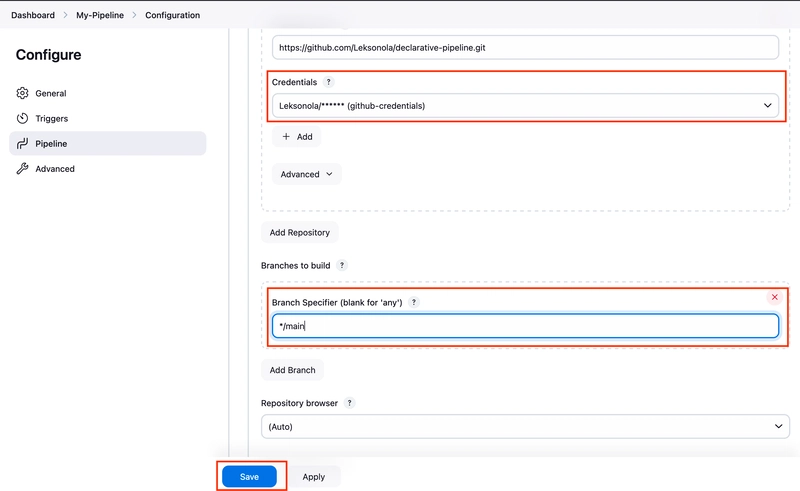
Choose the newly created credentials and scroll down to Branch Specifiers to change to main; this is the branch you will be using. Leave other other settings as default and click save.
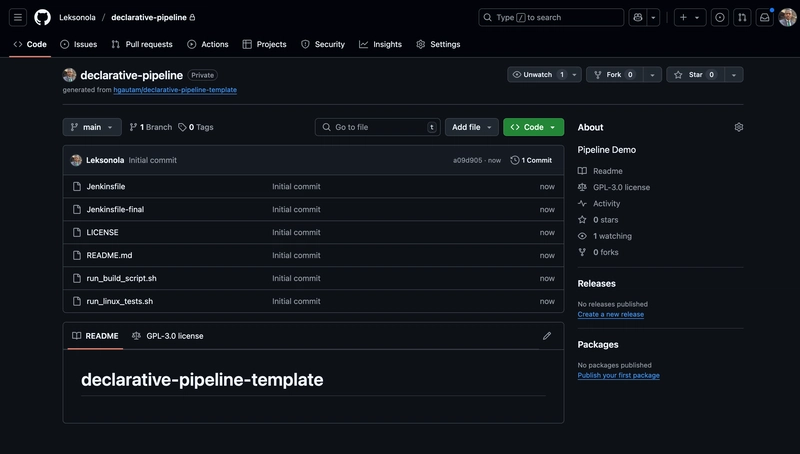
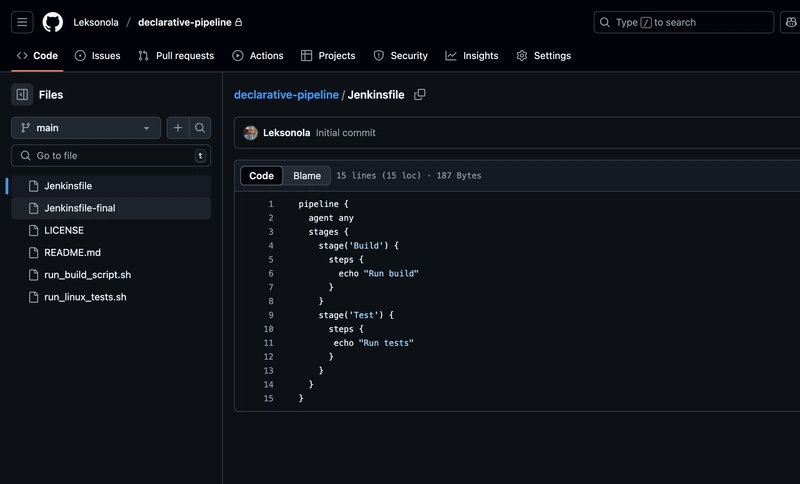
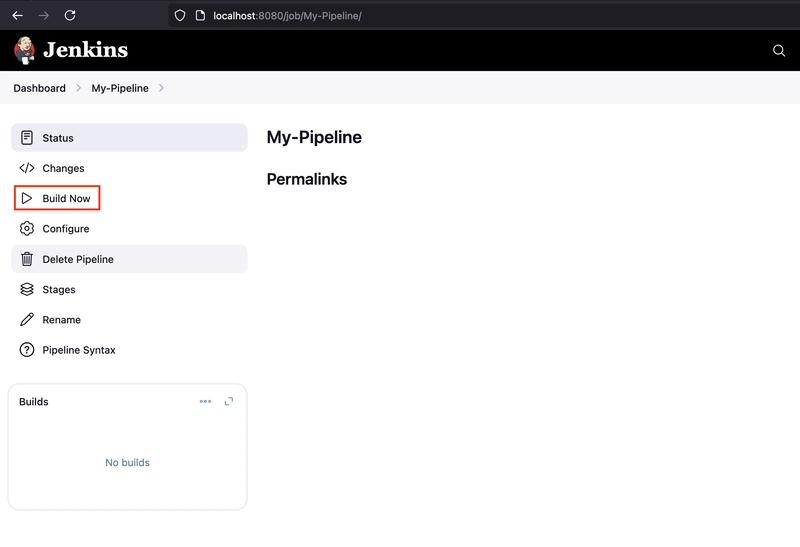
In the GitHub repository, there is a predefined Jenkinsfile with two stages i.e. build and test. There is a single step in each of this single stages ( an echo statement ). This base Jenkinsfile will be used to build our pipeline job.
In the Jenkins UI, click Build now.
Modify Build stage
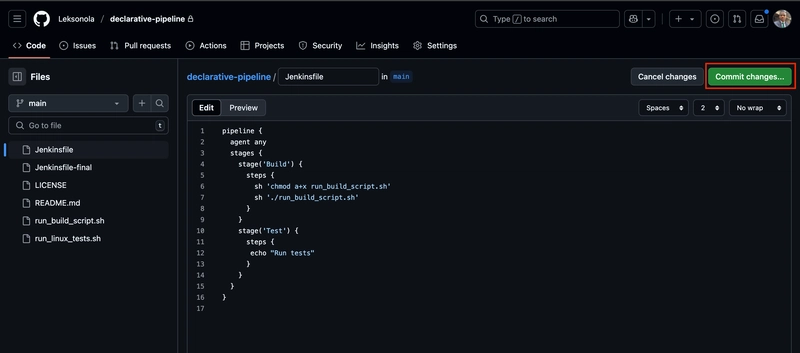
- Changes will be made to your build stage by clicking on Jenkinsfile in our repo and click on pencil icon to edit.
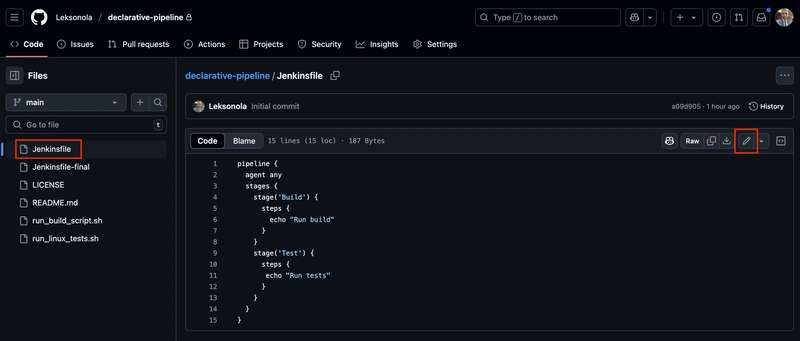
- Under buid stage, you will remove the existing step and add two new steps
sh 'chmod a+x run_build_script.sh'
sh './run_build_script.sh'
Your edited Jenkinsfile should look like this
pipeline {
  agent any
  stages {
    stage('Build') {
      steps {
        sh 'chmod a+x run_build_script.sh'
        sh './run_build_script.sh'
      }
    }
    stage('Test') {
      steps {
       echo "Run tests"
      }
    }
  }
}
- Click commit changes.
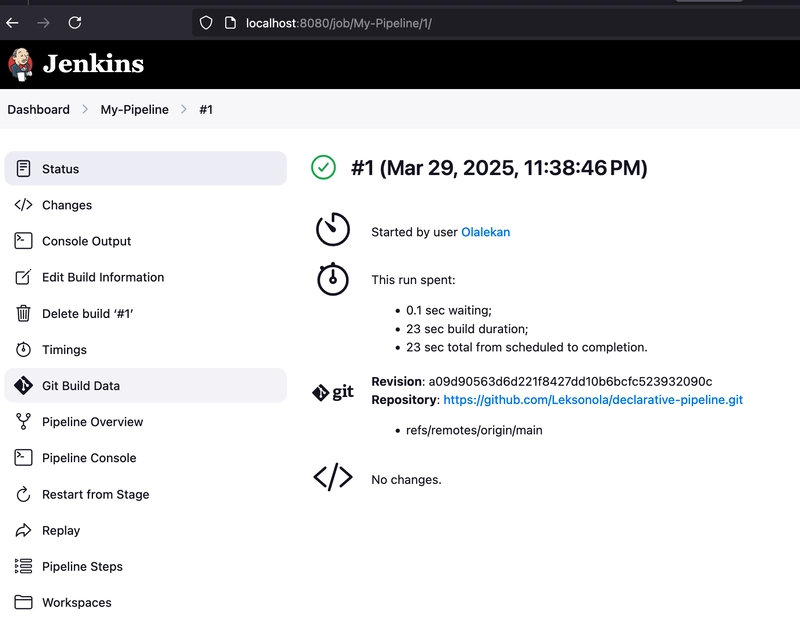
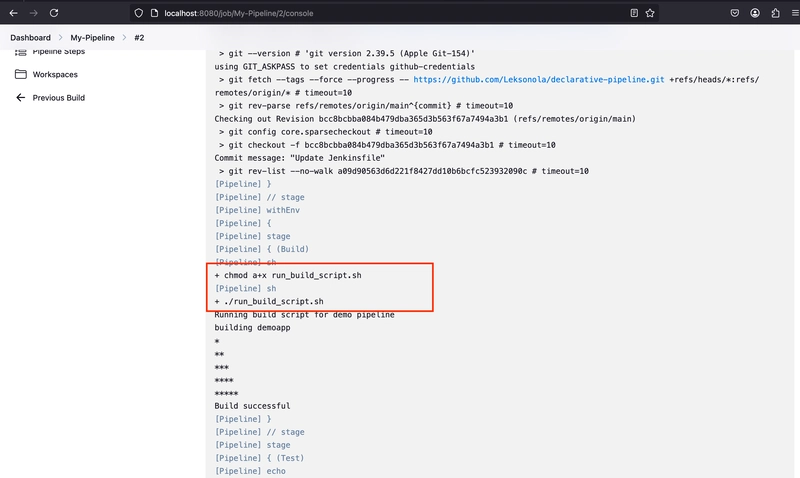
- Back to the Jenkins UI, Click Build now to start a new build

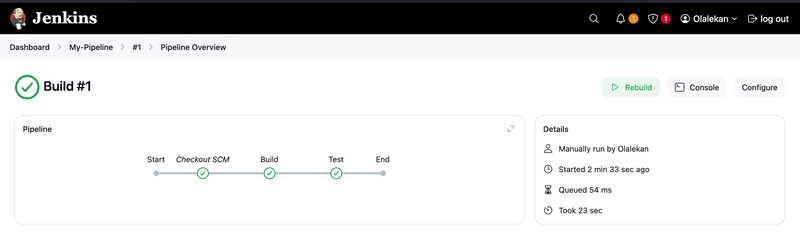
- Once build #2 is successful, click Console output.

- Scroll down to confirm the two steps configured as part of the build stage.
Modify Test stage
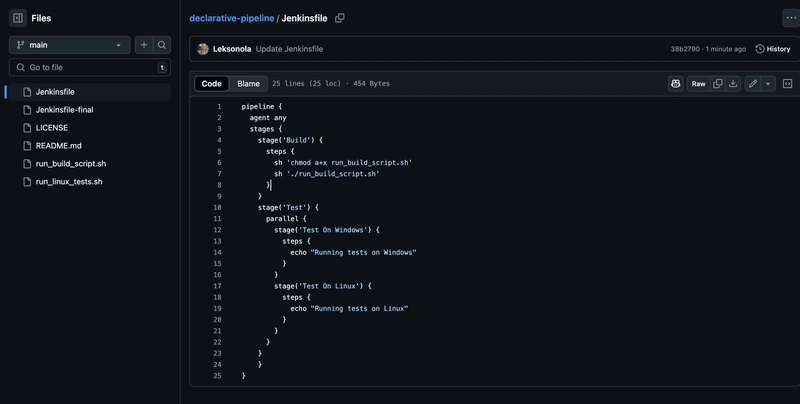
- Head back to Jenkinsfile in GitHub, Remove the existing stage and add a new one with a parallel block in it which has two stages ( Test on Windows and Test on Linux )
stage('Test') {
      parallel {
        stage('Test On Windows') {
          steps {
            echo "Running tests on Windows"
          }
        }
        stage('Test On Linux') {
          steps {
            echo "Running tests on Linux"
          }
        }
Your edited Jenkinsfile should look like this
pipeline {
  agent any
  stages {
    stage('Build') {
      steps {
        sh 'chmod a+x run_build_script.sh'
        sh './run_build_script.sh'
      }
    }
    stage('Test') {
      parallel {
        stage('Test On Windows') {
          steps {
            echo "Running tests on Windows"
          }
        }
        stage('Test On Linux') {
          steps {
            echo "Running tests on Linux"
          }
        }
      }
    }
    }
}
- commit the changes.
- Back to your Jenkins UI, Click Build now
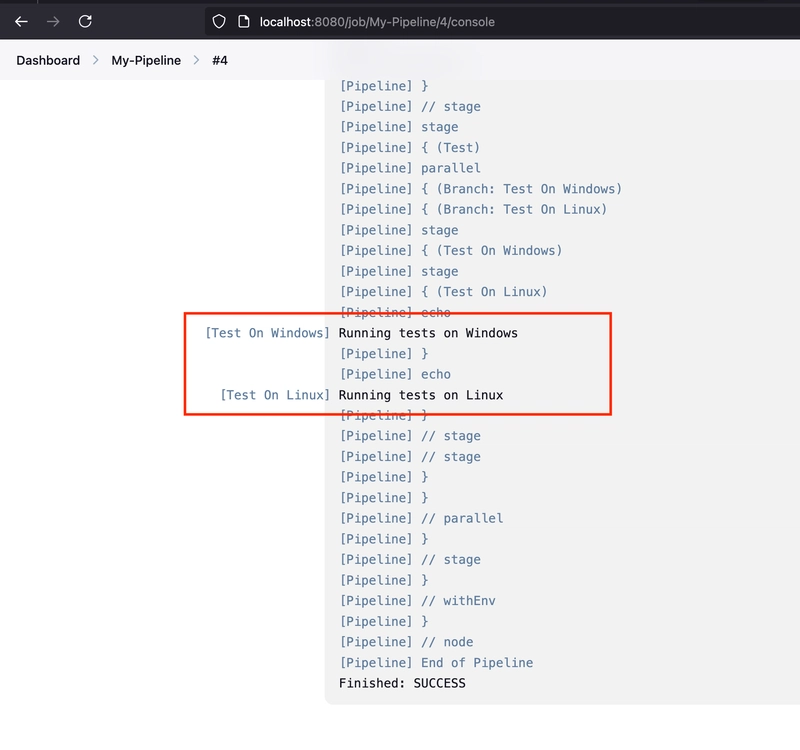
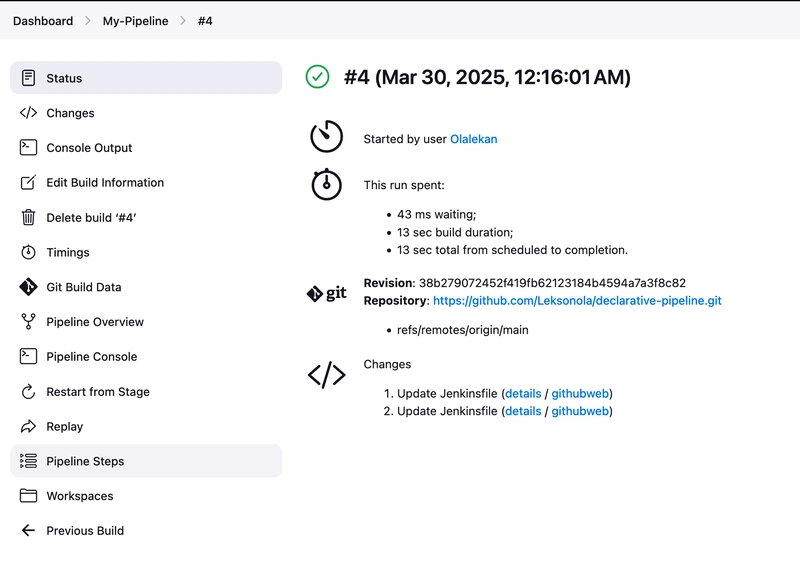 N.B: My build #3 encountered an error, I debugged it and build it again which is why is it displaying build #4.
 - Check the Console output, scroll down to confirm the two see the two parallel test stages.
Seek Approval to deploy to a staging environment
- Modify the Jenkinsfile again in GitHub by adding this:
stage('Confirm Deploy to staging') {
      steps {
        timeout(time: 60, unit: 'SECONDS') {
          input(message: 'Okay to Deploy?', ok: 'Let\'s Do it!')
        }
      }
    }
    stage('Deploy to Staging') {
      steps {
        echo "Deploying to staging..."
      }
    }
  }
}
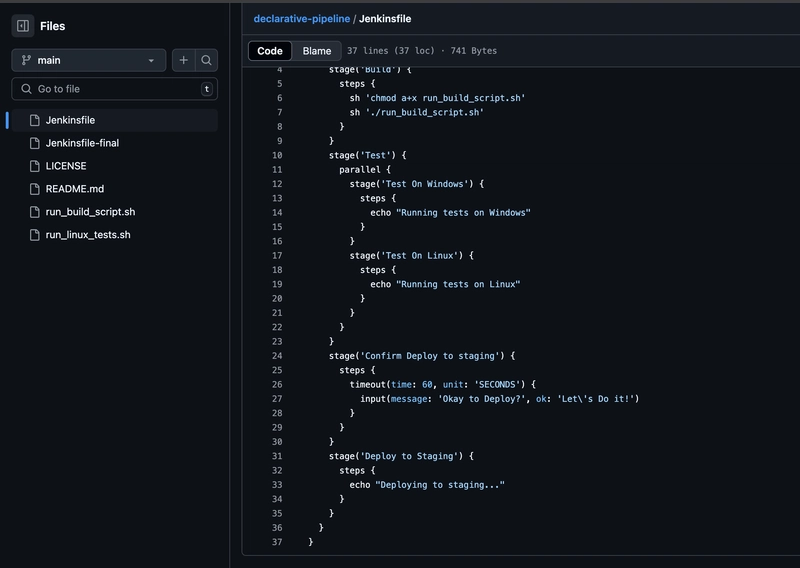
Your edited Jenkinsfile should look like this:
pipeline {
  agent any
  stages {
    stage('Build') {
      steps {
        sh 'chmod a+x run_build_script.sh'
        sh './run_build_script.sh'
      }
    }
    stage('Test') {
      parallel {
        stage('Test On Windows') {
          steps {
            echo "Running tests on Windows"
          }
        }
        stage('Test On Linux') {
          steps {
            echo "Running tests on Linux"
          }
        }
      }
    }
    stage('Confirm Deploy to staging') {
      steps {
        timeout(time: 60, unit: 'SECONDS') {
          input(message: 'Okay to Deploy?', ok: 'Let\'s Do it!')
        }
      }
    }
    stage('Deploy to Staging') {
      steps {
        echo "Deploying to staging..."
      }
    }
  }
}
- commit the changes
- Head back to the Jenkins UI to start another build.
- It asked for an approval
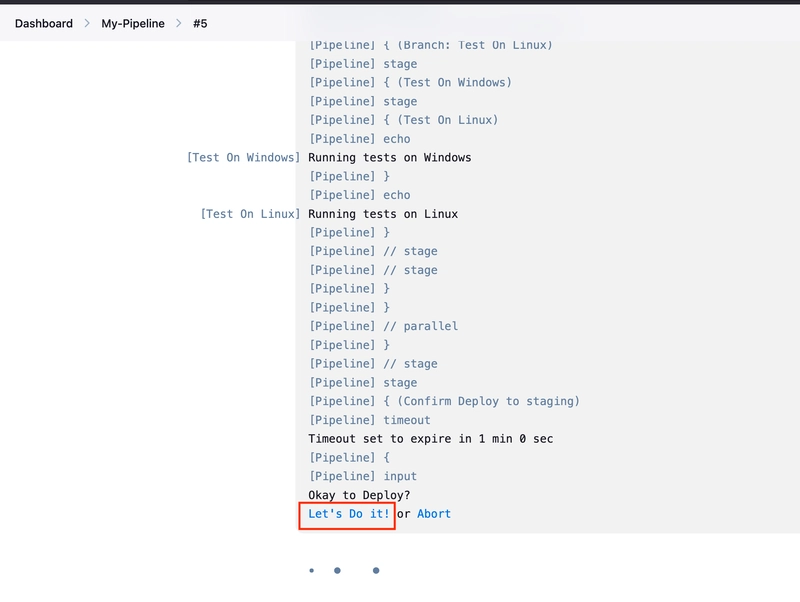
- After clicking Let's Do It!, it deployed to staging environment

Add stages to seek approval and then deploy to Production
- Modify the Jenkinsfile by adding:
stage('Confirm Deploy to production') {
      steps {
        timeout(time: 60, unit: 'SECONDS') {
          input(message: 'Okay to Deploy?', ok: 'Let\'s Do it!')
        }
      }
    }
    stage('Deploy to Production') {
      steps {
        echo "Deploying to production..."
      }
    }
  }
Your edited file should look like this:
pipeline {
  agent any
  stages {
    stage('Build') {
      steps {
        sh 'chmod a+x run_build_script.sh'
        sh './run_build_script.sh'
      }
    }
    stage('Test') {
      parallel {
        stage('Test On Windows') {
          steps {
            echo "Running tests on Windows"
          }
        }
        stage('Test On Linux') {
          steps {
            echo "Running tests on Linux"
          }
        }
      }
    }
    stage('Confirm Deploy to staging') {
      steps {
        timeout(time: 60, unit: 'SECONDS') {
          input(message: 'Okay to Deploy?', ok: 'Let\'s Do it!')
        }
      }
    }
    stage('Deploy to Staging') {
      steps {
        echo "Deploying to staging..."
      }
    }
    stage('Confirm Deploy to production') {
      steps {
        timeout(time: 60, unit: 'SECONDS') {
          input(message: 'Okay to Deploy?', ok: 'Let\'s Do it!')
        }
      }
    }
    stage('Deploy to Production') {
      steps {
        echo "Deploying to production..."
      }
    }

  }
}
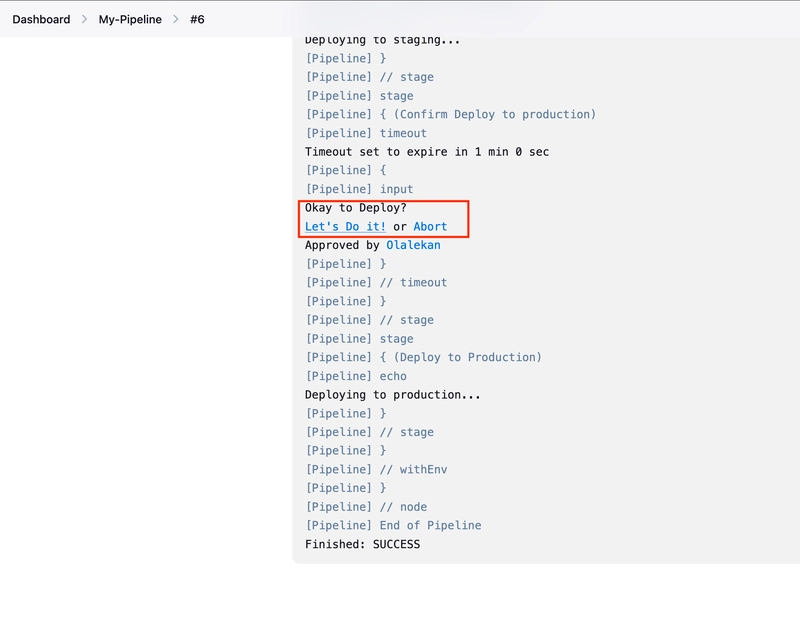
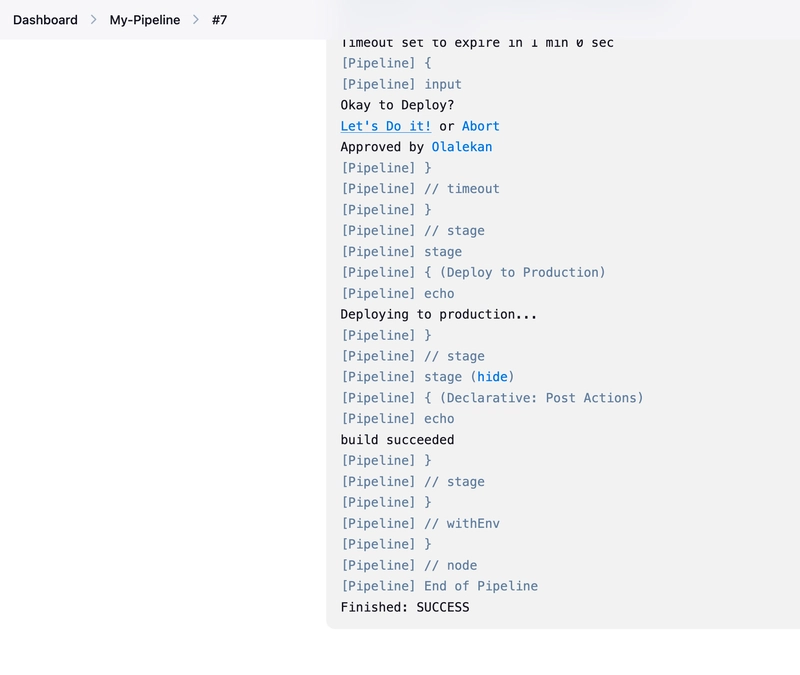
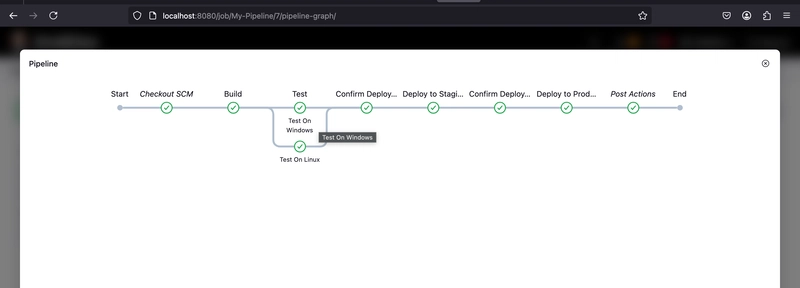
- Head back to the Jenkins UI and click Build now. You will approve deploy to staging as well as deploy to production.
Add a Post-build action
- Head to the Jenkinsfile and add a post-build action.
post {
    success {
      echo "build succeeded"
    }
    failure {
      echo "Build failed"
    }
  }
}
This will notify the users on the success and failure conditions.
Your edited Jenkinsfile should now look like this:
pipeline {
  agent any
  stages {
    stage('Build') {
      steps {
        sh 'chmod a+x run_build_script.sh'
        sh './run_build_script.sh'
      }
    }
    stage('Test') {
      parallel {
        stage('Test On Windows') {
          steps {
            echo "Running tests on Windows"
          }
        }
        stage('Test On Linux') {
          steps {
            echo "Running tests on Linux"
          }
        }
      }
    }
    stage('Confirm Deploy to staging') {
      steps {
        timeout(time: 60, unit: 'SECONDS') {
          input(message: 'Okay to Deploy?', ok: 'Let\'s Do it!')
        }
      }
    }
    stage('Deploy to Staging') {
      steps {
        echo "Deploying to staging..."
      }
    }
    stage('Confirm Deploy to production') {
      steps {
        timeout(time: 60, unit: 'SECONDS') {
          input(message: 'Okay to Deploy?', ok: 'Let\'s Do it!')
        }
      }
    }
    stage('Deploy to Production') {
      steps {
        echo "Deploying to production..."
      }
    }

  }
  post {
    success {
      echo "build succeeded"
    }
    failure {
      echo "Build failed"
    }
  }
}
- Commit the changes and click Build now.
Thanks for staying till the end