


How to Change the App Icon in React Native
Changing the app icon in a React Native project allows you to have full control over the process. In this guide, we will walk through updating the app icon for both iOS and Android platforms without using any third-party tools. 1. Prepare Your Icon Before replacing the existing icons, ensure you have an app icon that meets the following requirements: PNG format Square dimensions (1024x1024 recommended) Transparent or solid background Use online tools like App Icon Generator to generate the required icon sizes for both iOS and Android. 2. Replacing Icons for iOS Step 1: Locate the App Icon Assets In your React Native project, navigate to the following directory: ios/YourApp/Images.xcassets/AppIcon.appiconset/ This folder contains multiple images for different iOS screen resolutions. Step 2: Replace Existing Icons Delete all existing icons in the AppIcon.appiconset folder. Copy and paste the newly generated iOS icons into this folder. Open your project in Xcode (ios/YourApp.xcworkspace). Navigate to Assets.xcassets > AppIcon and verify that all icons are correctly placed. Step 3: Clean and Rebuild the iOS App After replacing the icons, clean and rebuild the app by running: cd ios && xcodebuild clean cd .. npx react-native run-ios 3. Replacing Icons for Android Step 1: Locate the App Icon Directory Android stores app icons in different mipmap folders based on screen density. Navigate to: android/app/src/main/res/ You will find the following directories: mipmap-mdpi/ mipmap-hdpi/ mipmap-xhdpi/ mipmap-xxhdpi/ mipmap-xxxhdpi/ Each folder contains ic_launcher.png, which represents the app icon for different screen sizes. Step 2: Replace Existing Icons Delete the existing ic_launcher.png files from each mipmap folder. Copy and paste the newly generated Android icons into their respective mipmap directories. Step 3: Clean and Rebuild the Android App After replacing the icons, clear the Gradle cache and rebuild the app by running: cd android && ./gradlew clean cd .. npx react-native run-android Conclusion By following these steps, you can update your React Native app’s icon without relying on external libraries. This ensures that your app’s branding is consistent across both iOS and Android platforms. Happy coding!

Changing the app icon in a React Native project allows you to have full control over the process. In this guide, we will walk through updating the app icon for both iOS and Android platforms without using any third-party tools.
1. Prepare Your Icon
Before replacing the existing icons, ensure you have an app icon that meets the following requirements:
- PNG format
- Square dimensions (1024x1024 recommended)
- Transparent or solid background
Use online tools like App Icon Generator to generate the required icon sizes for both iOS and Android.
2. Replacing Icons for iOS
Step 1: Locate the App Icon Assets
In your React Native project, navigate to the following directory:
ios/YourApp/Images.xcassets/AppIcon.appiconset/
This folder contains multiple images for different iOS screen resolutions.
Step 2: Replace Existing Icons
- Delete all existing icons in the AppIcon.appiconset folder.
- Copy and paste the newly generated iOS icons into this folder.
- Open your project in Xcode (ios/YourApp.xcworkspace).
- Navigate to Assets.xcassets > AppIcon and verify that all icons are correctly placed.
Step 3: Clean and Rebuild the iOS App
After replacing the icons, clean and rebuild the app by running:
cd ios && xcodebuild clean
cd ..
npx react-native run-ios
3. Replacing Icons for Android
Step 1: Locate the App Icon Directory
Android stores app icons in different mipmap folders based on screen density. Navigate to:
android/app/src/main/res/
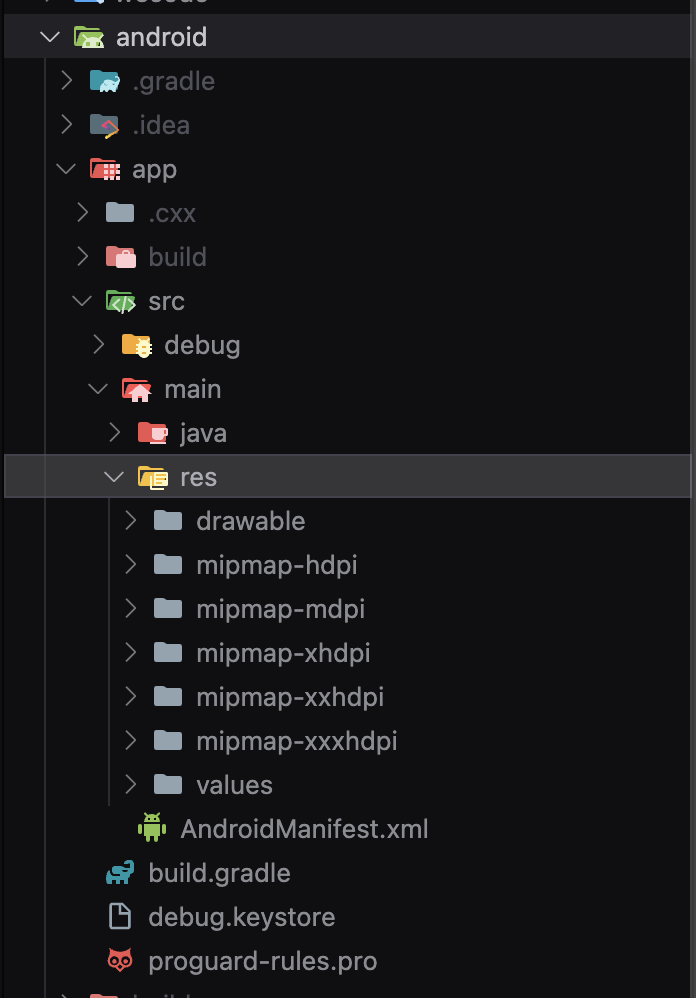
You will find the following directories:
mipmap-mdpi/mipmap-hdpi/mipmap-xhdpi/mipmap-xxhdpi/mipmap-xxxhdpi/
Each folder contains ic_launcher.png, which represents the app icon for different screen sizes.
Step 2: Replace Existing Icons
- Delete the existing
ic_launcher.pngfiles from each mipmap folder. - Copy and paste the newly generated Android icons into their respective mipmap directories.
Step 3: Clean and Rebuild the Android App
After replacing the icons, clear the Gradle cache and rebuild the app by running:
cd android && ./gradlew clean
cd ..
npx react-native run-android
Conclusion
By following these steps, you can update your React Native app’s icon without relying on external libraries. This ensures that your app’s branding is consistent across both iOS and Android platforms. Happy coding!


