


Expand your digital picture frame use cases with Pi3D integrated USB media stick support using UDiskie
I built and customized three instances of The Digital Picture Frame. It’s so simple yet such a great system setup that I fell in love. Today I want to share a method to use USB Media Sticks to view our photos. This method uses Udiskie, while the traditional method (explained by Wolfgang Männel in Expand your digital picture frame use cases with Pi3D integrated USB media stick support) uses python scripts to achieve a very similar goal. I recommend reading both articles and picking the method you feel more comfortable in. Both methods are mostly feature compatible in the end -- having an auto-mounted USB device. What This Setup Does Use Udiskie to manage USB auto-loading/reloading Modify Picture Frame's configuration to read photos from the automount directory Prepare the system to have Udiskie running when the system boots Installing Udiskie udiskie is a udisks2 front-end that allows to manage removable media such as CDs or flash drives from userspace. Let's install udiskie by running one simple command: sudo apt install udiskie udisks2 And although we won't use it, udiskie has a cool UI! Setup Udiskie Auto-Start To setup udiskie to work without password prompt and on boot we must first install PolicyKit: sudo apt-get install policykit-1 And then let's create a policy configuration with required permissions. Let's create the file with sudo nano /etc/polkit-1/rules.d/99-udisks2.rules and the following content: polkit.addRule(function(action, subject) { if (action.id.indexOf("org.freedesktop.udisks2.filesystem-mount") === 0 && subject.isInGroup("plugdev")) { return polkit.Result.YES; } }); Finally, let's create a udiskie.service file to ensure udiskie is working all the time. Let's use sudo nano /etc/systemd/system/udiskie.service: [Unit] Description=Auto-mount USB drives with udiskie After=graphical.target network-online.target [Service] User=pi ExecStart=/usr/bin/udiskie --automount Restart=on-failure [Install] WantedBy=default.target Then let's restart all services that are used: sudo systemctl restart polkit sudo systemctl restart udisks2 sudo systemctl restart udiskie And we're done with udiskie! Modifying PicFrame Configuration Configuration change to PicFrame is simple. We're going to change the photo directory to /media, the location where drives are mounted (e.g. /media/pi/E342-JS2J) nano picframe_data/config/configuration.yaml And inside model, let's change this line: pic_dir: "/media" # default="/home/pi/Pictures", root folder for images And we are done with PicFrame Configuration! With this we should be done! Reboot the system and insert a flash drive or two to see if pictures from all drives are coming to PicFrame.
I built and customized three instances of The Digital Picture Frame. It’s so simple yet such a great system setup that I fell in love.
Today I want to share a method to use USB Media Sticks to view our photos. This method uses Udiskie, while the traditional method (explained by Wolfgang Männel in Expand your digital picture frame use cases with Pi3D integrated USB media stick support) uses python scripts to achieve a very similar goal.
I recommend reading both articles and picking the method you feel more comfortable in. Both methods are mostly feature compatible in the end -- having an auto-mounted USB device.
What This Setup Does
- Use Udiskie to manage USB auto-loading/reloading
- Modify Picture Frame's configuration to read photos from the automount directory
- Prepare the system to have
Udiskierunning when the system boots
Installing Udiskie
udiskie is a udisks2 front-end that allows to manage removable media such as CDs or flash drives from userspace.
Let's install udiskie by running one simple command:
sudo apt install udiskie udisks2
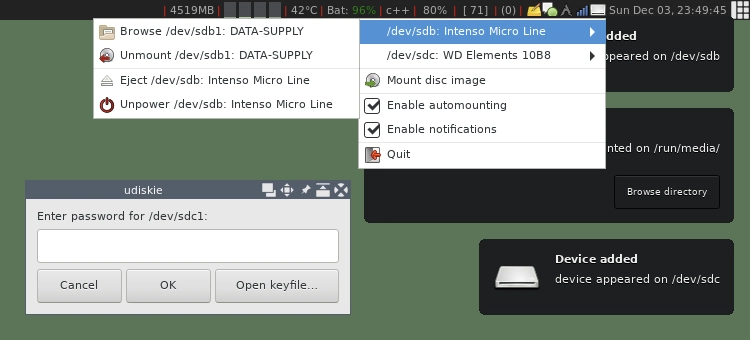
And although we won't use it, udiskie has a cool UI!
Setup Udiskie Auto-Start
To setup udiskie to work without password prompt and on boot we must first install PolicyKit:
sudo apt-get install policykit-1
And then let's create a policy configuration with required permissions. Let's create the file with sudo nano /etc/polkit-1/rules.d/99-udisks2.rules and the following content:
polkit.addRule(function(action, subject) {
    if (action.id.indexOf("org.freedesktop.udisks2.filesystem-mount") === 0 &&
        subject.isInGroup("plugdev")) {
        return polkit.Result.YES;
    }
});
Finally, let's create a udiskie.service file to ensure udiskie is working all the time. Let's use sudo nano /etc/systemd/system/udiskie.service:
[Unit]
Description=Auto-mount USB drives with udiskie
After=graphical.target network-online.target

[Service]
User=pi
ExecStart=/usr/bin/udiskie --automount
Restart=on-failure

[Install]
WantedBy=default.target
Then let's restart all services that are used:
sudo systemctl restart polkit
sudo systemctl restart udisks2
sudo systemctl restart udiskie
And we're done with udiskie!
Modifying PicFrame Configuration
Configuration change to PicFrame is simple. We're going to change the photo directory to /media, the location where drives are mounted (e.g. /media/pi/E342-JS2J)
nano picframe_data/config/configuration.yaml
And inside model, let's change this line:
pic_dir: "/media" # default="/home/pi/Pictures", root folder for images
And we are done with PicFrame Configuration! With this we should be done! Reboot the system and insert a flash drive or two to see if pictures from all drives are coming to PicFrame.


