


Docker Images and Containers: The Core Building Block
When working with Docker, understanding images and containers is fundamental. These two concepts form the backbone of containerized applications, enabling seamless deployment, scalability, and consistency across different environments. This blog dives into Docker images and containers, their differences, how they work, and best practices for managing them efficiently. What is a Docker Image? A Docker image is a blueprint for containers. It is a pre-configured, read-only package containing everything required to run an application, including: The operating system environment (typically a lightweight Linux distro) Dependencies (libraries, runtime versions, etc.) Application code Configuration files Preconfigured Images from Docker Hub Docker Hub offers a vast repository of prebuilt images. Instead of manually configuring environments, you can pull a ready-to-use image from Docker Hub. Example: docker pull node:14 This command fetches the official Node.js 14 image, saving time on installations. Practice Resource Building Your Own Image You can create a custom image using a Dockerfile: FROM node:14 # Use Node.js as the base image WORKDIR /app # Set the working directory COPY package.json . # Copy package.json into the container RUN npm install # Install dependencies COPY . . # Copy all files EXPOSE 3000 # Document port 3000 (optional) CMD ["node", "app.mjs"] # Run the app when the container starts To build the image from this Dockerfile, run: docker build -t my-app . What is a Docker Container? A container is a running instance of an image. While an image acts as a template, a container is an isolated, executable environment created from that image. Think of an image as a blueprint, and a container as a house built from that blueprint. One Image, Multiple Containers A single Docker image can spawn multiple containers, each functioning independently. Example: docker run -d my-app This starts two separate containers from the same my-app image. Viewing Running Containers To list active containers: docker ps Example output: CONTAINER ID IMAGE STATUS PORTS 41934adffdba my-app Up 5 min 0.0.0.0:3000->3000/tcp Each container has a unique ID, allowing for independent management. CMD vs RUN: What’s the Difference? In a Dockerfile, two commands often cause confusion: RUN and CMD. RUN: Executes commands during image build time. CMD: Specifies the default command to run when a container starts. Example: RUN npm install # Installs dependencies during image build CMD ["node", "app.mjs"] # Runs the app when the container starts So, RUN executes once during the image creation, while CMD runs every time a container starts. Running a Container & Exposing Ports Once an image is built, you can run a container: docker run However, this alone won’t expose the application externally. To make it accessible via localhost: docker run -p 3000:80 This maps port 80 inside the container to port 3000 on the host, allowing browser access at localhost:3000. EXPOSE vs -p (Port Mapping) EXPOSE in the Dockerfile is optional—it only documents that the app inside the container uses that port. To actually expose the port, use -p during docker run: docker run -p 3000:80 Without -p, the app won’t be accessible externally. Handling Code Updates: Why Doesn’t My App Refresh? If you change a source file, your application won’t update inside the running container. Why? Images are read-only Code is copied into /app during the build process, so changes to local files don’t reflect in the container To fix this, use bind mounts, which sync files between your local system and the container in real time. We’ll explore bind mounts in the next blog! Conclusion Docker images are the foundation; containers bring them to life. A single image can spawn multiple containers, enabling scalability. Use prebuilt images from Docker Hub to save time. CMD and RUN have distinct roles in Dockerfiles. Port mapping (-p) is essential to access the app from your host machine. Containers don’t auto-update with code changes—bind mounts are the solution.
When working with Docker, understanding images and containers is fundamental. These two concepts form the backbone of containerized applications, enabling seamless deployment, scalability, and consistency across different environments.
This blog dives into Docker images and containers, their differences, how they work, and best practices for managing them efficiently.
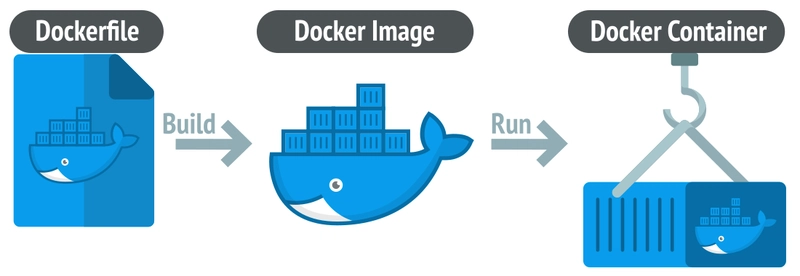
What is a Docker Image?
A Docker image is a blueprint for containers. It is a pre-configured, read-only package containing everything required to run an application, including:
- The operating system environment (typically a lightweight Linux distro)
- Dependencies (libraries, runtime versions, etc.)
- Application code
- Configuration files
Preconfigured Images from Docker Hub
Docker Hub offers a vast repository of prebuilt images. Instead of manually configuring environments, you can pull a ready-to-use image from Docker Hub.
Example:
docker pull node:14
This command fetches the official Node.js 14 image, saving time on installations.
Building Your Own Image
You can create a custom image using a Dockerfile:
FROM node:14  # Use Node.js as the base image

WORKDIR /app   # Set the working directory

COPY package.json .  # Copy package.json into the container

RUN npm install  # Install dependencies

COPY . .  # Copy all files

EXPOSE 3000  # Document port 3000 (optional)

CMD ["node", "app.mjs"]  # Run the app when the container starts
To build the image from this Dockerfile, run:
docker build -t my-app .
What is a Docker Container?
A container is a running instance of an image. While an image acts as a template, a container is an isolated, executable environment created from that image.
Think of an image as a blueprint, and a container as a house built from that blueprint.
One Image, Multiple Containers
A single Docker image can spawn multiple containers, each functioning independently.
Example:
docker run -d my-app
This starts two separate containers from the same my-app image.
Viewing Running Containers
To list active containers:
docker ps
Example output:
CONTAINER ID   IMAGE      STATUS     PORTS
41934adffdba   my-app     Up 5 min   0.0.0.0:3000->3000/tcp
Each container has a unique ID, allowing for independent management.
CMD vs RUN: What’s the Difference?
In a Dockerfile, two commands often cause confusion: RUN and CMD.
- RUN: Executes commands during image build time.
- CMD: Specifies the default command to run when a container starts.
Example:
RUN npm install  # Installs dependencies during image build
CMD ["node", "app.mjs"]  # Runs the app when the container starts
So, RUN executes once during the image creation, while CMD runs every time a container starts.
Running a Container & Exposing Ports
Once an image is built, you can run a container:
docker run
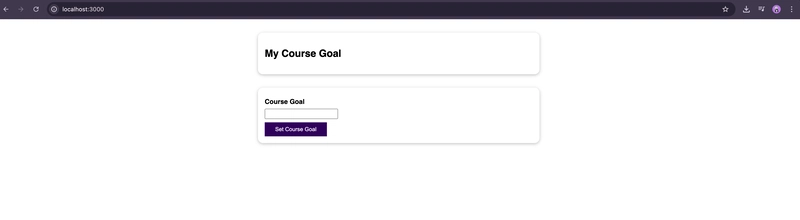
However, this alone won’t expose the application externally. To make it accessible via localhost:
docker run -p 3000:80
This maps port 80 inside the container to port 3000 on the host, allowing browser access at localhost:3000.
EXPOSE vs -p (Port Mapping)
-
EXPOSEin the Dockerfile is optional—it only documents that the app inside the container uses that port. - To actually expose the port, use
-pduringdocker run:
docker run -p 3000:80
Without -p, the app won’t be accessible externally.
Handling Code Updates: Why Doesn’t My App Refresh?
If you change a source file, your application won’t update inside the running container.
Why?
- Images are read-only
- Code is copied into
/appduring the build process, so changes to local files don’t reflect in the container
To fix this, use bind mounts, which sync files between your local system and the container in real time.
We’ll explore bind mounts in the next blog!
Conclusion
- Docker images are the foundation; containers bring them to life.
- A single image can spawn multiple containers, enabling scalability.
- Use prebuilt images from Docker Hub to save time.
- CMD and RUN have distinct roles in Dockerfiles.
-
Port mapping (
-p) is essential to access the app from your host machine. - Containers don’t auto-update with code changes—bind mounts are the solution.


