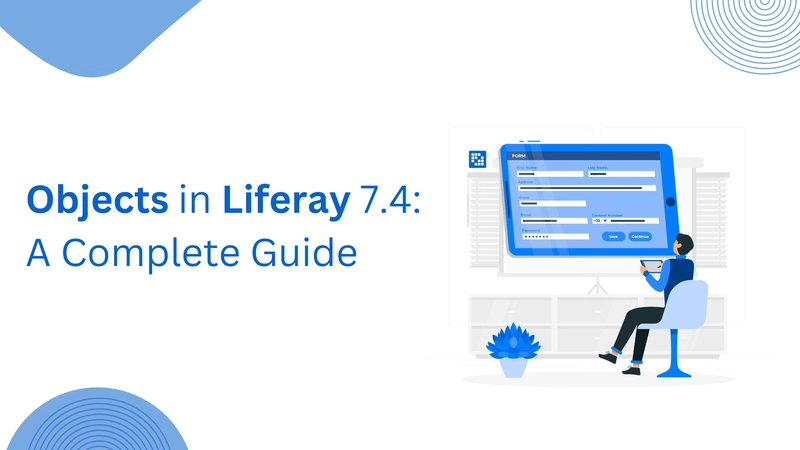
Creating and Managing Objects in Liferay 7.4: A Complete Guide
Liferay continues to evolve with each release, and version 7.4 introduces a standout feature that significantly enhances its low-code capabilities—Liferay Objects. This feature empowers users to create, customize, and manage business entities within the Liferay platform, all without needing to deploy custom modules. Let’s explore everything you need to know to create, manage, and extend objects effectively in Liferay 7.4. What Are Liferay Objects? Liferay Objects allow you to define custom data models directly in the UI, eliminating the need for the traditional Service Builder approach. These objects can be extended with fields, relationships, validations, actions, layouts, and views, enabling rapid application development with little to no coding. Key Capabilities: Low-code/no-code development Auto-generated REST and GraphQL APIs Custom workflows and validations Integration with Liferay's permission and UI frameworks Prerequisites for Using Objects Before getting started, ensure the following: Liferay DXP or Liferay Portal 7.4+ is installed Basic understanding of Liferay’s Control Panel Familiarity with custom entities and CRUD operations in Liferay Step-by-Step: Creating Your First Object 1. Creating an Object Navigation: Go to Control Panel → Objects → “+” (Add Object) Fill out the object definition form: Label: Human-readable name displayed in Forms, Workflows, etc. Plural Label: Display name in menus and UI. Object Name: System-level identifier (cannot be changed after publishing) Scope: Company: Object is available globally across the portal. Site: Object is site-specific and visible in the site menu. Panel Category Key: Choose where the object appears in the UI. After saving, the object enters Draft state. You'll need to publish it once you've added fields and configurations. ⚠️ Once an object is published, its name and scope cannot be changed. 2. Adding Fields to Your Object Navigation: Go to your object → Fields Tab → “+” Field options: Label: Display name in UI. Field Name: Backend identifier (camelCase, immutable after publishing). Field Type: Text, Date, Integer, Boolean, Relationship, etc. Required: Toggle for mandatory input. Tip: Set a field as the Entry Title to serve as the identifier for each entry in views. 3. Defining Relationships Liferay Objects support two types of relationships: One-to-Many (1:N) Many-to-Many (M:N) Navigation: Object → Relationships Tab → “+” Deletion Type: Prevent (Default): Block deletion if linked. Disassociate: Keep child, remove parent. Cascade: Delete child entries when parent is deleted (if permissions allow). 4. Creating Object Layouts Object layouts control how fields appear in the entry forms. Navigation: Object → Layouts Tab → “+” Types of Tabs: Field Tabs: Display custom fields. Relationship Tabs: Display linked object data. ⚠️ The first tab must be a Field Tab and is visible during object creation. Layout Steps: Add new layout and set as default. Add a main tab and blocks inside it. Add fields to blocks. Add relationship tabs for object associations. 5. Building Custom Actions Liferay allows users to define custom business logic via Object Actions. Custom Action Workflow: Create a Liferay module. Implement ObjectActionExecutor interface. Override execute() and getKey() methods. Register your action. Your action appears in the Object UI under Actions. 6. Using the Expression Builder for Validations Navigation: Object → Validations Tab → “+” Validation settings: Label and Trigger Event: Typically “on submission” Conditions Tab: Use Expression Builder to define rules Sections Available: Fields Operators Functions Add a custom error message to guide users on invalid inputs. 7. Defining Object Views Navigation: Object → Views Tab → “+” Use the View Builder to: Select visible columns Set default sort options Apply filters for conditional displays ✅ Set your preferred view as the default for consistent presentation. Key Benefits of Using Liferay Objects No-code Configuration: Ideal for business users and IT alike Agility: Rapid app development with minimal overhead Seamless Integration: Works natively with Liferay’s permission, workflow, and UI layers Scalability: Extendable with APIs and object actions Conclusion Liferay Objects in 7.4 offer a powerful and intuitive way to create flexible, data-driven applications directly within the platform. Whether you're a developer or a business analyst, you can leverage this feature to build and manage custom entities effortlessly—no deployment required. By combining Liferay Objects with expert Liferay Consulting Services, you can accelerate your digital initiatives while ensuring enterprise-grade scalability and security. Looking to Maximize Your Liferay 7.4 Experience? Partner with Aixtor Technologies experts

Liferay continues to evolve with each release, and version 7.4 introduces a standout feature that significantly enhances its low-code capabilities—Liferay Objects. This feature empowers users to create, customize, and manage business entities within the Liferay platform, all without needing to deploy custom modules.
Let’s explore everything you need to know to create, manage, and extend objects effectively in Liferay 7.4.
What Are Liferay Objects?
Liferay Objects allow you to define custom data models directly in the UI, eliminating the need for the traditional Service Builder approach. These objects can be extended with fields, relationships, validations, actions, layouts, and views, enabling rapid application development with little to no coding.
Key Capabilities:
- Low-code/no-code development
- Auto-generated REST and GraphQL APIs
- Custom workflows and validations
- Integration with Liferay's permission and UI frameworks
Prerequisites for Using Objects
- Before getting started, ensure the following:
- Liferay DXP or Liferay Portal 7.4+ is installed
- Basic understanding of Liferay’s Control Panel
- Familiarity with custom entities and CRUD operations in Liferay
Step-by-Step: Creating Your First Object
1. Creating an Object
Navigation: Go to Control Panel → Objects → “+” (Add Object)
Fill out the object definition form:
- Label: Human-readable name displayed in Forms, Workflows, etc.
- Plural Label: Display name in menus and UI.
Object Name: System-level identifier (cannot be changed after publishing)
-
Scope:
- Company: Object is available globally across the portal.
- Site: Object is site-specific and visible in the site menu.
Panel Category Key: Choose where the object appears in the UI.
After saving, the object enters Draft state. You'll need to publish it once you've added fields and configurations.
⚠️ Once an object is published, its name and scope cannot be changed.
2. Adding Fields to Your Object
Navigation: Go to your object → Fields Tab → “+”
Field options:
- Label: Display name in UI.
- Field Name: Backend identifier (camelCase, immutable after publishing).
- Field Type: Text, Date, Integer, Boolean, Relationship, etc.
- Required: Toggle for mandatory input.
Tip: Set a field as the Entry Title to serve as the identifier for each entry in views.
3. Defining Relationships
Liferay Objects support two types of relationships:
- One-to-Many (1:N)
- Many-to-Many (M:N) Navigation: Object → Relationships Tab → “+”
Deletion Type:
- Prevent (Default): Block deletion if linked.
- Disassociate: Keep child, remove parent.
- Cascade: Delete child entries when parent is deleted (if permissions allow).
4. Creating Object Layouts
Object layouts control how fields appear in the entry forms.
Navigation: Object → Layouts Tab → “+”
Types of Tabs:
- Field Tabs: Display custom fields.
- Relationship Tabs: Display linked object data.
⚠️ The first tab must be a Field Tab and is visible during object creation.
Layout Steps:
- Add new layout and set as default.
- Add a main tab and blocks inside it.
- Add fields to blocks.
- Add relationship tabs for object associations.
5. Building Custom Actions
Liferay allows users to define custom business logic via Object Actions.
- Custom Action Workflow:
- Create a Liferay module.
- Implement
ObjectActionExecutorinterface. - Override
execute()andgetKey()methods. - Register your action.
- Your action appears in the Object UI under Actions.
6. Using the Expression Builder for Validations
Navigation: Object → Validations Tab → “+”
Validation settings:
- Label and Trigger Event: Typically “on submission”
- Conditions Tab: Use Expression Builder to define rules
- Sections Available: Fields Operators Functions Add a custom error message to guide users on invalid inputs.
7. Defining Object Views
Navigation: Object → Views Tab → “+”
Use the View Builder to:
- Select visible columns
- Set default sort options
- Apply filters for conditional displays
✅ Set your preferred view as the default for consistent presentation.
Key Benefits of Using Liferay Objects
- No-code Configuration: Ideal for business users and IT alike
- Agility: Rapid app development with minimal overhead
- Seamless Integration: Works natively with Liferay’s permission, workflow, and UI layers
- Scalability: Extendable with APIs and object actions
Conclusion
Liferay Objects in 7.4 offer a powerful and intuitive way to create flexible, data-driven applications directly within the platform. Whether you're a developer or a business analyst, you can leverage this feature to build and manage custom entities effortlessly—no deployment required.
By combining Liferay Objects with expert Liferay Consulting Services, you can accelerate your digital initiatives while ensuring enterprise-grade scalability and security.
Looking to Maximize Your Liferay 7.4 Experience?
Partner with Aixtor Technologies experts Liferay Consulting Services to unlock the full potential of custom objects and transform how you build business applications.


_Olekcii_Mach_Alamy.jpg?width=1280&auto=webp&quality=80&disable=upscale#)


