Beginner's Guide to Laravel Middlewares: Everything You Need to Know
In Laravel, middleware is an essential concept that helps manage HTTP requests entering your application. Think of it as a filter that sits between a request and your application's logic, allowing you to inspect or modify requests before they reach your controllers or after they've passed through. In this article, we'll break down the basics of Laravel middlewares, explain how they function, and provide a practical example of using a middleware with JWT (JSON Web Token) authentication during user login. What is Middleware in Laravel? Definition: Middleware is a mechanism in Laravel that allows you to filter HTTP requests entering your application. They are like a chain of filters that can modify the request before it reaches your application’s core logic (such as controllers) or after the response has been generated by your controllers. Why Use Middleware? Authentication: Ensure users are logged in before accessing certain routes. Authorization: Verify if the user has the correct permissions to access a resource. Request Logging: Track incoming requests or log them for debugging. Cross-Origin Resource Sharing (CORS): Handle CORS headers before responding to requests from different origins. Throttle Requests: Limit the number of requests a user can make within a specified time window (e.g., to prevent abuse). Types of Middleware in Laravel Global Middleware: Runs on every HTTP request. Route Middleware: Applied only to specific routes or controllers. Group Middleware: Applied to a group of routes or controllers. How Middleware Works in Laravel Middleware Workflow: Incoming Request: When a user sends a request to your application, Laravel checks if there are any middleware assigned to the route. Middleware Execution: The middleware processes the request in the order they are registered. You can decide whether to pass the request further down the chain or stop the request if certain conditions are not met. Controller Action: If all middlewares pass, the request reaches the controller and executes the intended action. Response: Once the action is completed, the response is returned through the middleware stack in reverse order before it reaches the user. Example: Imagine a middleware that checks if the user is an administrator before allowing access to a route that manages user roles. If the user is not an administrator, they are redirected to a "Forbidden" page. How to Create Middleware in Laravel Creating middleware in Laravel is very simple. Here's the basic process: 1. Creating Middleware To create a custom middleware, use the artisan command: php artisan make:middleware CheckRole This will generate a file called CheckRole.php in the app/Http/Middleware directory. 2. Middleware Logic In the CheckRole middleware, you can define the logic that should be executed when a request comes in. Here's an example that checks if the user is an administrator: public function handle($request, Closure $next) { if (auth()->user()->role !== 'admin') { return redirect('forbidden'); } return $next($request); } 3. Registering Middleware To use the middleware, you need to register it in the app/Http/Kernel.php file. This allows Laravel to know where to apply the middleware. For Global Middleware, add it to the $middleware array. For Route Middleware, add it to the $routeMiddleware array. Example for registering a route middleware: protected $routeMiddleware = [ 'checkRole' => \App\Http\Middleware\CheckRole::class, ]; 4. Applying Middleware to Routes Once registered, you can apply your middleware to specific routes or controllers: Route::get('admin/dashboard', function () { // Admin dashboard logic here })->middleware('checkRole'); Middleware Example with JWT Authentication in Laravel One common use case for middleware in Laravel is authentication. Here, we will demonstrate how to use middleware with JWT (JSON Web Tokens) to protect routes and ensure that only authenticated users can access them. 1. Install JWT Authentication Package The first step is to install the JWT authentication package. Laravel does not have built-in JWT support, so we need a third-party package, such as tymon/jwt-auth. composer require tymon/jwt-auth After installation, publish the configuration: php artisan vendor:publish --provider="Tymon\JWTAuth\Providers\LaravelServiceProvider" 2. Generate JWT Secret To securely sign your tokens, you need to generate a secret key: php artisan jwt:secret 3. Create a Middleware to Authenticate Using JWT Now, create a middleware that will check if a request has a valid JWT token. This middleware will decode the token and authenticate the user. php artisan make:middleware JwtMiddleware In the JwtMiddleware.php file, use the follo

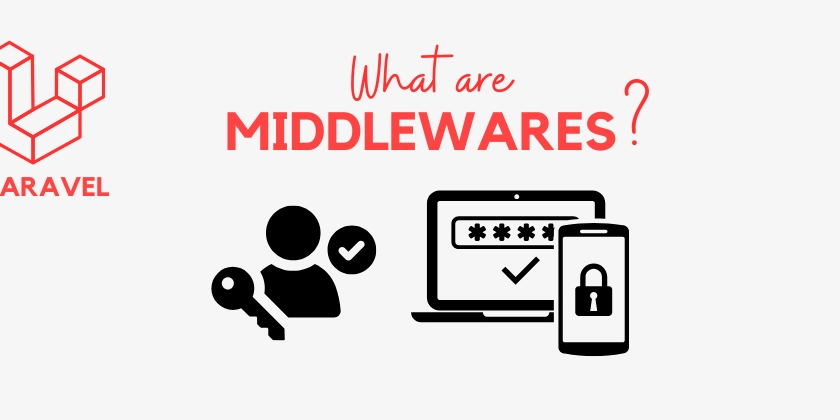
In Laravel, middleware is an essential concept that helps manage HTTP requests entering your application. Think of it as a filter that sits between a request and your application's logic, allowing you to inspect or modify requests before they reach your controllers or after they've passed through.
In this article, we'll break down the basics of Laravel middlewares, explain how they function, and provide a practical example of using a middleware with JWT (JSON Web Token) authentication during user login.
What is Middleware in Laravel?
Definition:
Middleware is a mechanism in Laravel that allows you to filter HTTP requests entering your application. They are like a chain of filters that can modify the request before it reaches your application’s core logic (such as controllers) or after the response has been generated by your controllers.
Why Use Middleware?
Authentication: Ensure users are logged in before accessing certain routes.
Authorization: Verify if the user has the correct permissions to access a resource.
Request Logging: Track incoming requests or log them for debugging.
Cross-Origin Resource Sharing (CORS): Handle CORS headers before responding to requests from different origins.
Throttle Requests: Limit the number of requests a user can make within a specified time window (e.g., to prevent abuse).
Types of Middleware in Laravel
- Global Middleware: Runs on every HTTP request.
- Route Middleware: Applied only to specific routes or controllers.
- Group Middleware: Applied to a group of routes or controllers.
How Middleware Works in Laravel
Middleware Workflow:
Incoming Request: When a user sends a request to your application, Laravel checks if there are any middleware assigned to the route.
Middleware Execution: The middleware processes the request in the order they are registered. You can decide whether to pass the request further down the chain or stop the request if certain conditions are not met.
Controller Action: If all middlewares pass, the request reaches the controller and executes the intended action.
Response: Once the action is completed, the response is returned through the middleware stack in reverse order before it reaches the user.
Example:
Imagine a middleware that checks if the user is an administrator before allowing access to a route that manages user roles. If the user is not an administrator, they are redirected to a "Forbidden" page.
How to Create Middleware in Laravel
Creating middleware in Laravel is very simple. Here's the basic process:
1. Creating Middleware
To create a custom middleware, use the artisan command:
php artisan make:middleware CheckRole
This will generate a file called CheckRole.php in the app/Http/Middleware directory.
2. Middleware Logic
In the CheckRole middleware, you can define the logic that should be executed when a request comes in. Here's an example that checks if the user is an administrator:
public function handle($request, Closure $next)
{
    if (auth()->user()->role !== 'admin') {
        return redirect('forbidden');
    }

    return $next($request);
}
3. Registering Middleware
To use the middleware, you need to register it in the app/Http/Kernel.php file. This allows Laravel to know where to apply the middleware.
For Global Middleware, add it to the
$middlewarearray.For Route Middleware, add it to the
$routeMiddlewarearray.
Example for registering a route middleware:
protected $routeMiddleware = [
    'checkRole' => \App\Http\Middleware\CheckRole::class,
];
4. Applying Middleware to Routes
Once registered, you can apply your middleware to specific routes or controllers:
Route::get('admin/dashboard', function () {
    // Admin dashboard logic here
})->middleware('checkRole');
Middleware Example with JWT Authentication in Laravel
One common use case for middleware in Laravel is authentication. Here, we will demonstrate how to use middleware with JWT (JSON Web Tokens) to protect routes and ensure that only authenticated users can access them.
1. Install JWT Authentication Package
The first step is to install the JWT authentication package. Laravel does not have built-in JWT support, so we need a third-party package, such as tymon/jwt-auth.
composer require tymon/jwt-auth
After installation, publish the configuration:
php artisan vendor:publish --provider="Tymon\JWTAuth\Providers\LaravelServiceProvider"
2. Generate JWT Secret
To securely sign your tokens, you need to generate a secret key:
php artisan jwt:secret
3. Create a Middleware to Authenticate Using JWT
Now, create a middleware that will check if a request has a valid JWT token. This middleware will decode the token and authenticate the user.
php artisan make:middleware JwtMiddleware
In the JwtMiddleware.php file, use the following code:
use Tymon\JWTAuth\Facades\JWTAuth;
use Tymon\JWTAuth\Exceptions\JWTException;

public function handle($request, Closure $next)
{
    try {
        // Check if a valid token is provided
        if (! $user = JWTAuth::parseToken()->authenticate()) {
            return response()->json(['error' => 'User not found'], 401);
        }
    } catch (JWTException $e) {
        return response()->json(['error' => 'Token is invalid'], 401);
    }

    // Allow the request to continue to the next middleware or controller
    return $next($request);
}
4. Register the Middleware
Next, register your JwtMiddleware in the Kernel.php file:
protected $routeMiddleware = [
    'jwt.auth' => \App\Http\Middleware\JwtMiddleware::class,
]
5. Apply Middleware to Routes
Finally, apply the jwt.auth middleware to the routes that require authentication:
Route::middleware(['jwt.auth'])->get('/user', function () {
    return response()->json(auth()->user());
});
6. JWT Token Generation and User Login
Now, create an endpoint for user login where the JWT token will be generated. In your AuthController.php:
use Tymon\JWTAuth\Facades\JWTAuth;
use Illuminate\Http\Request;

public function login(Request $request)
{
    $credentials = $request->only('email', 'password');

    if ($token = JWTAuth::attempt($credentials)) {
        return response()->json(['token' => $token]);
    }

    return response()->json(['error' => 'Unauthorized'], 401);
}
7. Testing JWT Authentication
You can now log in by sending a POST request to /login with email and password. The response will contain a JWT token. Use this token in the Authorization header of requests to protected routes like /user.
Example of API Request with JWT Token:
curl -X GET "http://your-app.com/user" -H "Authorization: Bearer "
Conclusion
Middlewares are a powerful tool in Laravel, allowing you to manage HTTP requests in a clean and organized way. Whether you're handling authentication, logging, or limiting access to certain routes, middlewares provide an elegant solution. In this article, we explored how to create custom middlewares, register them, and use them with JWT tokens for user authentication.
By understanding how Laravel middlewares function, you can build more secure, maintainable, and flexible applications. Happy coding!
Check out my previous Laravel series tutorials here.


