


_Olekcii_Mach_Alamy.jpg?width=1280&auto=webp&quality=80&disable=upscale#)


Host Multiple Services in EKS with One LoadBalancer: A Cost-Effective Approach
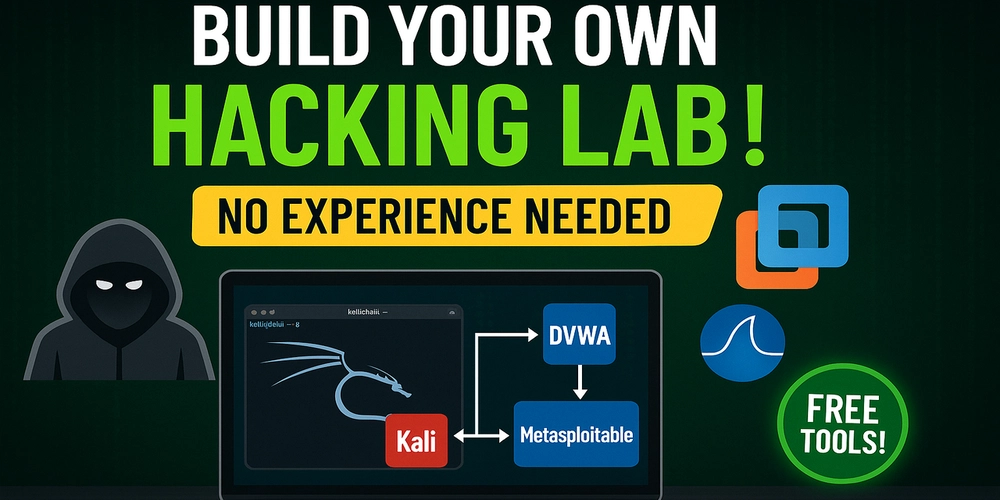
Managing multiple services in Amazon Elastic Kubernetes Service (EKS) can sometimes feel like juggling chainsaws. But it doesn't have to be expensive or complicated! This post shows you how to efficiently expose multiple applications through a single AWS LoadBalancer using the NGINX Ingress Controller and the power of Cloudflare for streamlined domain management. Let's dive in! 1. Installing the NGINX Ingress Controller: Your Traffic Director The NGINX Ingress Controller acts as a reverse proxy, intelligently routing incoming traffic to your various services. We'll install it using Helm, a package manager for Kubernetes. Add the Ingress Nginx Helm repository: This step adds the necessary repository to your Helm client. Code explanation: helm repo add ingress-nginx https://kubernetes.github.io/ingress-nginx Install the Ingress Controller: This command installs the NGINX Ingress Controller into your EKS cluster, creating a namespace and enabling the LoadBalancer service. Code explanation: helm install nginx ingress-nginx/ingress-nginx \ --namespace ingress-nginx --create-namespace \ --set controller.publishService.enabled=true This creates an Elastic Load Balancer (ELB) – think of it as a highly available receptionist for your applications – routing traffic efficiently within your cluster. 2. Retrieving Your LoadBalancer Hostname: Finding Your Receptionist's Address Now that the ELB is up and running, we need its address to tell the world how to reach it. Code explanation: kubectl get svc -n ingress-nginx Look for the EXTERNAL-IP or hostname under the nginx-ingress-controller service. This is the public address of your LoadBalancer. Keep this handy; you'll need it in the next step. 3. Pointing Your Domains with Cloudflare: Setting Up the Signposts Cloudflare acts as your DNS provider, directing traffic based on the domain name. Let's configure it to point to our LoadBalancer. Access your Cloudflare DNS settings: Log in to your Cloudflare account and navigate to the DNS settings for your domain. Create CNAME records: For each application (e.g., app1, app2), create a CNAME record. Name: app1.example.com (replace with your subdomain) Target: Your ELB hostname (obtained in Step 2) Proxy: Optional. Setting this to "Proxied" leverages Cloudflare's CDN and SSL capabilities for enhanced performance and security. Repeat this for each application, using a unique subdomain for each. Think of these CNAME records as signposts, guiding traffic from specific domain names to your LoadBalancer. 4. Deploying Your Services: The Applications Themselves Before routing traffic, ensure your Kubernetes services are correctly defined. They should use ClusterIP type, making them accessible only within the cluster. Here's an example: Code explanation: apiVersion: v1 kind: Service metadata: name: service-a spec: ports: - port: 80 targetPort: 8080 selector: app: service-a type: ClusterIP This defines a service named service-a, exposing port 80 internally, connecting to pods labeled with app: service-a on port 8080. Remember to replace service-a and port numbers as needed for your applications. 5. Configuring the Ingress Resource: Directing Traffic to the Right Application This is where the magic happens! The Ingress resource defines how traffic is routed based on the incoming domain name. Code explanation: apiVersion: networking.k8s.io/v1 kind: Ingress metadata: name: app-ingress annotations: nginx.ingress.kubernetes.io/rewrite-target: / spec: ingressClassName: nginx rules: - host: app1.example.com http: paths: - path: / pathType: Prefix backend: service: name: service-a port: number: 80 - host: app2.example.com http: paths: - path: / pathType: Prefix backend: service: name: service-b port: number: 80 This Ingress resource routes app1.example.com to service-a and app2.example.com to service-b. The nginx.ingress.kubernetes.io/rewrite-target: / annotation ensures clean URLs. Optional: Securing Your Services with TLS/HTTPS For enhanced security, consider using Cloudflare's Flexible SSL or integrating cert-manager with Let's Encrypt to automatically manage TLS certificates for end-to-end encryption. Conclusion: Simple, Scalable, and Cost-Effective By using the NGINX Ingress Controller and Cloudflare, you can efficiently manage multiple services in EKS using a single LoadBalancer. This approach significantly reduces costs associated with multiple load balancers while offering robust features like CDN and enhanced security. Now go forth and efficiently manage your EKS services!

Managing multiple services in Amazon Elastic Kubernetes Service (EKS) can sometimes feel like juggling chainsaws. But it doesn't have to be expensive or complicated! This post shows you how to efficiently expose multiple applications through a single AWS LoadBalancer using the NGINX Ingress Controller and the power of Cloudflare for streamlined domain management. Let's dive in!
1. Installing the NGINX Ingress Controller: Your Traffic Director
The NGINX Ingress Controller acts as a reverse proxy, intelligently routing incoming traffic to your various services. We'll install it using Helm, a package manager for Kubernetes.
- Add the Ingress Nginx Helm repository: This step adds the necessary repository to your Helm client.
Code explanation:
helm repo add ingress-nginx https://kubernetes.github.io/ingress-nginx
- Install the Ingress Controller: This command installs the NGINX Ingress Controller into your EKS cluster, creating a namespace and enabling the LoadBalancer service.
Code explanation:
   helm install nginx ingress-nginx/ingress-nginx \
       --namespace ingress-nginx --create-namespace \
       --set controller.publishService.enabled=true
This creates an Elastic Load Balancer (ELB) – think of it as a highly available receptionist for your applications – routing traffic efficiently within your cluster.
2. Retrieving Your LoadBalancer Hostname: Finding Your Receptionist's Address
Now that the ELB is up and running, we need its address to tell the world how to reach it.
Code explanation:
kubectl get svc -n ingress-nginx
Look for the EXTERNAL-IP or hostname under the nginx-ingress-controller service. This is the public address of your LoadBalancer. Keep this handy; you'll need it in the next step.
3. Pointing Your Domains with Cloudflare: Setting Up the Signposts
Cloudflare acts as your DNS provider, directing traffic based on the domain name. Let's configure it to point to our LoadBalancer.
Access your Cloudflare DNS settings: Log in to your Cloudflare account and navigate to the DNS settings for your domain.
Create CNAME records: For each application (e.g.,
app1,app2), create a CNAME record.
-
Name:
app1.example.com(replace with your subdomain) - Target: Your ELB hostname (obtained in Step 2)
- Proxy: Optional. Setting this to "Proxied" leverages Cloudflare's CDN and SSL capabilities for enhanced performance and security. Repeat this for each application, using a unique subdomain for each.
Think of these CNAME records as signposts, guiding traffic from specific domain names to your LoadBalancer.
4. Deploying Your Services: The Applications Themselves
Before routing traffic, ensure your Kubernetes services are correctly defined. They should use ClusterIP type, making them accessible only within the cluster. Here's an example:
Code explanation:
apiVersion: v1
kind: Service
metadata:
  name: service-a
spec:
  ports:
  - port: 80
    targetPort: 8080
  selector:
    app: service-a
  type: ClusterIP
This defines a service named service-a, exposing port 80 internally, connecting to pods labeled with app: service-a on port 8080. Remember to replace service-a and port numbers as needed for your applications.
5. Configuring the Ingress Resource: Directing Traffic to the Right Application
This is where the magic happens! The Ingress resource defines how traffic is routed based on the incoming domain name.
Code explanation:
apiVersion: networking.k8s.io/v1
kind: Ingress
metadata:
  name: app-ingress
  annotations:
    nginx.ingress.kubernetes.io/rewrite-target: /
spec:
  ingressClassName: nginx
  rules:
  - host: app1.example.com
    http:
      paths:
      - path: /
        pathType: Prefix
        backend:
          service:
            name: service-a
            port:
              number: 80
  - host: app2.example.com
    http:
      paths:
      - path: /
        pathType: Prefix
        backend:
          service:
            name: service-b
            port:
              number: 80
This Ingress resource routes app1.example.com to service-a and app2.example.com to service-b. The nginx.ingress.kubernetes.io/rewrite-target: / annotation ensures clean URLs.
Optional: Securing Your Services with TLS/HTTPS
For enhanced security, consider using Cloudflare's Flexible SSL or integrating cert-manager with Let's Encrypt to automatically manage TLS certificates for end-to-end encryption.
Conclusion: Simple, Scalable, and Cost-Effective
By using the NGINX Ingress Controller and Cloudflare, you can efficiently manage multiple services in EKS using a single LoadBalancer. This approach significantly reduces costs associated with multiple load balancers while offering robust features like CDN and enhanced security. Now go forth and efficiently manage your EKS services!


