


Hands-On Guide: Configuring a Static Website on Amazon S3
Introduction Static websites, composed of HTML, CSS, JavaScript, and media files, are ideal for portfolios, blogs, or landing pages. Amazon S3 offers a cost-effective, scalable solution to host static sites without managing servers. This guide walks you through hosting a sample website on S3, covering bucket creation, permissions, and testing. By the end, you’ll have a live site accessible via an S3 endpoint URL. Step-by-Step Guide Create an S3 Bucket Step 1.1: Log into the AWS Management Console, navigate to S3, and click Create bucket. Step 1.2: Name your bucket (e.g., my-static-website-123). Ensure the name is globally unique. Step 1.3: Select a region (e.g., us-east-1). Step 1.4: Take the default settings Step 1.5: Click Create bucket. 2. Enable Static Website Hosting Step 2.1: Navigate to the Properties tab. Step 2.2: Scroll to Static website hosting and click Edit. Step 2.3: Select Enable, then specify: Index document: index.html Error document: 404.html Step 2.4: Click Save. 3. Configure Bucket Permissions Step 3.1: Go to the bucket’s Permissions tab. step 3.2: Click Edit on Block public access (bucket settings) to unblock public access Step 3.3: Under Bucket Policy, paste this JSON (replace my-static-website-123 with your bucket name): { "Version": "2012-10-17", "Statement": [ { "Sid": "PublicReadGetObject", "Effect": "Allow", "Principal": "*", "Action": "s3:GetObject", "Resource": "arn:aws:s3:::my-static-website-123/*" } ] } Step 3.3: Click Save. 4. Upload Sample Website Files - Click on upload after adding the Files and Folders - You should have a successful notification after uploading 5. Test the Website Step 5.1: Under Static website hosting, note the Bucket website endpoint (e.g., http://my-static-website-123.s3-website-us-east-1.amazonaws.com). Step 5.2: Open the URL in a browser. You should see your uploaded content. Step 5.3: Test the error page by visiting an invalid path (e.g., http://my-static-website-123.s3-website-us-east-1.amazonaws.com/invalid). Conclusion I’ve successfully hosted a static website on Amazon S3! This setup is ideal for low-cost, high-availability sites. By leveraging S3’s simplicity and scalability, you can focus on content creation while AWS handles infrastructure. Explore advanced features like versioning for backups or S3 events for serverless workflows to further optimize your site.
Introduction
Static websites, composed of HTML, CSS, JavaScript, and media files, are ideal for portfolios, blogs, or landing pages. Amazon S3 offers a cost-effective, scalable solution to host static sites without managing servers. This guide walks you through hosting a sample website on S3, covering bucket creation, permissions, and testing. By the end, you’ll have a live site accessible via an S3 endpoint URL.
Step-by-Step Guide
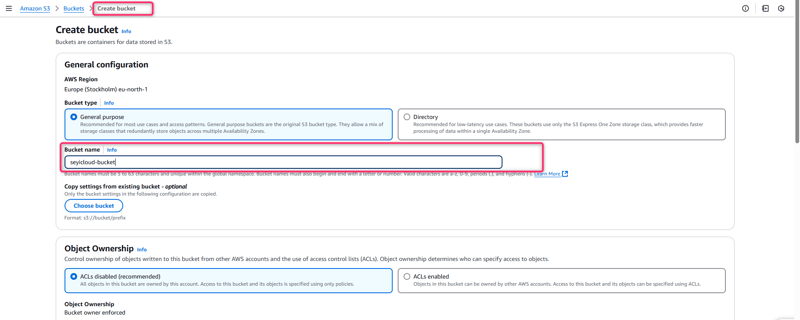
- Create an S3 Bucket Step 1.1: Log into the AWS Management Console, navigate to S3, and click Create bucket.
- Step 1.2: Name your bucket (e.g., my-static-website-123). Ensure the name is globally unique.
- Step 1.3: Select a region (e.g., us-east-1).
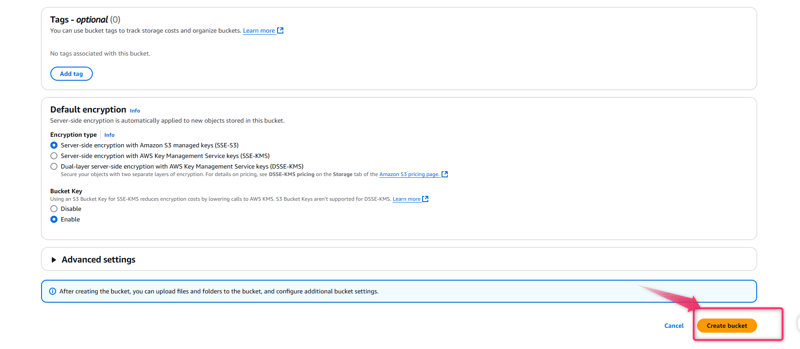
- Step 1.4: Take the default settings
- Step 1.5: Click Create bucket.
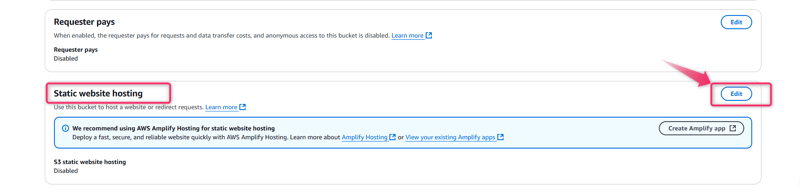
2. Enable Static Website Hosting
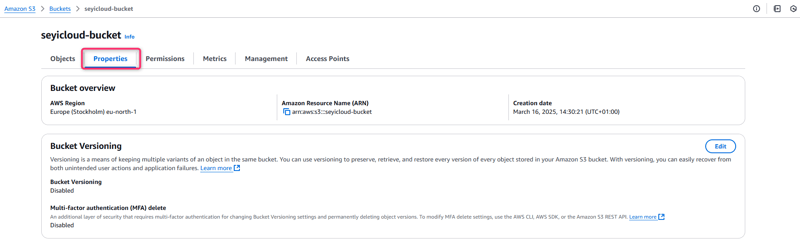
- Step 2.1: Navigate to the Properties tab.
- Step 2.2: Scroll to Static website hosting and click Edit.
- Step 2.3: Select Enable, then specify: Index document: index.html Error document: 404.html
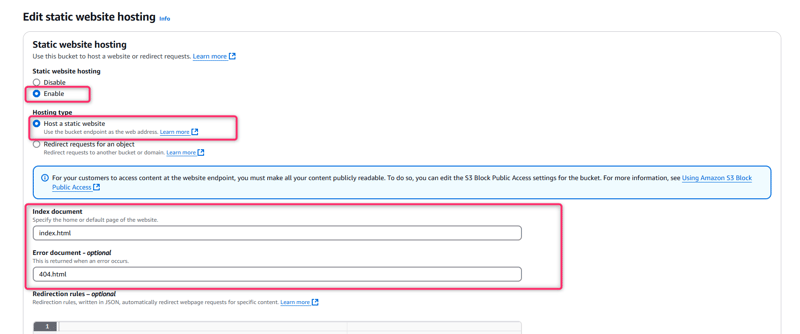
Step 2.4: Click Save.
3. Configure Bucket Permissions
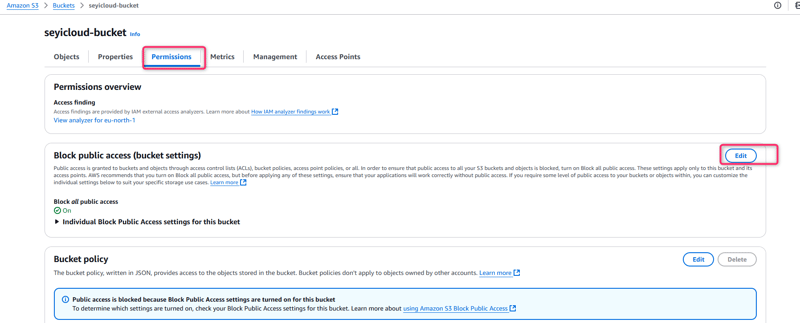
- Step 3.1: Go to the bucket’s Permissions tab.
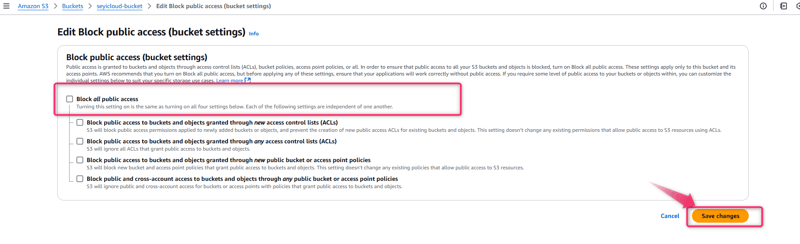
- step 3.2: Click Edit on Block public access (bucket settings) to unblock public access
- Step 3.3: Under Bucket Policy, paste this JSON (replace my-static-website-123 with your bucket name):
{
  "Version": "2012-10-17",
  "Statement": [
    {
      "Sid": "PublicReadGetObject",
      "Effect": "Allow",
      "Principal": "*",
      "Action": "s3:GetObject",
      "Resource": "arn:aws:s3:::my-static-website-123/*"
    }
  ]
}
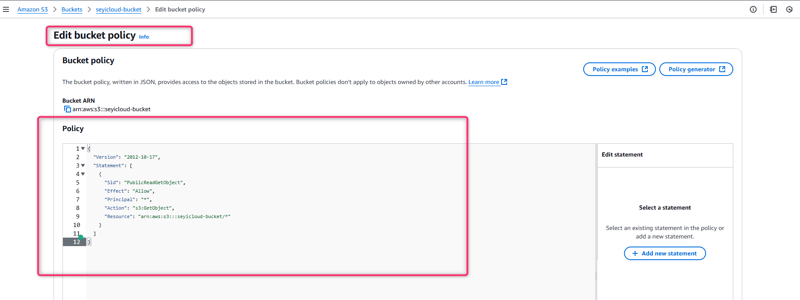
Step 3.3: Click Save.
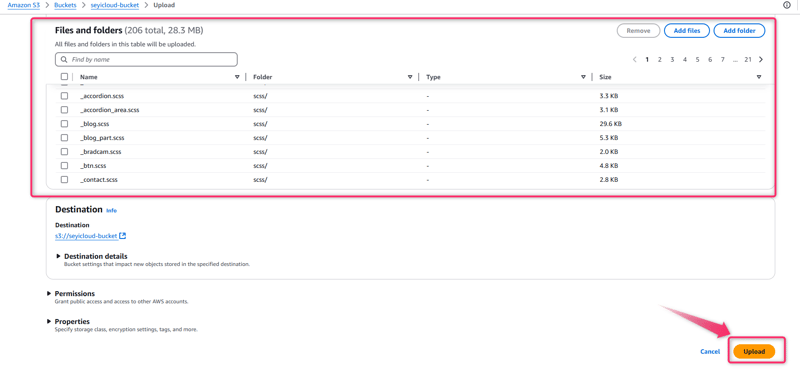
4. Upload Sample Website Files
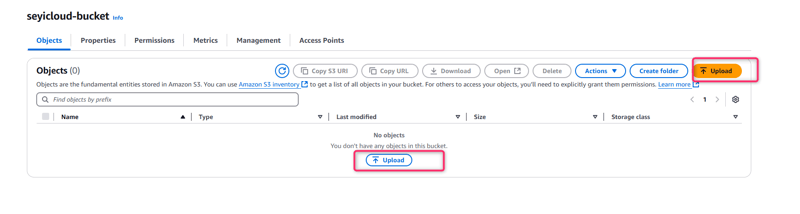
- Click on upload after adding the Files and Folders
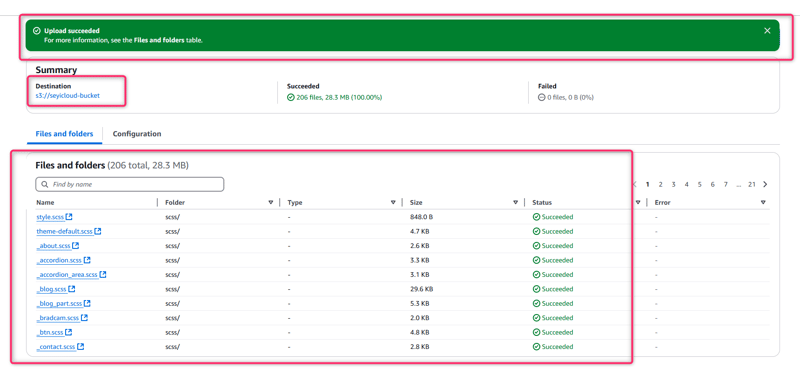
- You should have a successful notification after uploading
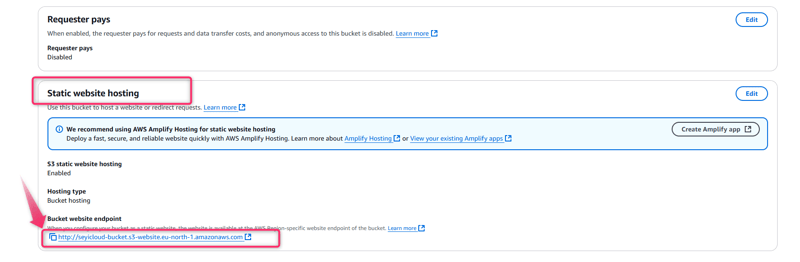
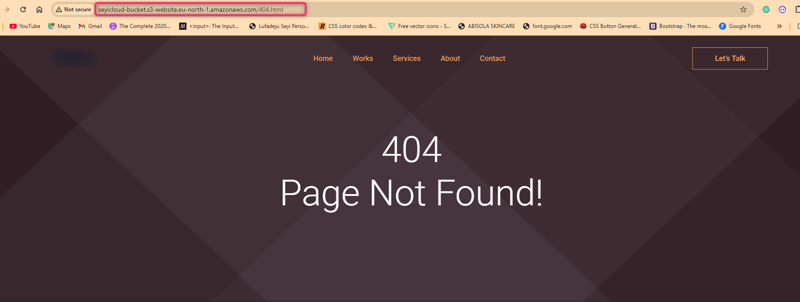
5. Test the Website
- Step 5.1: Under Static website hosting, note the Bucket website endpoint (e.g., http://my-static-website-123.s3-website-us-east-1.amazonaws.com).
Step 5.2: Open the URL in a browser. You should see your uploaded content.

Step 5.3: Test the error page by visiting an invalid path (e.g., http://my-static-website-123.s3-website-us-east-1.amazonaws.com/invalid).
Conclusion
I’ve successfully hosted a static website on Amazon S3! This setup is ideal for low-cost, high-availability sites.
By leveraging S3’s simplicity and scalability, you can focus on content creation while AWS handles infrastructure. Explore advanced features like versioning for backups or S3 events for serverless workflows to further optimize your site.