


Getting started with Angular
Angular is one of the coolest frameworks around for building dynamic web apps. Whether you’re totally new to web development or switching over from another framework, this guide will get you started with Angular quickly and have a bit of fun along the way! What’s in Store: What is Angular? Setting Up Your Angular Playground Creating Your First Angular Project Getting to Know Your Angular App Running Your App Locally 1. What’s Angular All About? Angular is a framework by Google for building single-page applications (SPAs) using HTML, CSS, and TypeScript. It’s a modern take on web development that makes building complex apps a breeze. Here are some fun features you’ll love: Two-way Data Binding: Keeps your data and UI in perfect sync—magic! Dependency Injection: Helps you organize and test your code with ease. Angular CLI: A powerful command-line tool that makes setting up and managing your project super simple. 2. Setting Up Your Angular Playground Before you dive into coding, you need to set up your environment. Here’s how to get started: Step 1: Install Node.js and npm Angular runs on Node.js. Download it from nodejs.org. Installing Node.js also gets you npm, which is like your app’s personal assistant for managing dependencies. Open your terminal and check your installation with: node -v && npm -v Step 2: Install Angular CLI Angular CLI is your best buddy for Angular development. Install it globally with: npm install -g @angular/cli Then, make sure it’s working by running: ng version 3. Creating Your First Angular Project Now for the fun part—building your very first Angular app! Step 1: Generate a New Project Use Angular CLI to kick off a new project: ng new my-first-angular-app You’ll get a couple of quick prompts: Which stylesheet format? Choose “CSS” to keep things simple. Do you want to enable Server-Side Rendering (SSR) and Static Site Generation (SSG/Prerendering)? Choose “No”. Step 2: Step Into Your Project Change into your project’s folder: cd my-first-angular-app Step 3: Launch Your App Fire up the development server with: ng serve Open your browser and visit http://localhost:4200 to see your shiny new app in action! 4. Getting to Know Your Angular App After creating your Angular project, you'll encounter a structured set of files and folders. Let's explore the key components within the src/app/ directory: app.config.ts: Defines the application configuration, instructing Angular on assembling the application. As you introduce more providers, declare them here. app.component.ts: Defines the root component, AppComponent, which serves as the primary view in your application. app.component.html: The HTML template associated with AppComponent, where you design the user interface. app.component.css: Contains the CSS styles specific to AppComponent, allowing for component-level styling. app.component.spec.ts: Provides unit tests for AppComponent to ensure its functionality remains intact during development. app.routes.ts: Defines the application's routing configuration, mapping URL paths to components. Understanding these files is crucial, as they form the backbone of your Angular application, enabling you to build, configure, and style your app effectively. For more information on the functions of the various files and directories, checkout workspace configuration files in an Angular app. 5. Running and Enjoying Your Angular App Anytime you want to work on your app, just run: ng serve If you’re feeling adventurous and want to change the port, try: ng serve --port 4300 The server reloads your app automatically whenever you make changes—so you can see your progress instantly! What’s Next? Now that you’ve set up and run your first Angular project, you’re ready to dive deeper. Create More Components: Build custom parts of your UI. Master Data Binding: Learn how to make your data and view work together seamlessly. Explore Services and APIs: Discover how to fetch and manage data from external sources. Angular is a powerful tool, and with its amazing CLI and organised structure, you’re well on your way to building stunning web applications—whether it’s a simple site or a complex enterprise app. Stay tuned for more fun tutorials as you continue your Angular adventure! Happy coding, and have fun exploring Angular

Angular is one of the coolest frameworks around for building dynamic web apps. Whether you’re totally new to web development or switching over from another framework, this guide will get you started with Angular quickly and have a bit of fun along the way!
What’s in Store:
- What is Angular?
- Setting Up Your Angular Playground
- Creating Your First Angular Project
- Getting to Know Your Angular App
- Running Your App Locally
1. What’s Angular All About?
Angular is a framework by Google for building single-page applications (SPAs) using HTML, CSS, and TypeScript. It’s a modern take on web development that makes building complex apps a breeze. Here are some fun features you’ll love:
- Two-way Data Binding: Keeps your data and UI in perfect sync—magic!
- Dependency Injection: Helps you organize and test your code with ease.
- Angular CLI: A powerful command-line tool that makes setting up and managing your project super simple.
2. Setting Up Your Angular Playground
Before you dive into coding, you need to set up your environment. Here’s how to get started:
Step 1: Install Node.js and npm
Angular runs on Node.js. Download it from nodejs.org. Installing Node.js also gets you npm, which is like your app’s personal assistant for managing dependencies.
Open your terminal and check your installation with:
node -v && npm -v
Step 2: Install Angular CLI
Angular CLI is your best buddy for Angular development. Install it globally with:
npm install -g @angular/cli
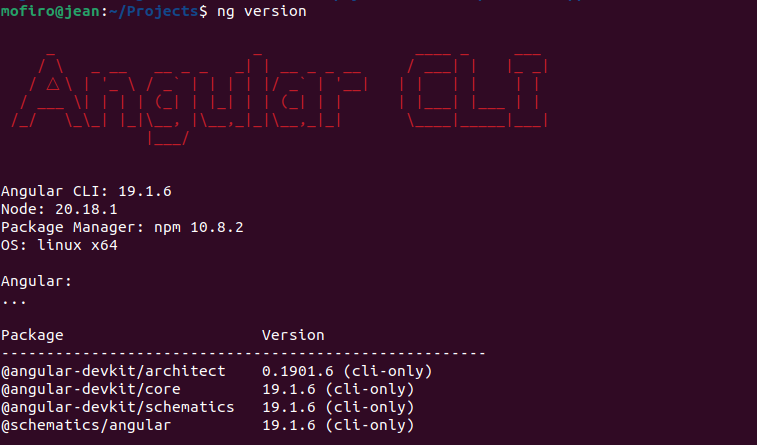
Then, make sure it’s working by running:
ng version
3. Creating Your First Angular Project
Now for the fun part—building your very first Angular app!
Step 1: Generate a New Project
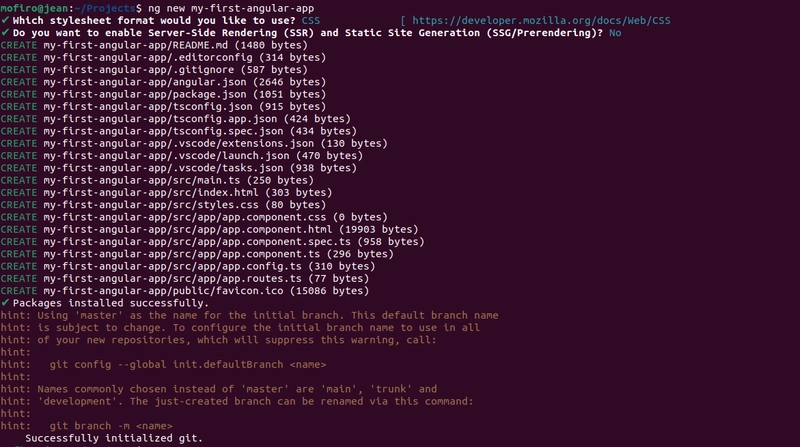
Use Angular CLI to kick off a new project:
ng new my-first-angular-app
You’ll get a couple of quick prompts:
- Which stylesheet format? Choose “CSS” to keep things simple.
- Do you want to enable Server-Side Rendering (SSR) and Static Site Generation (SSG/Prerendering)? Choose “No”.
Step 2: Step Into Your Project
Change into your project’s folder:
cd my-first-angular-app
Step 3: Launch Your App
Fire up the development server with:
ng serve
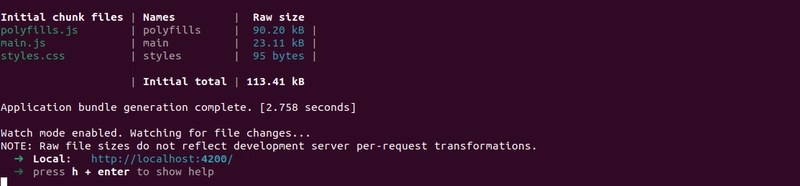
Open your browser and visit http://localhost:4200 to see your shiny new app in action!
4. Getting to Know Your Angular App
After creating your Angular project, you'll encounter a structured set of files and folders. Let's explore the key components within the src/app/ directory:
app.config.ts: Defines the application configuration, instructing Angular on assembling the application. As you introduce more providers, declare them here.app.component.ts: Defines the root component,AppComponent, which serves as the primary view in your application.app.component.html: The HTML template associated withAppComponent, where you design the user interface.app.component.css: Contains the CSS styles specific toAppComponent, allowing for component-level styling.app.component.spec.ts: Provides unit tests forAppComponentto ensure its functionality remains intact during development.app.routes.ts: Defines the application's routing configuration, mapping URL paths to components.
Understanding these files is crucial, as they form the backbone of your Angular application, enabling you to build, configure, and style your app effectively. For more information on the functions of the various files and directories, checkout workspace configuration files in an Angular app.
5. Running and Enjoying Your Angular App
Anytime you want to work on your app, just run:
ng serve
If you’re feeling adventurous and want to change the port, try:
ng serve --port 4300
The server reloads your app automatically whenever you make changes—so you can see your progress instantly!

What’s Next?
Now that you’ve set up and run your first Angular project, you’re ready to dive deeper.
- Create More Components: Build custom parts of your UI.
- Master Data Binding: Learn how to make your data and view work together seamlessly.
- Explore Services and APIs: Discover how to fetch and manage data from external sources.
Angular is a powerful tool, and with its amazing CLI and organised structure, you’re well on your way to building stunning web applications—whether it’s a simple site or a complex enterprise app. Stay tuned for more fun tutorials as you continue your Angular adventure!
Happy coding, and have fun exploring Angular