


_Muhammad_R._Fakhrurrozi_Alamy.jpg?width=1280&auto=webp&quality=80&disable=upscale#)


Building Your First Plugin for Microsoft 365 Copilot: A Step-by-Step Guide
Microsoft 365 Copilot brings AI assistance directly into the tools millions use every day, such as Word, Excel, Outlook, and Teams. With the recent introduction of Copilot Extensibility, developers can now build plugins that extend Copilot’s capabilities using existing APIs, Microsoft Graph, and the Power Platform. If you're looking to create your first plugin, here’s a practical guide to get you started. What Are Microsoft 365 Copilot Plugins? Plugins allow Copilot to interact with external data, services, and workflows. They are based on OpenAI’s plugin standard and enhanced by Microsoft’s security, compliance, and identity management frameworks. In simple terms, a Copilot plugin is a web API described by an OpenAPI specification, authenticated by Azure Active Directory (Azure AD), and registered through Microsoft’s Developer Portal. Step 1: Set Up Your Environment Before you begin: You need an Azure subscription. Set up an Azure Active Directory (AAD) App Registration for authentication. Ensure you have access to the Microsoft 365 Developer Program (free sandbox environments available). Recommended tools: Visual Studio Code Postman (for testing APIs) ngrok (optional for local development tunneling) Step 2: Build Your Web API The heart of a plugin is a RESTful API that Copilot will call. You can build this API using: .NET Node.js Python Any framework you are comfortable with. Key things to ensure: Your API must use OAuth 2.0 authentication via Azure AD. API responses should be concise and optimized for AI consumption (structured JSON). Endpoints should perform clear, specific tasks (e.g., getCustomerDetails, fetchSalesReport). Example endpoint: GET /customerDetails/{id} Response: { "name": "John Doe", "email": "john@example.com", "purchaseHistory": ["Product A", "Product B"] } Step 3: Create the OpenAPI Specification You must define your API in an OpenAPI (Swagger) 3.0 format. This file describes: Available endpoints Request/response formats Authentication methods Microsoft requires minimalistic OpenAPI documents to keep interactions fast and predictable for Copilot. Step 4: Register Your Plugin Use the Microsoft 365 Developer Portal to register your plugin: Upload your OpenAPI specification. Connect the plugin to your AAD app for authentication. Define permissions carefully (the fewer, the better). Test the endpoints from the portal itself. Once registered, the plugin becomes available within the Microsoft 365 ecosystem where users can install and use it with Copilot. Step 5: Test with Copilot After successful registration: Install the plugin in your sandbox environment. Test it across different Microsoft 365 apps. Ensure that Copilot understands your plugin’s responses and properly integrates them into conversations or task automation. Testing Tip: Keep your API responses clean and descriptive, as Copilot depends on accurate information to respond intelligently. Final Notes Plugins for Microsoft 365 Copilot open a new way for developers to integrate business logic into daily productivity workflows. Microsoft handles identity, security, and compliance, so developers can focus on building useful APIs that Copilot can use to serve users better. If you’re familiar with building APIs and working with Azure, you already have most of the skills needed to build impactful plugins.
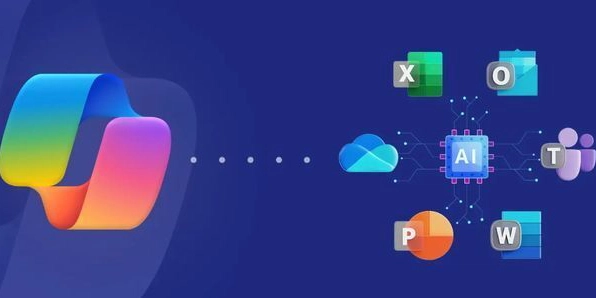
Microsoft 365 Copilot brings AI assistance directly into the tools millions use every day, such as Word, Excel, Outlook, and Teams. With the recent introduction of Copilot Extensibility, developers can now build plugins that extend Copilot’s capabilities using existing APIs, Microsoft Graph, and the Power Platform.
If you're looking to create your first plugin, here’s a practical guide to get you started.
What Are Microsoft 365 Copilot Plugins?
Plugins allow Copilot to interact with external data, services, and workflows. They are based on OpenAI’s plugin standard and enhanced by Microsoft’s security, compliance, and identity management frameworks.
In simple terms, a Copilot plugin is a web API described by an OpenAPI specification, authenticated by Azure Active Directory (Azure AD), and registered through Microsoft’s Developer Portal.
Step 1: Set Up Your Environment
Before you begin:
- You need an Azure subscription.
- Set up an Azure Active Directory (AAD) App Registration for authentication.
- Ensure you have access to the Microsoft 365 Developer Program (free sandbox environments available).
Recommended tools:
- Visual Studio Code
- Postman (for testing APIs)
- ngrok (optional for local development tunneling)
Step 2: Build Your Web API
The heart of a plugin is a RESTful API that Copilot will call. You can build this API using:
- .NET
- Node.js
- Python
- Any framework you are comfortable with.
Key things to ensure:
- Your API must use OAuth 2.0 authentication via Azure AD.
- API responses should be concise and optimized for AI consumption (structured JSON).
- Endpoints should perform clear, specific tasks (e.g., getCustomerDetails, fetchSalesReport).
Example endpoint:
GET /customerDetails/{id}

Response:

{

  "name": "John Doe",

  "email": "john@example.com",

  "purchaseHistory": ["Product A", "Product B"]

}
Step 3: Create the OpenAPI Specification
You must define your API in an OpenAPI (Swagger) 3.0 format.
This file describes:
- Available endpoints
- Request/response formats
- Authentication methods
Microsoft requires minimalistic OpenAPI documents to keep interactions fast and predictable for Copilot.
Step 4: Register Your Plugin
Use the Microsoft 365 Developer Portal to register your plugin:
- Upload your OpenAPI specification.
- Connect the plugin to your AAD app for authentication.
- Define permissions carefully (the fewer, the better).
- Test the endpoints from the portal itself. Once registered, the plugin becomes available within the Microsoft 365 ecosystem where users can install and use it with Copilot.
Step 5: Test with Copilot
After successful registration:
- Install the plugin in your sandbox environment.
- Test it across different Microsoft 365 apps.
- Ensure that Copilot understands your plugin’s responses and properly integrates them into conversations or task automation.
Testing Tip:
Keep your API responses clean and descriptive, as Copilot depends on accurate information to respond intelligently.
Final Notes
Plugins for Microsoft 365 Copilot open a new way for developers to integrate business logic into daily productivity workflows. Microsoft handles identity, security, and compliance, so developers can focus on building useful APIs that Copilot can use to serve users better.
If you’re familiar with building APIs and working with Azure, you already have most of the skills needed to build impactful plugins.