


Build a Simple Grocery Tracker App using Vue JS and Supabase
Co-authored with @kindadailybren Sometimes, the best way to learn a new technology is to start building something. What better way to do this than to pick a stack, spin up a project, and figure things out along the way? For this project, the stack is simple but powerful: Vue for the frontend and Supabase for the backend. Vue makes it easy to create responsive, dynamic interfaces, while Supabase handles the database, API, and even real-time functionality — all without needing to write a full backend from scratch. This article walks through the entire process — from setting things up to building core features like adding, updating, and deleting data, and finally exploring what could be improved or added next. Along the way, you’ll find practical examples, key takeaways, and code snippets that break down how each component works, helping you build a solid grasp of these technologies. By the end, you’ll (hopefully) feel confident enough to take what you’ve learned and start building your own projects using Vue and Supabase. Stack Breakdown This project is built using two main technologies: Vue and Supabase. Vue is a progressive JavaScript framework that is great for building reactive user interfaces. It’s lightweight, easy to learn, and provides a clean syntax that makes frontend development feel intuitive. Supabase is an open-source Firebase alternative that provides a full backend out of the box — including a PostgreSQL database, authentication, file storage, and auto-generated APIs. It’s developer-friendly, easy to set up, and integrates smoothly with frontend frameworks like Vue. Together, Vue and Supabase make a solid stack for quickly building modern web apps — without needing to spin up an entire backend from scratch. Vue, Supabase, and Why We Chose Them When trying to dive into something new, we knew we wanted a stack that was both easy to use and powerful enough to build something real. Vue and Supabase ended up being the perfect combo for that. We picked Vue because of how intuitive it is — the syntax is clean, straightforward, and just makes sense. It didn’t feel overwhelming to dive into, and building dynamic UIs felt smooth from the start. For the backend, we went with Supabase. It’s open source and super easy to set up — no complicated config or boilerplate. We got a fully functional backend out of the box, complete with a PostgreSQL database, authentication, file storage, and even real-time updates. Together, these two tools let us focus on actually building the project instead of getting stuck on setup. They gave us a fast way to go from an idea to a working app, while learning a lot in the process. Creating the Frontend Alright, for this project, we’re keeping things light and fast by using Vite. What is Vite? Think of it as a modern build tool that makes setting up and running your frontend super quick. Difference between Vite and Vue? Vite is just the tool that runs your Vue app behind the scenes. Vue handles the UI stuff, Vite handles the dev server and bundling. We’ll be using npm as our package manager, so make sure that’s installed. To get started, run: npm create vite@latest Follow the prompts: Next up, we’ll set up Pinia for state management (a fancy way of saying “shared data between components”): npm install pinia Once that's installed, use this code in the main.ts: import { createPinia } from 'pinia' const pinia = createPinia() const app = createApp(App) app.use(pinia) This code sets up Pinia, which is a tool that helps your app share data between different components. First, it brings in Pinia, then creates a "store" (like a central place to keep your app's data). After that, it starts your Vue app and tells it to use that store so every part of the app can access and update shared data easily. After that, feel free to do a little cleaning. Delete any of the default files you’re not using. And that's it. Your frontend is ready to roll! Next up, backend! Setting up Supabase Create a Supabase Account First, you'll need a Supabase account. Just sign up, it's quick and they are offering a free tier. Once you're in, create a new project from the dashboard. For this project, we are going to use just the Supabase dashboard to configure our database. Configure the Database Head over to the "Table Editor" section. Here you can create new tables. Make a table called “product”. Add a few attributes or columns: id (UUID), name (varchar), quantity (int4), and price (numeric). Column Name | Type id | UUID name | varchar quantity | int4 price | numeric That's all we need for this app. Connect Supabase to Vue JS Next, in your frontend project, make a directory called supabase and inside it, create a file named supabaseClient.ts. And, drop the following code: import { createClient } from "@supabase/supabase-js"; const supabase_url = import.meta.env.VITE_SUPABASE_UR
Co-authored with @kindadailybren
Sometimes, the best way to learn a new technology is to start building something.
What better way to do this than to pick a stack, spin up a project, and figure things out along the way?
For this project, the stack is simple but powerful: Vue for the frontend and Supabase for the backend. Vue makes it easy to create responsive, dynamic interfaces, while Supabase handles the database, API, and even real-time functionality — all without needing to write a full backend from scratch.
This article walks through the entire process — from setting things up to building core features like adding, updating, and deleting data, and finally exploring what could be improved or added next. Along the way, you’ll find practical examples, key takeaways, and code snippets that break down how each component works, helping you build a solid grasp of these technologies. By the end, you’ll (hopefully) feel confident enough to take what you’ve learned and start building your own projects using Vue and Supabase.
Stack Breakdown
This project is built using two main technologies: Vue and Supabase.
Vue is a progressive JavaScript framework that is great for building reactive user interfaces. It’s lightweight, easy to learn, and provides a clean syntax that makes frontend development feel intuitive.
Supabase is an open-source Firebase alternative that provides a full backend out of the box — including a PostgreSQL database, authentication, file storage, and auto-generated APIs. It’s developer-friendly, easy to set up, and integrates smoothly with frontend frameworks like Vue.
Together, Vue and Supabase make a solid stack for quickly building modern web apps — without needing to spin up an entire backend from scratch.
Vue, Supabase, and Why We Chose Them
When trying to dive into something new, we knew we wanted a stack that was both easy to use and powerful enough to build something real. Vue and Supabase ended up being the perfect combo for that.
We picked Vue because of how intuitive it is — the syntax is clean, straightforward, and just makes sense. It didn’t feel overwhelming to dive into, and building dynamic UIs felt smooth from the start.
For the backend, we went with Supabase. It’s open source and super easy to set up — no complicated config or boilerplate. We got a fully functional backend out of the box, complete with a PostgreSQL database, authentication, file storage, and even real-time updates.
Together, these two tools let us focus on actually building the project instead of getting stuck on setup. They gave us a fast way to go from an idea to a working app, while learning a lot in the process.
Creating the Frontend
Alright, for this project, we’re keeping things light and fast by using Vite.
What is Vite?
Think of it as a modern build tool that makes setting up and running your frontend super quick.
Difference between Vite and Vue?
Vite is just the tool that runs your Vue app behind the scenes. Vue handles the UI stuff, Vite handles the dev server and bundling.
We’ll be using npm as our package manager, so make sure that’s installed. To get started, run:
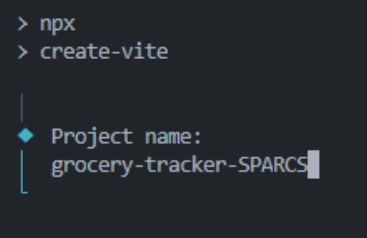
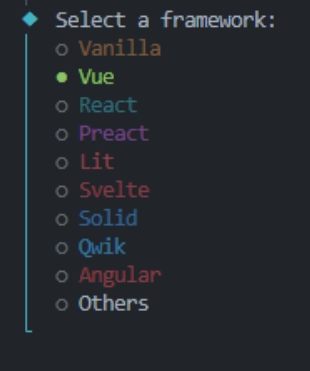
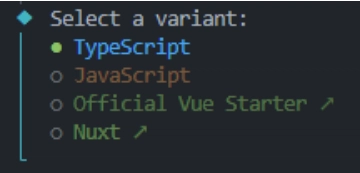
npm create vite@latest
Follow the prompts:
Next up, we’ll set up Pinia for state management (a fancy way of saying “shared data between components”):
npm install pinia
Once that's installed, use this code in the main.ts:
import { createPinia } from 'pinia'
const pinia = createPinia()
const app = createApp(App)
app.use(pinia)
This code sets up Pinia, which is a tool that helps your app share data between different components. First, it brings in Pinia, then creates a "store" (like a central place to keep your app's data). After that, it starts your Vue app and tells it to use that store so every part of the app can access and update shared data easily.
After that, feel free to do a little cleaning. Delete any of the default files you’re not using. And that's it. Your frontend is ready to roll!
Next up, backend!
Setting up Supabase
Create a Supabase Account
First, you'll need a Supabase account. Just sign up, it's quick and they are offering a free tier. Once you're in, create a new project from the dashboard. For this project, we are going to use just the Supabase dashboard to configure our database.
Configure the Database
Head over to the "Table Editor" section. Here you can create new tables. Make a table called “product”. Add a few attributes or columns: id (UUID), name (varchar), quantity (int4), and price (numeric).
Column Name     | Type
id          | UUID
name        | varchar
quantity    | int4
price       | numeric
That's all we need for this app.
Connect Supabase to Vue JS
Next, in your frontend project, make a directory called supabase and inside it, create a file named supabaseClient.ts. And, drop the following code:
import { createClient } from "@supabase/supabase-js";
const supabase_url = import.meta.env.VITE_SUPABASE_URL;
const supabase_key = import.meta.env.VITE_SUPABASE_KEY;
export const supabase = createClient(supabase_url, supabase_key);
What this does is it sets up a connection between your app and your Supabase backend by creating a client using the project URL and API Key (p.s. store the url and key in your .env file for security). With that client, you are now connected to your hosted Supabase backend.
Components Structure
In this section, you will see how the main components of the web app are implemented. Each code snippet is followed by an explanation to help you understand how the components work together to build interactive UI features.
Button Component:
<script lang="ts" setup>
defineProps<{ msg?: string }>()
script>

<template>
     class="border-[1px] border-dashed px-4 py text-2xl cursor-pointer hover:bg-gray-300 transition-all duration-150">{{ msg }}
template>
- This is a reusable button component. It accepts an optional msg prop to display text on the button. The button is styled with a dashed border, padding, large text, and a hover effect that changes the background color. It is used across different components for consistent styling and interactivity.
Forms Component:
<template>
class="flex flex-col gap-4">
class="flex justify-between text-2xl xl:text-3xl items-center">
{{ nameRef }}
class="flex gap-10">
class="flex gap-2 xl:gap-4">
₱ {{ priceRef }}
x
{{ quantityRef }}
class="hover:cursor-pointer" @click="isEditing = !isEditing">
Edit


